笔记参考B站黑马程序员视频:spring原理
1.Scope类型
Singleton Scope
定义:在整个应用程序中,只有一个实例存在。
Spring Framework 中的使用:默认的 bean Scope,Spring 容器中只会创建一个实例,并在需要时共享给所有请求。
Prototype Scope
定义:每次请求时都会创建一个新的实例。
Spring Framework 中的使用:每次通过 Spring 容器获取 bean 时,都会返回一个新的实例。
Request Scope
定义:在每个 HTTP 请求中创建一个新的实例,适用于 web 应用。
Spring Framework 中的使用:仅在 web 应用中有意义,确保每个 HTTP 请求处理过程中,使用的 bean 都是独立的。
优点:避免多个请求之间状态混乱,保证请求级别的数据安全性。
Session Scope
定义:在每个用户会话(session)中创建一个实例,适用于需要跟踪用户状态的 web 应用。
Spring Framework 中的使用:确保每个用户在其会话期间使用的 bean 是唯一的。
优点:适合需要持久性用户数据的情况,如用户登录信息、购物车等。
application Scope
应用程序作用域(application scope)用于在整个应用程序生命周期内共享数据。具体来说,application Scope 是指将数据存储在 ServletContext 中,在应用程序启动时加载,并在整个应用程序运行期间可供所有用户和所有会话访问的作用域。
演示:
application Scope
package com.dreams.demo08;

import org.slf4j.Logger;
import org.slf4j.LoggerFactory;
import org.springframework.context.annotation.Scope;
import org.springframework.stereotype.Component;

import javax.annotation.PreDestroy;

@Scope("application")
@Component
public class BeanForApplication {
    private static final Logger log = LoggerFactory.getLogger(BeanForApplication.class);

    @PreDestroy
    public void destroy() {
        log.debug("destroy");
    }
}
Session Scope
package com.dreams.demo08;

import org.slf4j.Logger;
import org.slf4j.LoggerFactory;
import org.springframework.context.annotation.Scope;
import org.springframework.stereotype.Component;

import javax.annotation.PreDestroy;

@Scope("session")
@Component
public class BeanForSession {
    private static final Logger log = LoggerFactory.getLogger(BeanForSession.class);

    @PreDestroy
    public void destroy() {
        log.debug("destroy");
    }
}
request scope
package com.dreams.demo08;

import org.slf4j.Logger;
import org.slf4j.LoggerFactory;
import org.springframework.context.annotation.Scope;
import org.springframework.stereotype.Component;

import javax.annotation.PreDestroy;

@Scope("request")
@Component
public class BeanForRequest {
    private static final Logger log = LoggerFactory.getLogger(BeanForRequest.class);

    @PreDestroy
    public void destroy() {
        log.debug("destroy");
    }

}
再来个启动类
package com.dreams.demo08;

import org.springframework.boot.SpringApplication;
import org.springframework.boot.autoconfigure.SpringBootApplication;


@SpringBootApplication
public class DemoApplication {
    public static void main(String[] args) {
        SpringApplication.run(DemoApplication.class, args);
    }
}
控制层方法
package com.dreams.demo08;
import org.springframework.beans.factory.annotation.Autowired;
import org.springframework.context.annotation.Lazy;
import org.springframework.web.bind.annotation.GetMapping;
import org.springframework.web.bind.annotation.RestController;
import javax.servlet.ServletContext;
import javax.servlet.http.HttpServletRequest;
import javax.servlet.http.HttpSession;
@RestController
public class MyController {
@Lazy
@Autowired
private BeanForRequest beanForRequest;
@Lazy
@Autowired
private BeanForSession beanForSession;
@Lazy
@Autowired
private BeanForApplication beanForApplication;
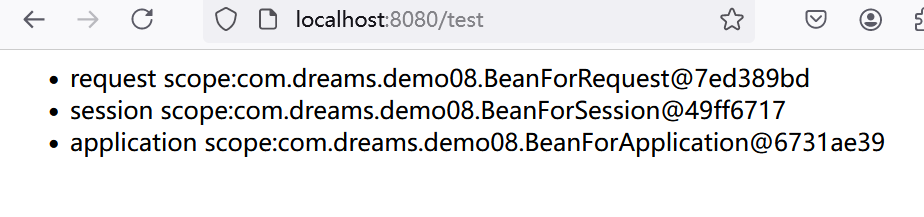
@GetMapping(value = "/test", produces = "text/html")
public String test(HttpServletRequest request, HttpSession session) {
ServletContext sc = request.getServletContext();
String sb = "<ul>" +
"<li>" + "request scope:" + beanForRequest + "</li>" +
"<li>" + "session scope:" + beanForSession + "</li>" +
"<li>" + "application scope:" + beanForApplication + "</li>" +
"</ul>";
return sb;
}
}
jdk >= 9 如果反射调用 jdk 中方法,jdk <= 8 不会有问题,如果 jdk > 8, 运行时需要添加VM参数
--add-opens java.base/java.lang=ALL-UNNAMED
否则会出现以下报错
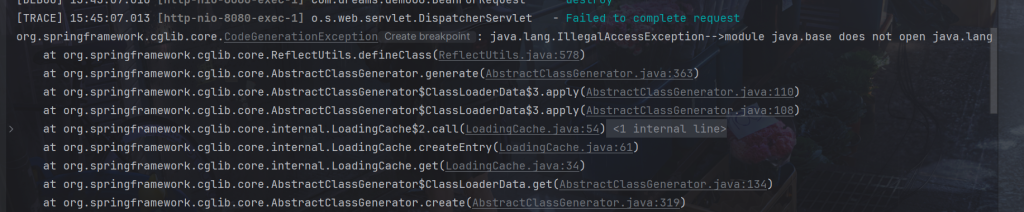
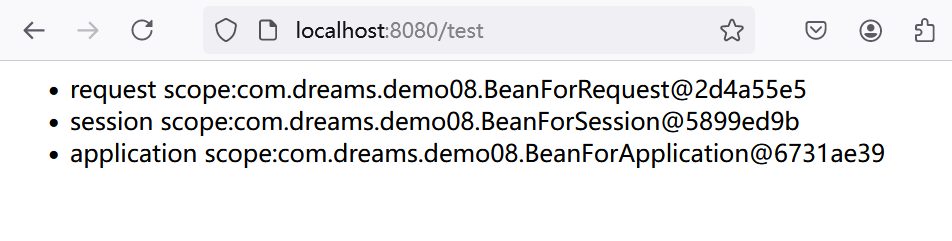
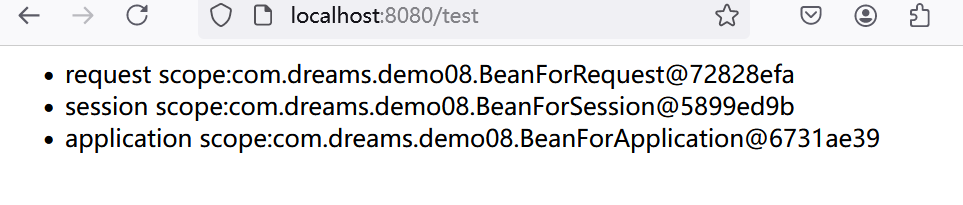
运行效果如下:
清下缓存
2.scope失效
演示
如果上面的控制层在不加 @Lazy注入时,scope是失效的
package com.dreams.demo08.demo;

import org.springframework.context.annotation.Scope;
import org.springframework.stereotype.Component;

@Scope("prototype")
@Component
public class F1 {
}
然后在单例(默认)中注入上面的多例
package com.dreams.demo08.demo;

import org.springframework.beans.factory.annotation.Autowired;
import org.springframework.stereotype.Component;

@Component
public class One {

    @Autowired
    private F1 f1;

    public F1 getF1() {
        return f1;
    }

}
启动类调用
package com.dreams.demo08;
import com.dreams.demo08.demo.One;
import org.slf4j.Logger;
import org.slf4j.LoggerFactory;
import org.springframework.context.annotation.AnnotationConfigApplicationContext;
import org.springframework.context.annotation.ComponentScan;
@ComponentScan("com.dreams.demo08.demo")
public class ScopeApplication {
private static final Logger log = LoggerFactory.getLogger(ScopeApplication.class);
public static void main(String[] args) {
AnnotationConfigApplicationContext context =
new AnnotationConfigApplicationContext(ScopeApplication.class);
One bean = context.getBean(One.class);
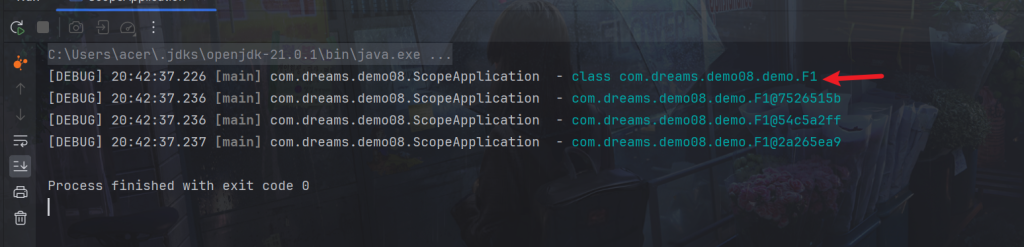
log.debug("{}",bean.getF1());
log.debug("{}",bean.getF1());
log.debug("{}",bean.getF1());
context.close();
}
}
可以看到scope没有生效,还是单例
原理就是:
对于单例对象来讲,依赖注入仅发生了一次,后续再没有用到多例的 One,因此 One 用的始终是第一次依赖注入的 F1
方法1-@Lazy解决
解决方法就是:
代理对象虽然还是同一个,但当每次使用代理对象的任意方法
- 每次调用bean.getF1()时,这个代理对象都会
package com.dreams.demo08.demo;

import org.springframework.beans.factory.annotation.Autowired;
import org.springframework.context.annotation.Lazy;
import org.springframework.stereotype.Component;

@Component
public class One {

    @Lazy
    @Autowired
    private F1 f1;

    public F1 getF1() {
        return f1;
    }

}
启动类
log.debug("{}",bean.getF1().getClass());可以看到是代理对象

方法2-proxyMode配置解决
将@Lazy注释掉,在要注入的多例类加上proxyMode配置
package com.dreams.demo08.demo;

import org.springframework.context.annotation.Scope;
import org.springframework.context.annotation.ScopedProxyMode;
import org.springframework.stereotype.Component;

@Scope(value = "prototype",proxyMode = ScopedProxyMode.TARGET_CLASS)
@Component
public class F1 {
}
可以看到成功了,当然底层也是代理对象

方法3-对象工厂解决
package com.dreams.demo08.demo;

import org.springframework.beans.factory.ObjectFactory;
import org.springframework.beans.factory.annotation.Autowired;
import org.springframework.stereotype.Component;

@Component
public class One {
    @Autowired
    private ObjectFactory<F1> f1;

    public F1 getF1() {
        return f1.getObject();
    }

}
可以看到这里就不是使用代理了
方法4-注入容器
package com.dreams.demo08.demo;

import org.springframework.beans.factory.annotation.Autowired;
import org.springframework.context.ApplicationContext;
import org.springframework.stereotype.Component;

@Component
public class One {
    @Autowired
    private ApplicationContext context;

    public F1 getF1() {
        return context.getBean(F1.class);
    }

}
同样没有用代理

3.参考
黑马程序员:spring