代码、内容参考来自于张秀宏大佬的自己动手写Java虚拟机 (Java核心技术系列)以及尚硅谷宋红康:JVM全套教程。
1.属性表概述
属性表集合(attributes)
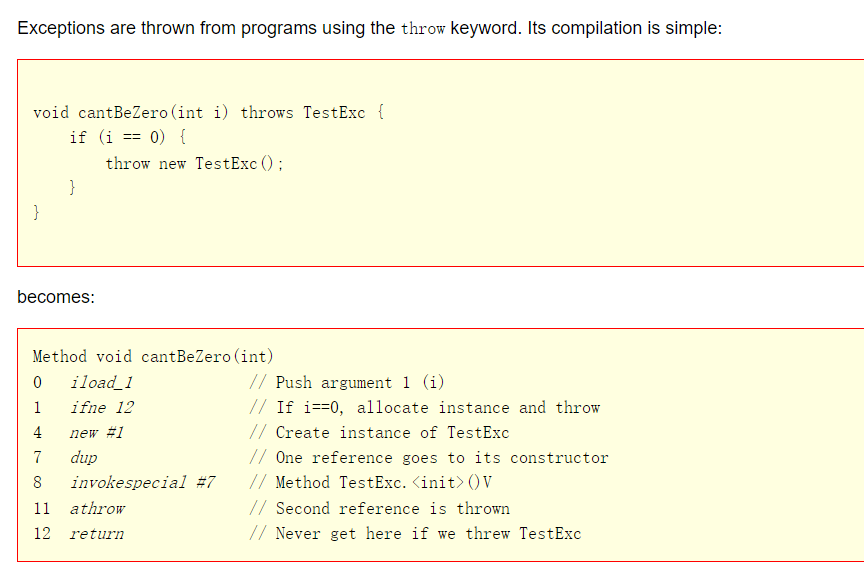
方法表集合之后的属性表集合,指的是class文件所携带的辅助信息,比如该class文件的源文件的名称,以及任何带有RetentionPolicy.CLASS或者RetentionPolicy.RUNTIME的注解,这类信息通常被用于Java虚拟机的验证和运行,以及Java程序的调试,一般无须深入了解。
此外,字段表、方法表都可以有自己的属性表,用于描述某些场景专有的信息。
属性表集合的限制没有那么严格,不再要求各个属性表具有严格的顺序,并且只要不与己有的属性名重复,任何人实现的编译器都可以向属性表中写入自己定义的属性信息,但Java虚拟机运行时会忽略掉它不认识的属性。
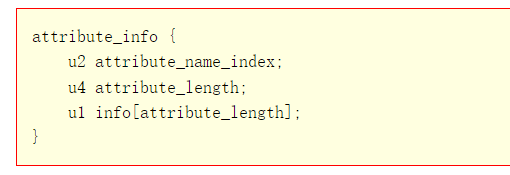
属性表的每个项的值必须是attribute_info结构。属性表的结构比较灵活,各种不同的属性只要满足以下结构即可。
属性的通用格式:

即只需说明属性的名称以及占用位数的长度即可,属性表具体的结构可以去自定义。
属性类型:
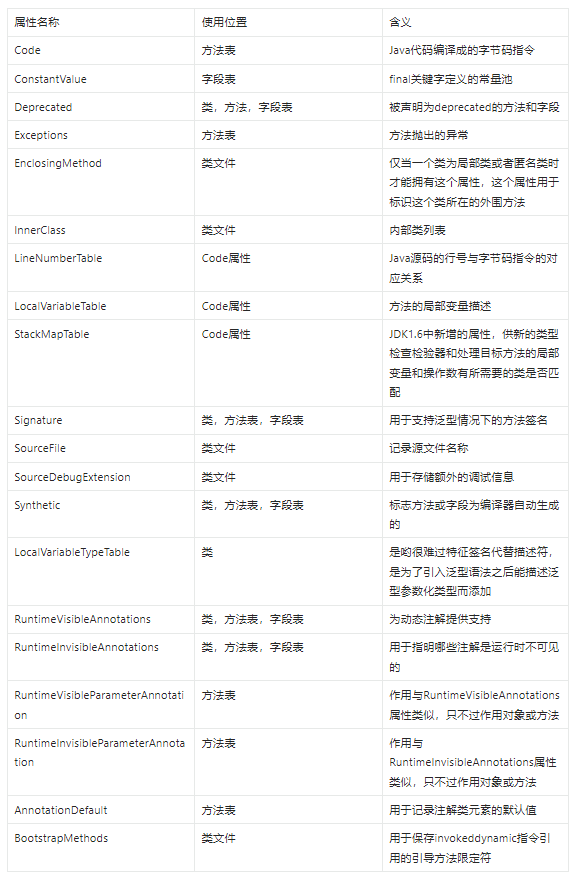
属性表实际上可以有很多类型,上面看到的Code属性只是其中一种, Java8里面定义了23种属性。下面这些是虚拟机中预定义的属性:
或查看官网:
Chapter 4. The class File Format (oracle.com)
2.AttributeInfo接口
和常量池类似,各种属性表达的信息也各不相同,因此无法用统一的结构来定义。不同之处在于,常量是由Java虚拟机规范严格定义的,共有14种。但属性是可以扩展的,不同的虚拟机实现可以定义自己的属性类型。由于这个原因,Java虚拟机规范没有使用tag,而是使用属性名来区别不同的属性。属性数据放在属性名之后的u1表中,这样Java虚拟机实现就可以跳过自己无法识别的属性。
属性的结构定义如下:
注意,属性表中存放的属性名实际上并不是编码后的字符串,而是常量池索引,指向常量池中的CONSTANT_Utf8_info常量。
整体代码
在classfile目录下创建attribute_info.go文件,代码如下:
package classfile

/*
attribute_info {
    u2 attribute_name_index;
    u4 attribute_length;
    u1 info[attribute_length];
}
*/
type AttributeInfo interface {
    readInfo(reader *ClassReader)
}

func readAttributes(reader *ClassReader, cp ConstantPool) []AttributeInfo {
    attributesCount := reader.readUint16()
    attributes := make([]AttributeInfo, attributesCount)
    for i := range attributes {
        attributes[i] = readAttribute(reader, cp)
    }
    return attributes
}

func readAttribute(reader *ClassReader, cp ConstantPool) AttributeInfo {
    attrNameIndex := reader.readUint16()
    attrName := cp.getUtf8(attrNameIndex)
    attrLen := reader.readUint32()
    attrInfo := newAttributeInfo(attrName, attrLen, cp)
    attrInfo.readInfo(reader)
    return attrInfo
}

func newAttributeInfo(attrName string, attrLen uint32, cp ConstantPool) AttributeInfo {
    switch attrName {
    case "Code":
        return &CodeAttribute{cp: cp}
    case "ConstantValue":
        return &ConstantValueAttribute{}
    case "Deprecated":
        return &DeprecatedAttribute{}
    case "Exceptions":
        return &ExceptionsAttribute{}
    case "LineNumberTable":
        return &LineNumberTableAttribute{}
    case "LocalVariableTable":
        return &LocalVariableTableAttribute{}
    case "SourceFile":
        return &SourceFileAttribute{cp: cp}
    case "Synthetic":
        return &SyntheticAttribute{}
    default:
        return &UnparsedAttribute{attrName, attrLen, nil}
    }
}
UnparsedAttribute结构体在classfile\attr_unparsed.go文件中,代码如下:
package classfile

/*
attribute_info {
    u2 attribute_name_index;
    u4 attribute_length;
    u1 info[attribute_length];
}
*/
type UnparsedAttribute struct {
    name string
    length uint32
    info []byte
}

func (self *UnparsedAttribute) readInfo(reader *ClassReader) {
    self.info = reader.readBytes(self.length)
}

func (self *UnparsedAttribute) Info() []byte {
    return self.info
}
代码解释
AttributeInfo接口
在其中定义AttributeInfo接口

readAttribute
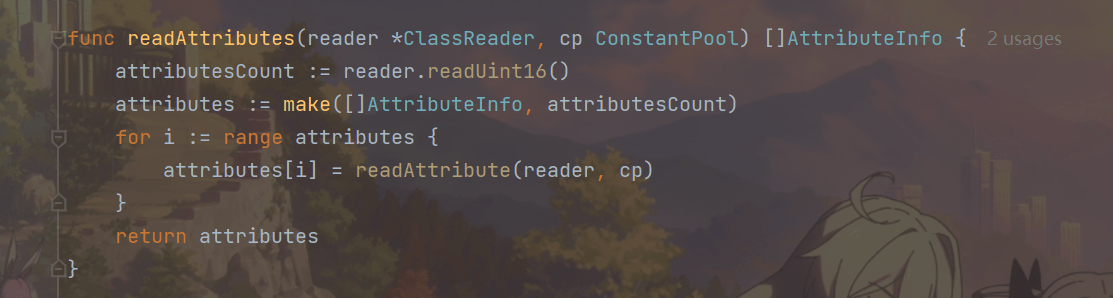
和ConstantInfo接口一样,AttributeInfo接口也只定义了一个类似readInfo()的方法,需要由具体的属性实现。readAttributes()函数读取属性表,代码如下:
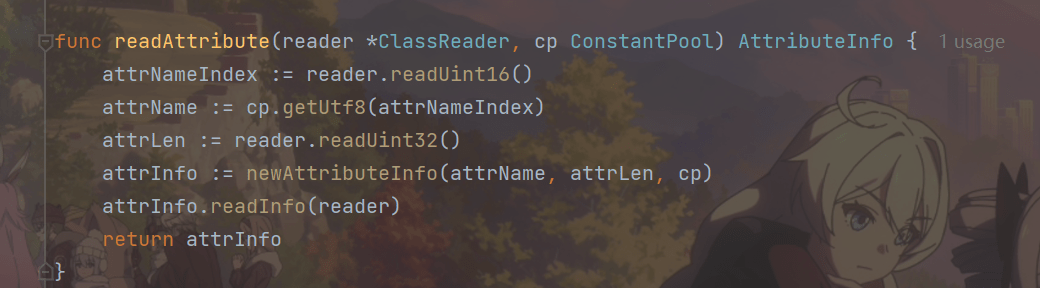
函数readAttribute()读取单个属性
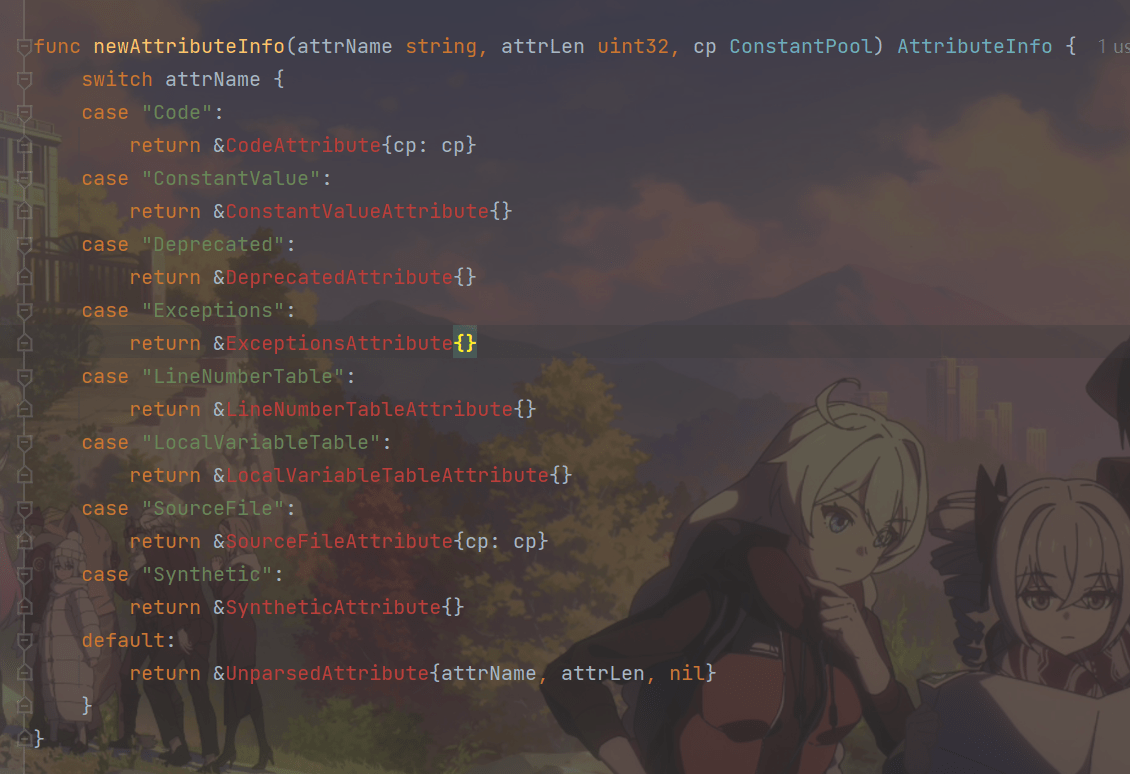
newAttributeInfo()
readAttribute()先读取属性名索引,根据它从常量池中找到属性名,然后读取属性长度,接着调用newAttributeInfo()函数创建具体的属性实例。Java虚拟机规范预定义了23种属性,先解析其中的8种。
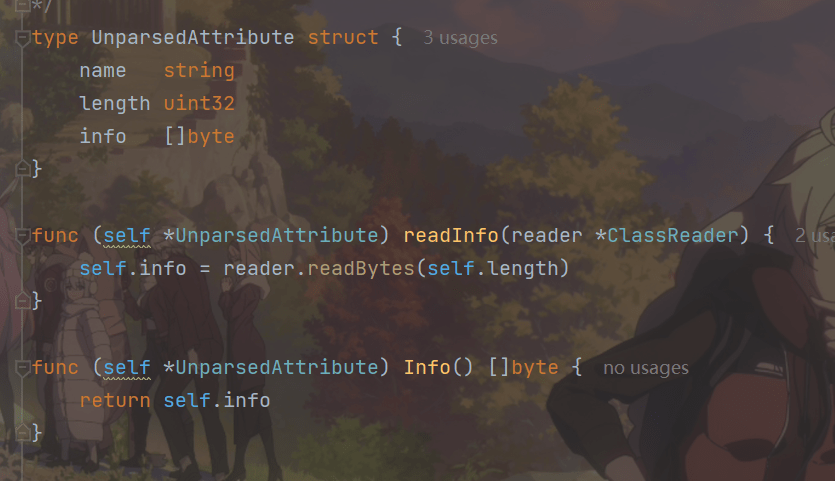
UnparsedAttribute结构体和readInfo和Getter方法
UnparsedAttribute
按照用途,23种预定义属性可以分为三组:
第一组属性是实现Java虚拟机所必需的,共有5种;
第二组属性是Java类库所必需的,共有12种;
第三组属性主要提供给工具使用,共有6种。
第三组属性是可选的,也就是说可以不出现在class文件中。如果class文件中存在第三组属性,Java虚拟机实现或者Java类库也是可以利用它们的,比如使用LineNumberTable属性在异常堆栈中显示行号。
从class文件演进的角度来讲,
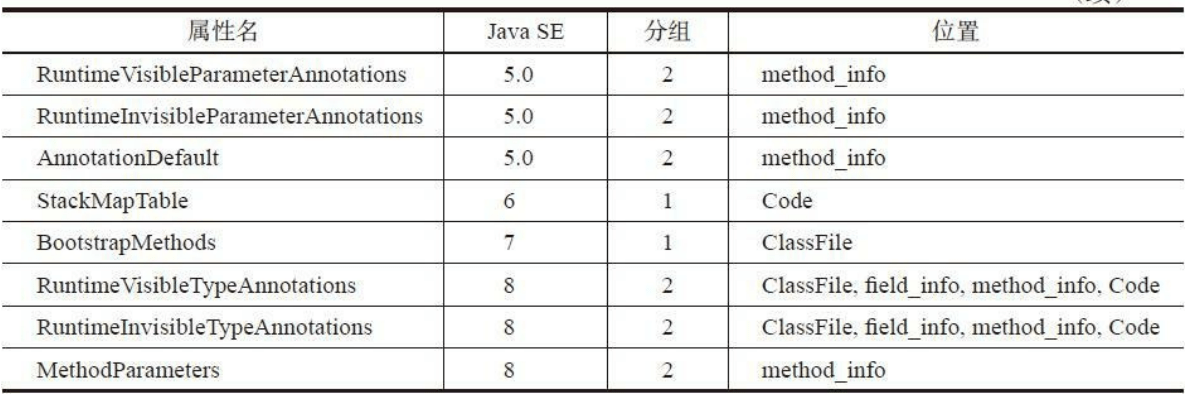
JDK1.0时只有6种预定义属性,JDK1.1增加了3种。J2SE 5.0增加了9种属性,主要用于支持泛型和注解。Java SE 6增加了StackMapTable属性,用于优化字节码验证。Java SE 7增加了BootstrapMethods属性,用于支持新增的invokedynamic指令。Java SE 8又增加了三种属性。
下图给出了这23种属性出现的Java版本、分组以及它们在class文件中的位置。

3.Deprecated和Synthetic属性
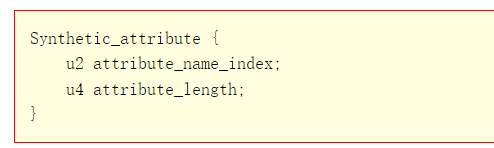
Deprecated和Synthetic是最简单的两种属性,仅起标记作用,不包含任何数据。这两种属性都是JDK1.1引入的,可以出现在ClassFile、field_info和method_info结构中,
它们的结构定义如下:
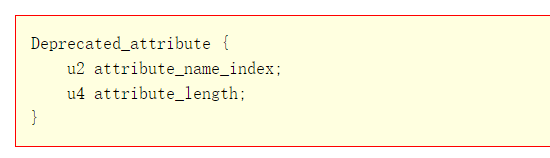
由于不包含任何数据,所以attribute_length的值必须是0。Deprecated属性用于指出类、接口、字段或方法已经不建议使用,编译器等工具可以根据Deprecated属性输出警告信息。J2SE 5.0之前
可以使用Javadoc提供的@deprecated标签指示编译器给类、接口、字段或方法添加Deprecated属性,语法格式如下:
/** @deprecated */
public void oldMethod() {...}
从J2SE 5.0开始,也可以使用@Deprecated注解,语法格式如下:
@Deprecated
public void oldMethod() {}
Synthetic属性用来标记源文件中不存在、由编译器生成的类成员,引入Synthetic属性主要是为了支持嵌套类和嵌套接口。具体细节就不介绍了,
Java虚拟机规范相关章节Chapter 4. The class File Format (oracle.com)
整体代码
在classfile目录下创建attr_markers.go文件,在其中定义DeprecatedAttribute和SyntheticAttribute结构体,代码如下:
package classfile

/*
Deprecated_attribute {
    u2 attribute_name_index;
    u4 attribute_length;
}
*/
type DeprecatedAttribute struct {
    MarkerAttribute
}

/*
Synthetic_attribute {
    u2 attribute_name_index;
    u4 attribute_length;
}
*/
type SyntheticAttribute struct {
    MarkerAttribute
}

type MarkerAttribute struct{}

func (self *MarkerAttribute) readInfo(reader *ClassReader) {
    // read nothing
}
由于这两个属性都没有数据,所以readInfo()方法是空的。
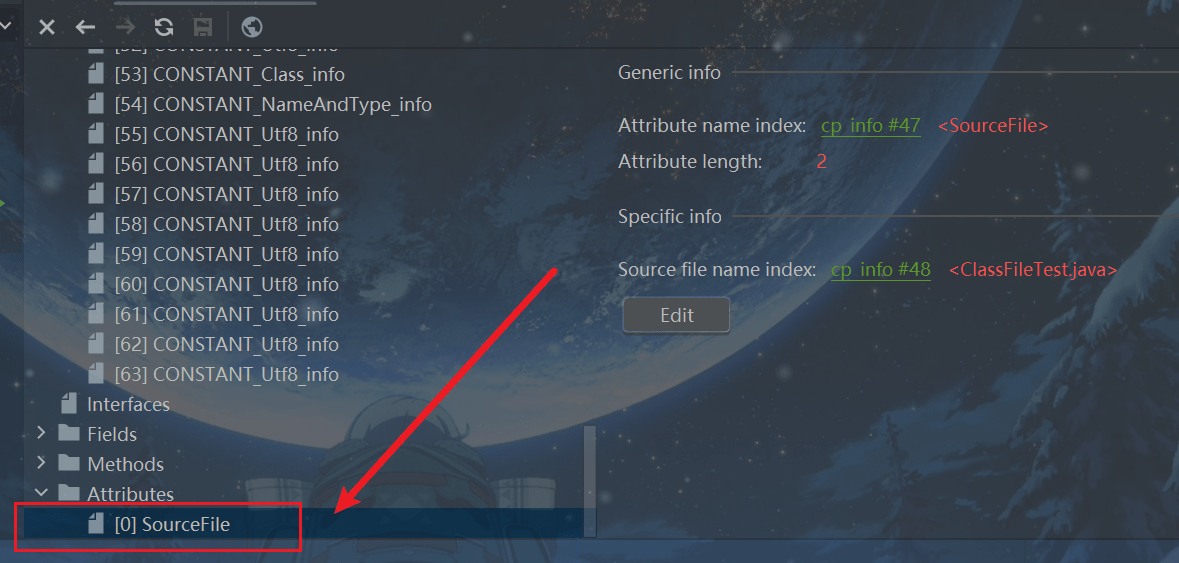
4.SourceFile属性
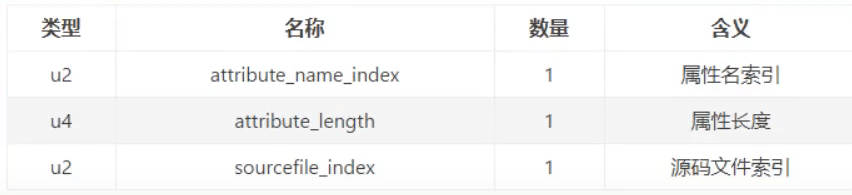
SourceFile是可选定长属性,只会出现在ClassFile结构中,用于指出源文件名。其结构定义如下:
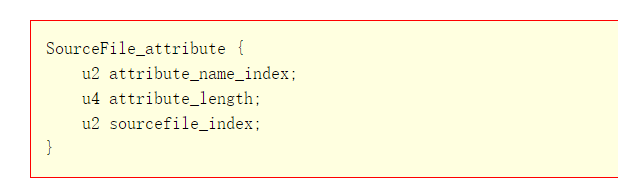
SourceFile属性表结构
其中attribute_length必须是2,官网描述:

可以看到,其长度总是固定的8个字节。
sourcefile_index是常量池索引,指向CONSTANT_Utf8_info常量。
整体代码
在classfile目录下创建attr_source_file.go文件,在其中定义SourceFileAttribute结构体,代码
如下:
package classfile

/*
SourceFile_attribute {
    u2 attribute_name_index;
    u4 attribute_length;
    u2 sourcefile_index;
}
*/
type SourceFileAttribute struct {
    cp ConstantPool
    sourceFileIndex uint16
}

func (self *SourceFileAttribute) readInfo(reader *ClassReader) {
    self.sourceFileIndex = reader.readUint16()
}

func (self *SourceFileAttribute) FileName() string {
    return self.cp.getUtf8(self.sourceFileIndex)
}
如图:
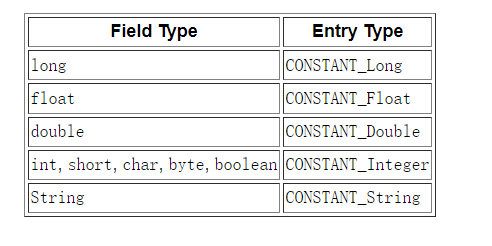
5.ConstantValue属性
ConstantValue是定长属性,只会出现在field_info结构中,用于表示常量表达式的值,详见Java语言规范的15.28节。
其结构定义如下:
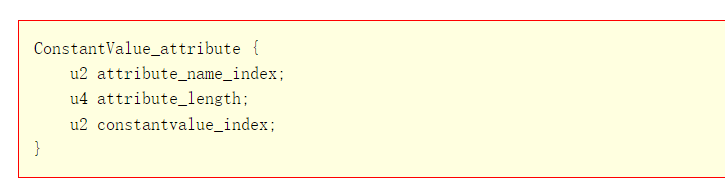
attribute_length的值必须是2。

constantvalue_index是常量池索引,但具体指向哪种常量因字段类型而异。
如图:
整体代码
在classfile目录下创建attr_constant_value.go文件,
代码如下:
package classfile

/*
ConstantValue_attribute {
    u2 attribute_name_index;
    u4 attribute_length;
    u2 constantvalue_index;
}
*/
type ConstantValueAttribute struct {
    constantValueIndex uint16
}

func (self *ConstantValueAttribute) readInfo(reader *ClassReader) {
    self.constantValueIndex = reader.readUint16()
}

func (self *ConstantValueAttribute) ConstantValueIndex() uint16 {
    return self.constantValueIndex
}
代码解释
各方法用法与前一致,不在阐述。
6.Code属性
Code属性就是存放方法体里面的代码。但是,并非所有方法表都有Code属性。像接口或者抽象方法,他们没有具体的方法体,因此也就不会有Code属性了。
Code属性表的结构,如下图:
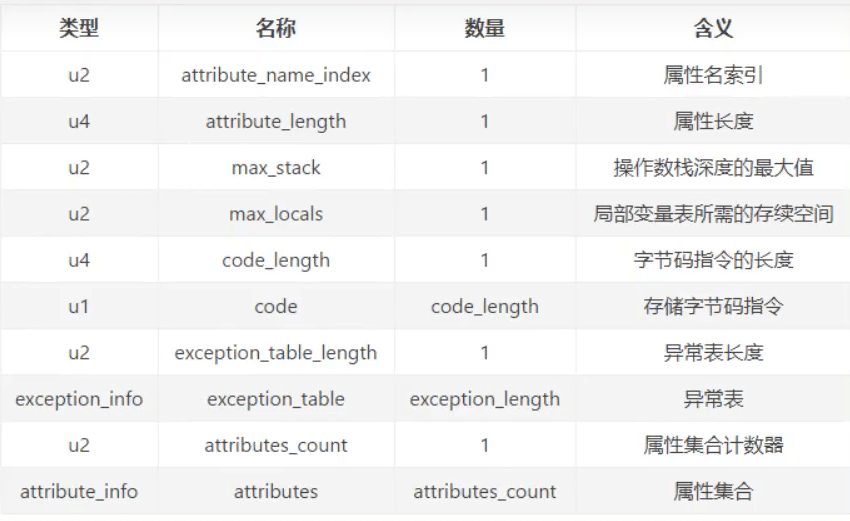
可以看到: Code属性表的前两项跟属性表是一致的,即Code属性表遵循属性表的结构,后面那些则是他自定义的结构。
Code是变长属性,只存在于method_info结构中。Code属性中存放字节码等方法相关信息。相比前面介绍的几种属性,Code属性比较复杂,其结构定义如下:
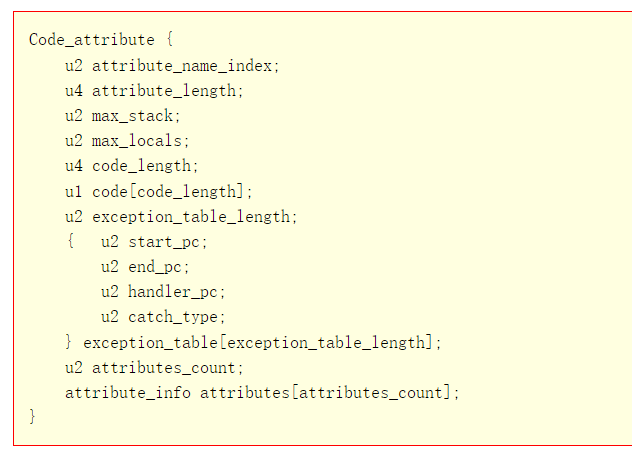
max_stack给出操作数栈的最大深度,max_locals给出局部变量表大小。接着是字节码,存在u1表中。最后是异常处理表和属性表。在第4章讨论运行时数据区,并且实现操作数栈和局部变量表
时,max_stack和max_locals就会派上用场。在第5章讨论指令集和解释器时,会用到字节码。在第10章讨论异常处理时,会使用异常处理表。
整体代码
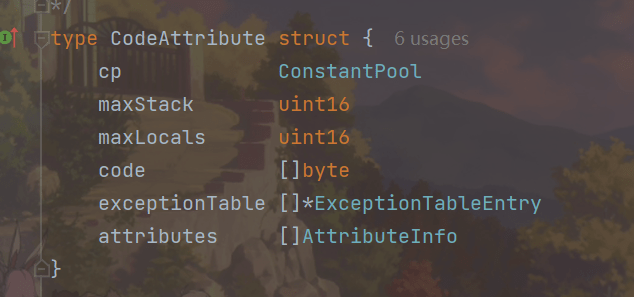
把Code属性结构翻译成Go结构体,定义在classfile\attr_code.go文件中,代码如下:
package classfile
/*
Code_attribute {
u2 attribute_name_index;
u4 attribute_length;
u2 max_stack;
u2 max_locals;
u4 code_length;
u1 code[code_length];
u2 exception_table_length;
{ u2 start_pc;
u2 end_pc;
u2 handler_pc;
u2 catch_type;
} exception_table[exception_table_length];
u2 attributes_count;
attribute_info attributes[attributes_count];
}
*/
type CodeAttribute struct {
cp ConstantPool
maxStack uint16
maxLocals uint16
code []byte
exceptionTable []*ExceptionTableEntry
attributes []AttributeInfo
}
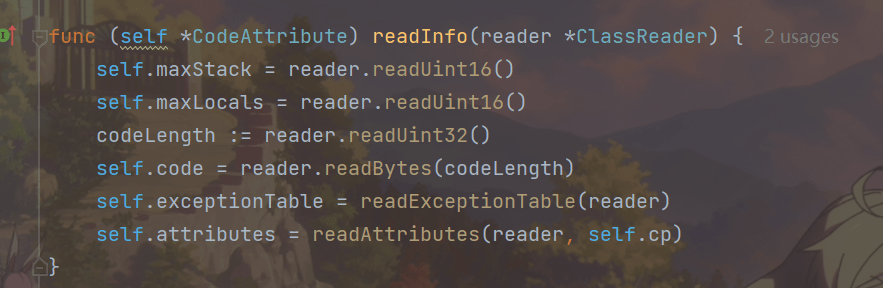
func (self *CodeAttribute) readInfo(reader *ClassReader) {
self.maxStack = reader.readUint16()
self.maxLocals = reader.readUint16()
codeLength := reader.readUint32()
self.code = reader.readBytes(codeLength)
self.exceptionTable = readExceptionTable(reader)
self.attributes = readAttributes(reader, self.cp)
}
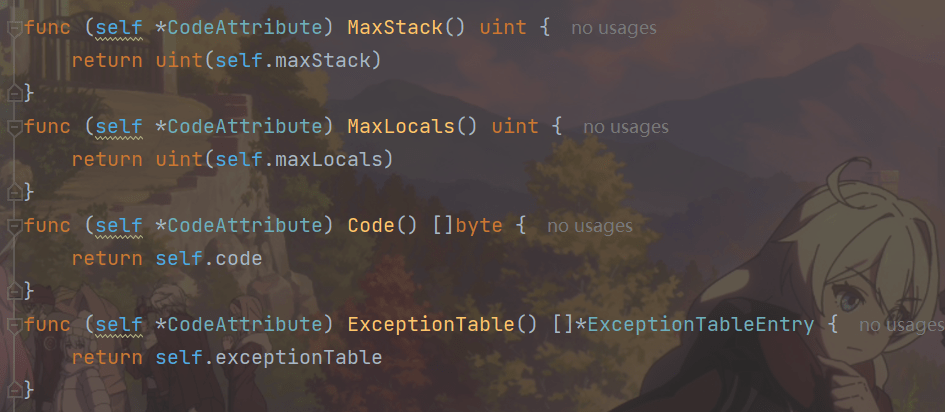
func (self *CodeAttribute) MaxStack() uint {
return uint(self.maxStack)
}
func (self *CodeAttribute) MaxLocals() uint {
return uint(self.maxLocals)
}
func (self *CodeAttribute) Code() []byte {
return self.code
}
func (self *CodeAttribute) ExceptionTable() []*ExceptionTableEntry {
return self.exceptionTable
}
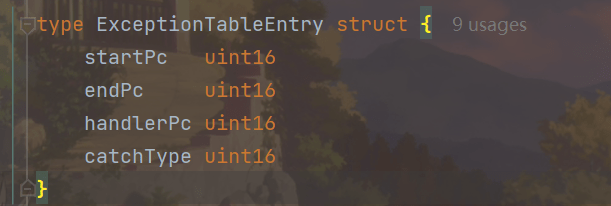
type ExceptionTableEntry struct {
startPc uint16
endPc uint16
handlerPc uint16
catchType uint16
}
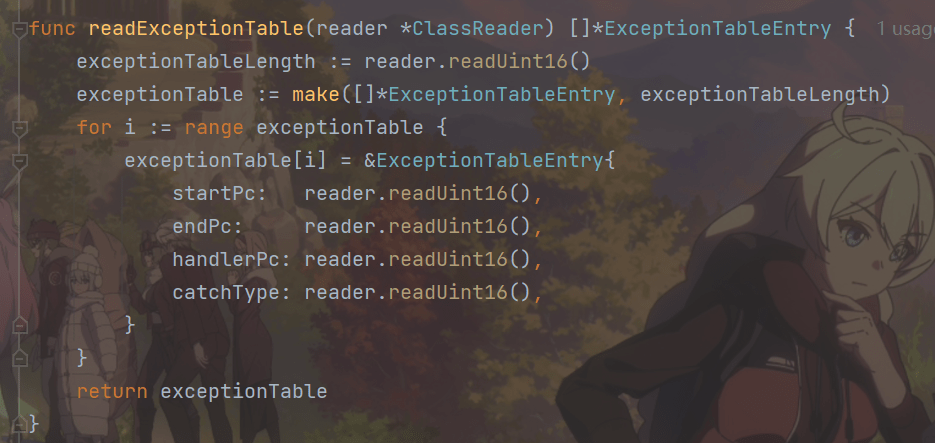
func readExceptionTable(reader *ClassReader) []*ExceptionTableEntry {
exceptionTableLength := reader.readUint16()
exceptionTable := make([]*ExceptionTableEntry, exceptionTableLength)
for i := range exceptionTable {
exceptionTable[i] = &ExceptionTableEntry{
startPc: reader.readUint16(),
endPc: reader.readUint16(),
handlerPc: reader.readUint16(),
catchType: reader.readUint16(),
}
}
return exceptionTable
}
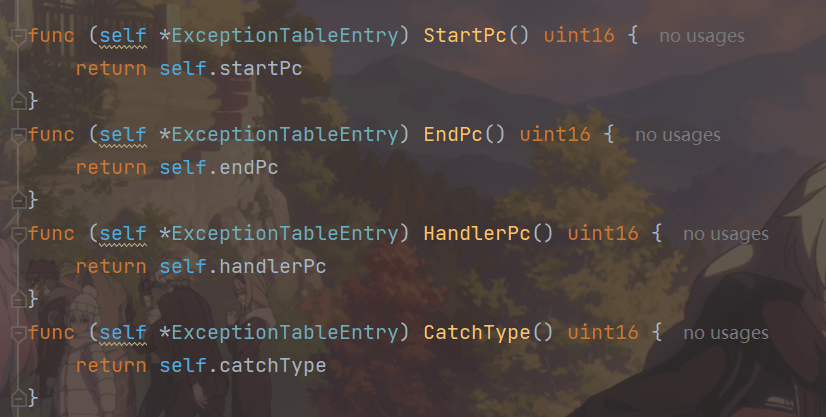
func (self *ExceptionTableEntry) StartPc() uint16 {
return self.startPc
}
func (self *ExceptionTableEntry) EndPc() uint16 {
return self.endPc
}
func (self *ExceptionTableEntry) HandlerPc() uint16 {
return self.handlerPc
}
func (self *ExceptionTableEntry) CatchType() uint16 {
return self.catchType
}
代码解释
结构体
CodeAttribute和ExceptionTableEntry以及各自的Getter方法
readInfo方法
readInfo方法,代码简单,不在阐述。
readExceptionTable
readExceptionTable()函数,就是结构体中又有一个结构体,所以需要再次赋值,代码简单,不在阐述
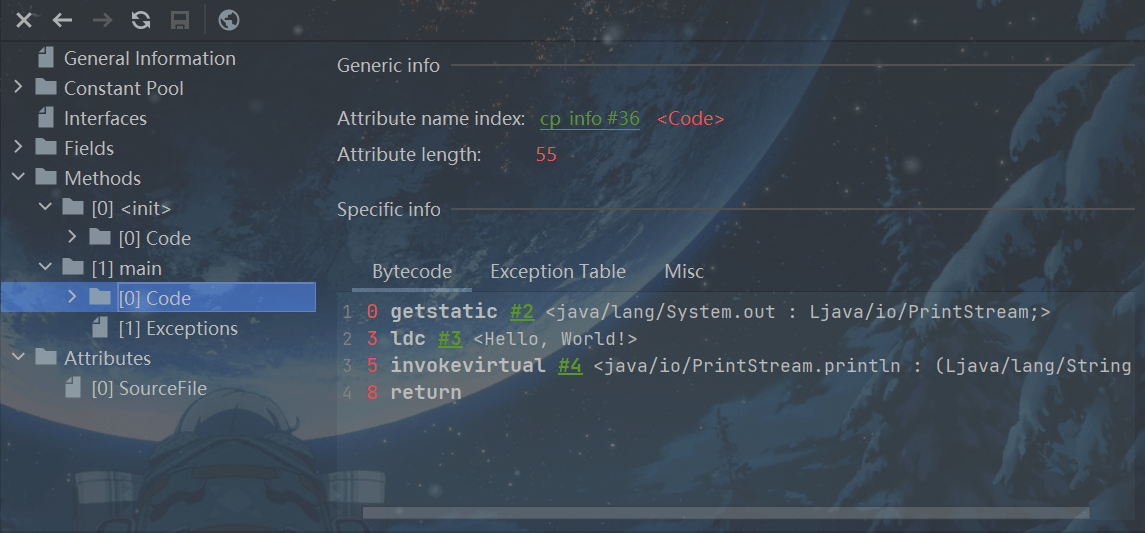
ClassFileTest.main()方法的Code属性如图。
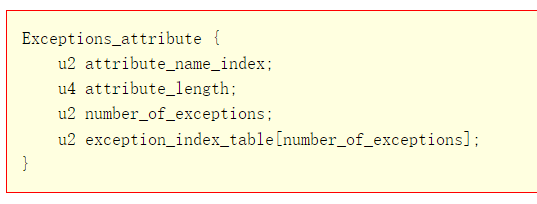
7.Exceptions属性
Exceptions是变长属性,记录方法抛出的异常表,其结构定义如下:
整体代码
在classfile目录下创建attr_exceptions.go文件,在其中定义ExceptionsAttribute结构体,代码如下:
package classfile

/*
Exceptions_attribute {
    u2 attribute_name_index;
    u4 attribute_length;
    u2 number_of_exceptions;
    u2 exception_index_table[number_of_exceptions];
}
*/
type ExceptionsAttribute struct {
    exceptionIndexTable []uint16
}

func (self *ExceptionsAttribute) readInfo(reader *ClassReader) {
    self.exceptionIndexTable = reader.readUint16s()
}

func (self *ExceptionsAttribute) ExceptionIndexTable() []uint16 {
    return self.exceptionIndexTable
}
代码解释
代码简单,不在阐述。
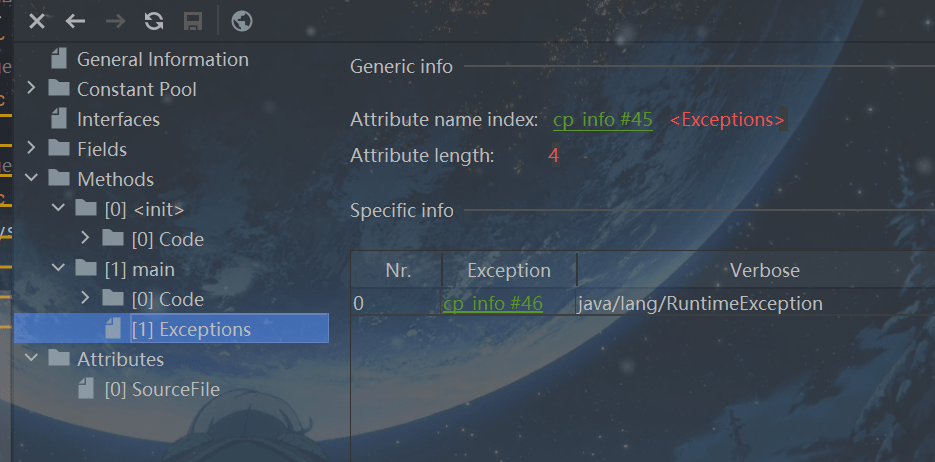
ClassFileTest.main()方法的Exceptions属性。
8.LineNumberTable和LocalVariableTable属性
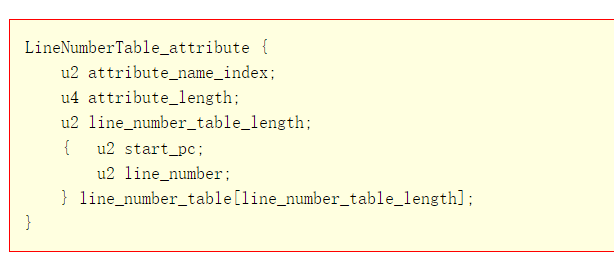
LineNumberTable 属性
LineNumberTable属性是可选变长属性,位于Code结构的属性表。
LineNumberTable属性是用来描述Java源码行号与字节码行号之间的对应关系。这个属性可以用来在调试的时候定位代码执行的行数。
start_pc即字节码行号;
line_number即Java源代码行号。
在Code属性的属性表中,LineNumberTable属性可以按照任意顺序出现,此外,多个LineNumberTable属性可以共同表示一个行号在源文件中表示的内容,即 LineNumberTable 属性不需要与源文件的行一一对应。
LineNumberTable属性表结构:
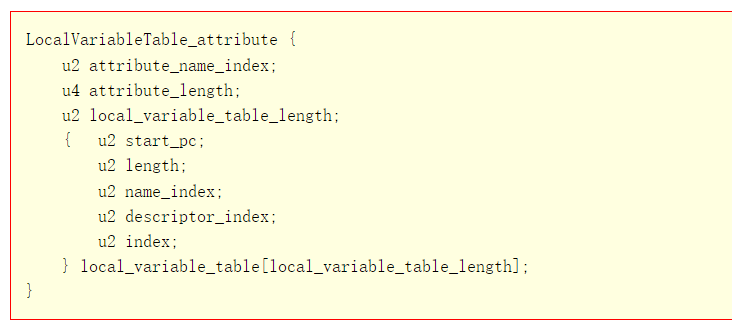
LocalVariableTable属性
LocalVariableTable是可选变长属性,位于Code属性的属性表中。它被调试器用于确定方法在执行过程中局部变量的信息在Code 属性的属性表中,LocalVariableTable 属性可以按照任意顺序出现。Code 属性中的每个局部变量最多只能有一个LocalVariableTable属性。
- start pc + length表示这个变量在字节码中的生命周期起始和结束的偏移位置(this生命周期从头0到结尾10)
- index就是这个变量在局部变量表中的槽位(槽位可复用)
- name就是变量名称
- Descriptor表示局部变量类型描述
LocalVariableTable 属性表结构:
这两种属性和前面介绍的SourceFile属性都属于调试信息,都不是运行时必需的。在使用javac编译器编译Java程序时,默认会在class文件中生成这些信息。
可以使用javac提供的-g:none选项来关闭这些信息的生成,这里就不多介绍了,具体请参考javac用法。
LineNumberTable和LocalVariableTable属性表
整体代码
把上面的结构定义翻译成Go结构体,定义在classfile\attr_line_number_table.go文件中,代码如下:
package classfile

/*
LineNumberTable_attribute {
    u2 attribute_name_index;
    u4 attribute_length;
    u2 line_number_table_length;
    { u2 start_pc;
      u2 line_number;
    } line_number_table[line_number_table_length];
}
*/
type LineNumberTableAttribute struct {
    lineNumberTable []*LineNumberTableEntry
}

type LineNumberTableEntry struct {
    startPc uint16
    lineNumber uint16
}

func (self *LineNumberTableAttribute) readInfo(reader *ClassReader) {
    lineNumberTableLength := reader.readUint16()
    self.lineNumberTable = make([]*LineNumberTableEntry, lineNumberTableLength)
    for i := range self.lineNumberTable {
        self.lineNumberTable[i] = &LineNumberTableEntry{
            startPc: reader.readUint16(),
            lineNumber: reader.readUint16(),
        }
    }
}

func (self *LineNumberTableAttribute) GetLineNumber(pc int) int {
    for i := len(self.lineNumberTable) - 1; i >= 0; i-- {
        entry := self.lineNumberTable[i]
        if pc >= int(entry.startPc) {
            return int(entry.lineNumber)
        }
    }
    return -1
}
把上面的结构定义翻译成Go结构体,定义在classfile/attr_local_variable_table.go文件中,代码如下:
package classfile

/*
LocalVariableTable_attribute {
    u2 attribute_name_index;
    u4 attribute_length;
    u2 local_variable_table_length;
    { u2 start_pc;
      u2 length;
      u2 name_index;
      u2 descriptor_index;
      u2 index;
    } local_variable_table[local_variable_table_length];
}
*/
type LocalVariableTableAttribute struct {
    localVariableTable []*LocalVariableTableEntry
}

type LocalVariableTableEntry struct {
    startPc         uint16
    length          uint16
    nameIndex       uint16
    descriptorIndex uint16
    index           uint16
}

func (self *LocalVariableTableAttribute) readInfo(reader *ClassReader) {
    localVariableTableLength := reader.readUint16()
    self.localVariableTable = make([]*LocalVariableTableEntry, localVariableTableLength)
    for i := range self.localVariableTable {
        self.localVariableTable[i] = &LocalVariableTableEntry{
            startPc: reader.readUint16(),
            length: reader.readUint16(),
            nameIndex: reader.readUint16(),
            descriptorIndex: reader.readUint16(),
            index: reader.readUint16(),
        }
    }
}
代码解释
代码简单,不在阐述
在第10章讨论异常处理时会详细讨论LineNumberTable属性。
9.测试代码
整体代码
打开main.go文件,修改import语句和startJVM()函数,代码如下:
package main
import (
"fmt"
"jvmgo/ch03/classfile"
"jvmgo/ch03/classpath"
"strings"
)
func main() {
cmd := parseCmd()
if cmd.versionFlag {
fmt.Println("version 0.0.1")
} else if cmd.helpFlag || cmd.class == "" {
printUsage()
} else {
startJVM(cmd)
}
}
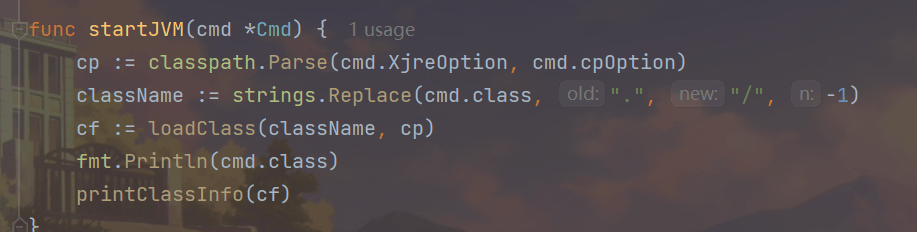
func startJVM(cmd *Cmd) {
cp := classpath.Parse(cmd.XjreOption, cmd.cpOption)
className := strings.Replace(cmd.class, ".", "/", -1)
cf := loadClass(className, cp)
fmt.Println(cmd.class)
printClassInfo(cf)
}
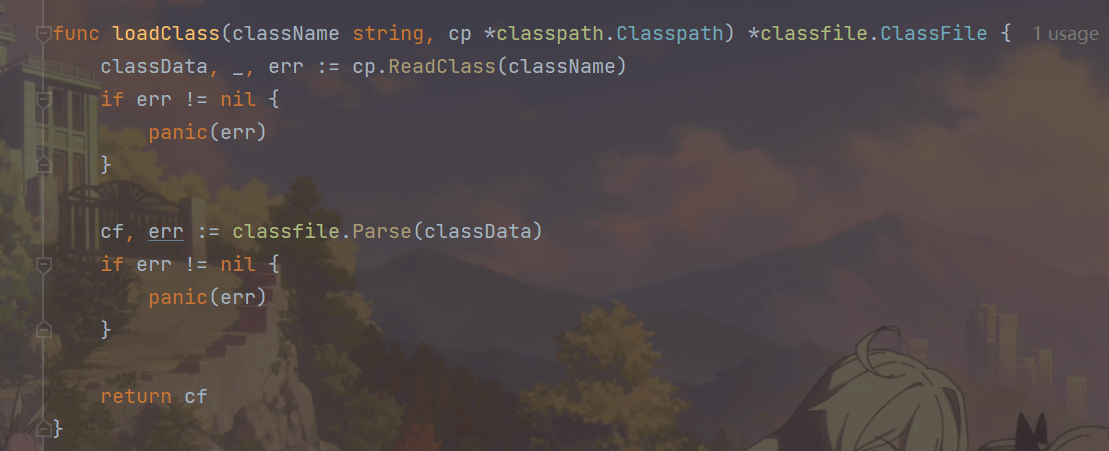
func loadClass(className string, cp *classpath.Classpath) *classfile.ClassFile {
classData, _, err := cp.ReadClass(className)
if err != nil {
panic(err)
}
cf, err := classfile.Parse(classData)
if err != nil {
panic(err)
}
return cf
}
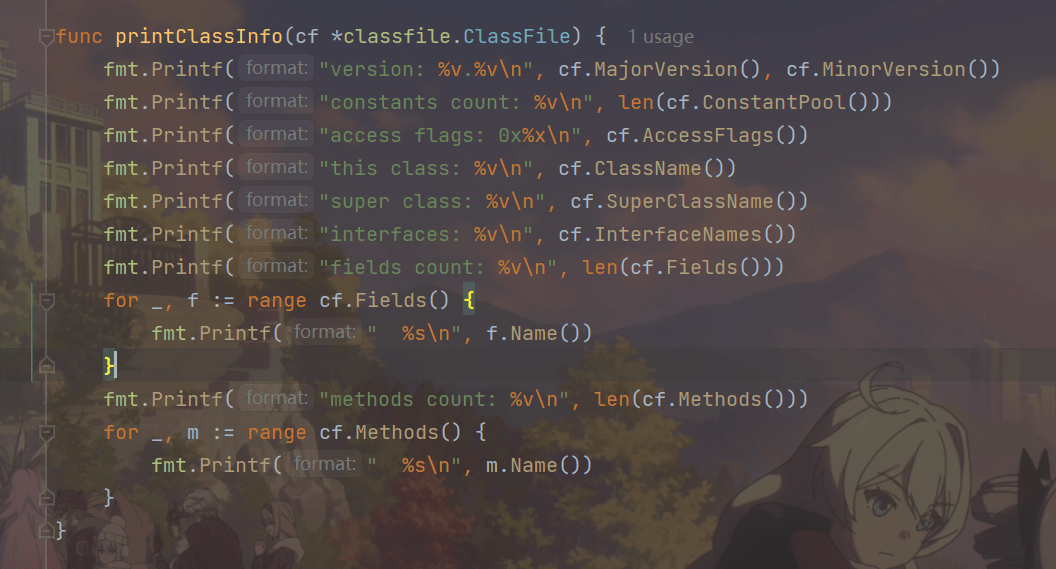
func printClassInfo(cf *classfile.ClassFile) {
fmt.Printf("version: %v.%v\n", cf.MajorVersion(), cf.MinorVersion())
fmt.Printf("constants count: %v\n", len(cf.ConstantPool()))
fmt.Printf("access flags: 0x%x\n", cf.AccessFlags())
fmt.Printf("this class: %v\n", cf.ClassName())
fmt.Printf("super class: %v\n", cf.SuperClassName())
fmt.Printf("interfaces: %v\n", cf.InterfaceNames())
fmt.Printf("fields count: %v\n", len(cf.Fields()))
for _, f := range cf.Fields() {
fmt.Printf(" %s\n", f.Name())
}
fmt.Printf("methods count: %v\n", len(cf.Methods()))
for _, m := range cf.Methods() {
fmt.Printf(" %s\n", m.Name())
}
}
代码解释
main()函数不用变,修改startJVM()函数,代码如下:
loadClass()函数读取并解析class文件,代码如下:
printClassInfo()函数把class文件的一些重要信息打印出来,代码如下:
打开命令行窗口,执行下面的命令编译本章代码。
go install jvmgo\ch03
编译成功后,在D:\go\workspace\bin目录下会出现ch03.exe文件。
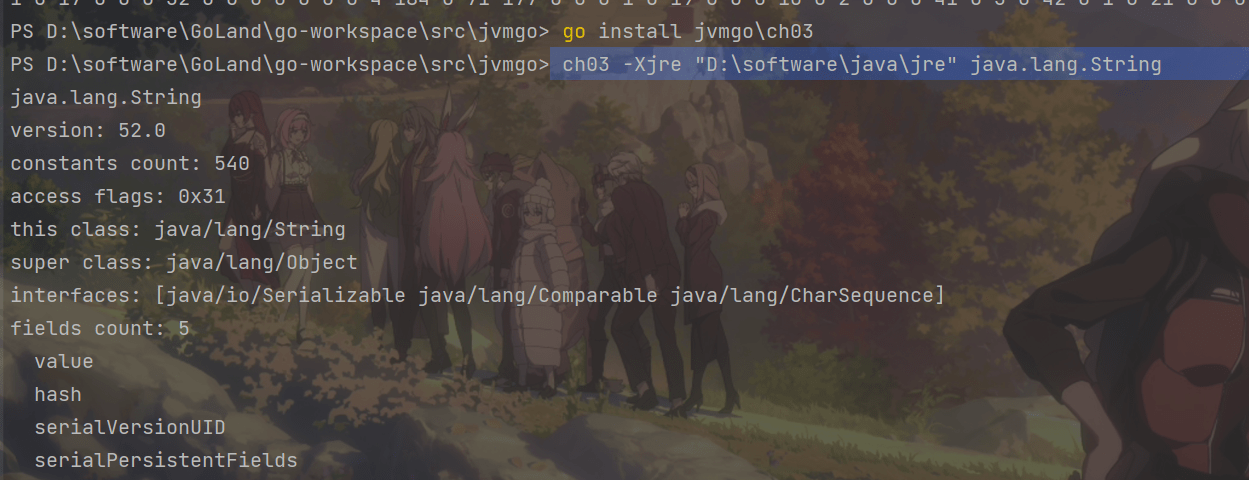
执行ch03.exe,指定-Xjre选项和类名,就可以打印出class文件的信息。
ch03 -Xjre "D:\software\java\jre" java.lang.String
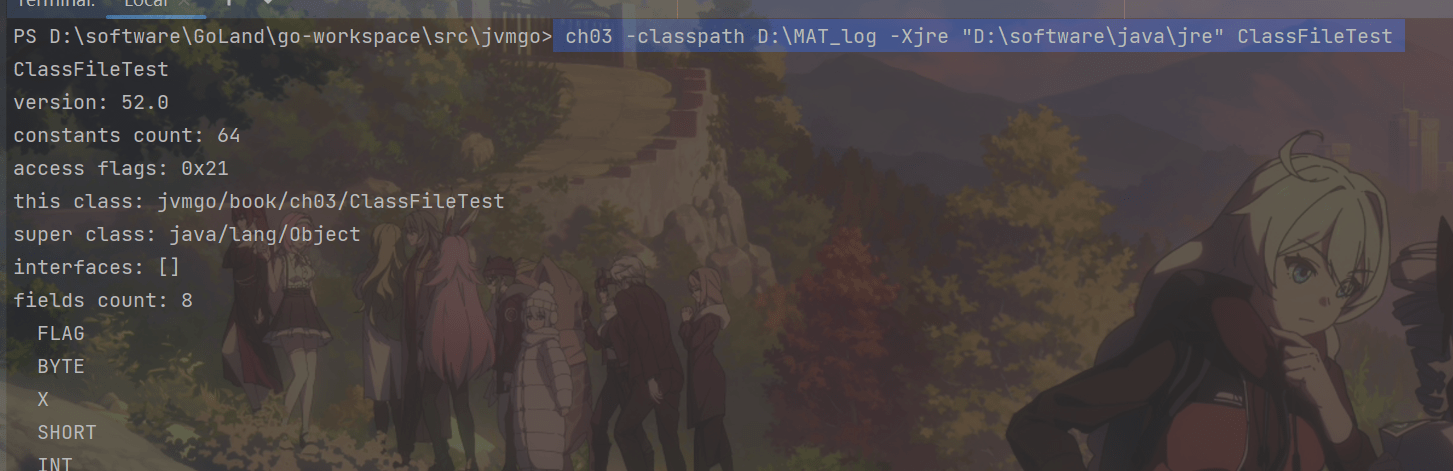
测试自己编写的类,要指定-classpath选项。
ch03 -classpath D:\MAT_log -Xjre "D:\software\java\jre" ClassFileTest
10.参考
尚硅谷宋红康:JVM全套教程:https://www.bilibili.com/video/BV1PJ411n7xZ
周志明:深入理解java虚拟机
张秀宏:自己动手写Java虚拟机 (Java核心技术系列)