1.环境及准备工作
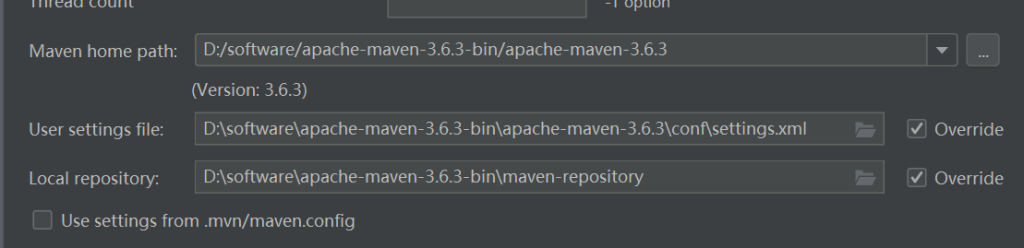
项目环境
java1.8

maven3.6.3
准备工作
新建项目
在pom.xml文件加入依赖
<dependencies>
    <dependency>
        <groupId>javax.servlet</groupId>
        <artifactId>servlet-api</artifactId>
        <version>2.5</version>
    </dependency>
</dependencies>
2.基本请求
全部代码都在文章里了,大多数代码,我都加了注释。
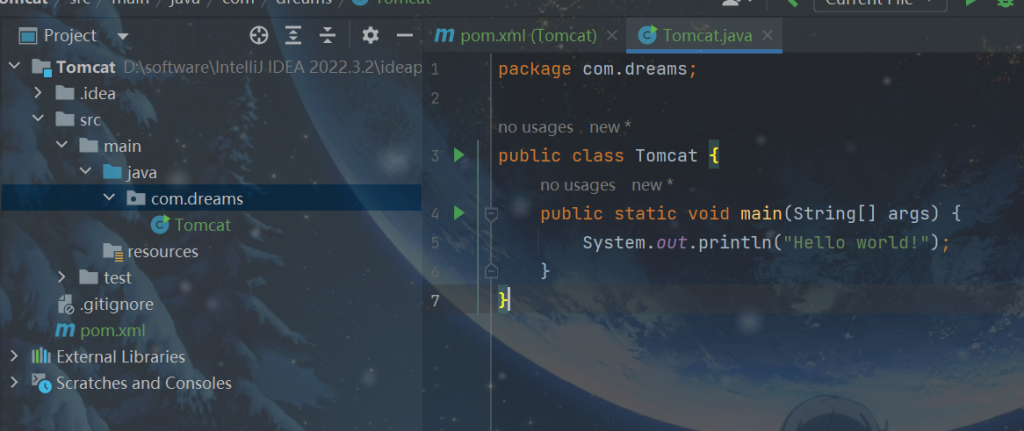
tomcat启动从main方法进入
public static void main(String[] args) {
    Tomcat tomcat = new Tomcat();
    tomcat.start();
    System.out.println("Hello world!");
}
调用start完成真正的使用:
代码还没写全,但是,我们先解决一个问题,如下:
服务器一次只能连接一个客户端
public void start(){
    try {
        //一个服务端的端口8080,socket连接TCP
        ServerSocket serverSocket = new ServerSocket(8080);
        //得到socket连接
        Socket socket = serverSocket.accept();
        //其他代码......

    } catch (IOException e) {
        throw new RuntimeException(e);
    }
}
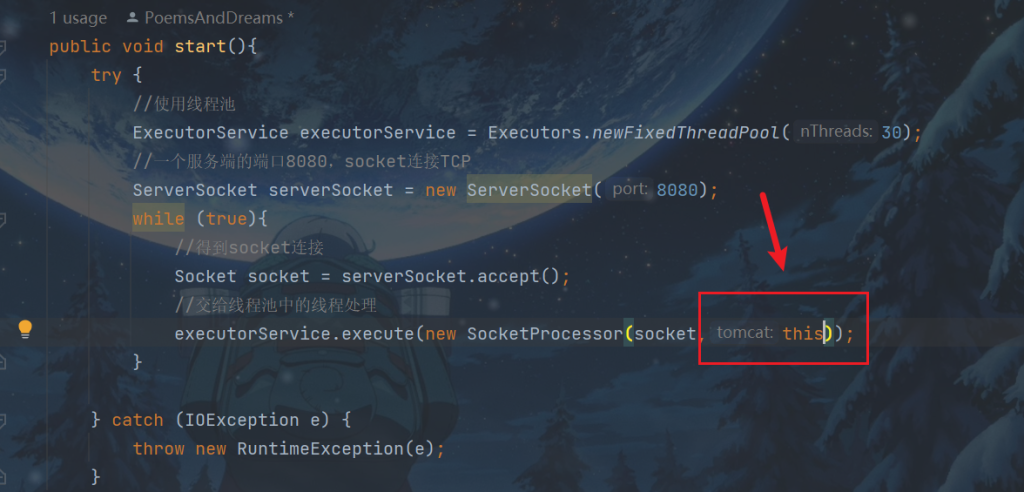
tomcat在解决这个问题时使用了BIO模型,参考后,我们对其改一下:
public void start(){
    try {
        //使用线程池
        ExecutorService executorService = Executors.newFixedThreadPool(30);
        //一个服务端的端口8080,socket连接TCP
        ServerSocket serverSocket = new ServerSocket(8080);
        while (true){
            //得到socket连接
            Socket socket = serverSocket.accept();
            //交给线程池中的线程处理
            executorService.execute(new SocketProcessor(socket));
        }
    } catch (IOException e) {
        throw new RuntimeException(e);
    }
}
在当前目录下,新建socket目录下新建SocketProcessor类代码如下:
package com.dreams.socket;

import java.net.Socket;

public class SocketProcessor implements Runnable{

    private Socket socket;

    public SocketProcessor(Socket socket) {
        this.socket = socket;
    }

    @Override
    public void run() {
        //具体处理
        process(socket);
    }

    private void process(Socket socket) {
        // 具体处理的逻辑

    }

}
具体处理的逻辑
private void process(Socket socket) {
    //处理逻辑
    try {
        //比如浏览器发送数据,在这里获取发送的数据
        InputStream inputStream = socket.getInputStream();
        //构造一个字节数组,1KB
        byte[] bytes = new byte[1024];
        //每次读取1KB,暂时先如此,今后优化
        inputStream.read(bytes);
        //暂时输出测试,解析字节流
        System.out.println(new String(bytes));

    } catch (IOException e) {
        throw new RuntimeException(e);
    }

}
先测试一下:

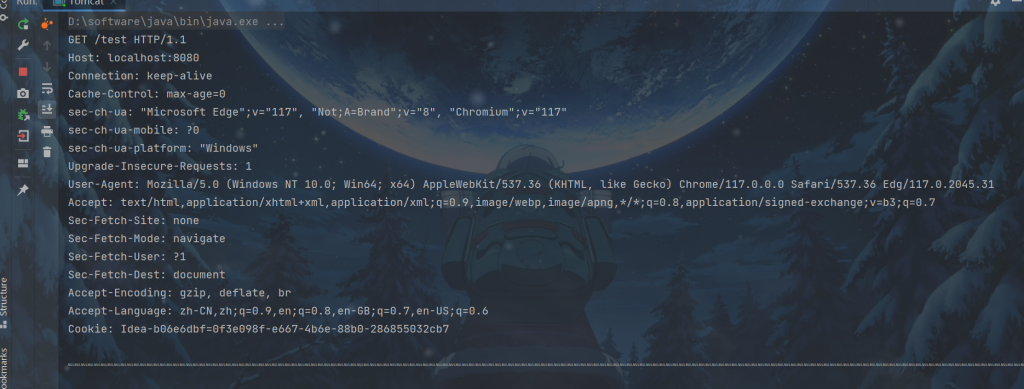
我们截取一下上述的请求头,其余也可以截取,但是一个小型的tomcat就不处理了
再改一下代码:
private void process(Socket socket) {
    //处理逻辑
    try {
        //比如浏览器发送数据,在这里获取发送的数据
        InputStream inputStream = socket.getInputStream();
        //构造一个字节数组,1KB
        byte[] bytes = new byte[1024];
        //每次读取1KB,暂时先如此,今后优化
        inputStream.read(bytes);
        String request = new String(bytes);
        int index1,index2,index3;
        index1 = request.indexOf(' ');
        index2 = request.indexOf(' ',index1+1);
        index3 = request.indexOf('\r');
        String method = request.substring(0,index1);
        String url = request.substring(index1 + 1,index2);
        String protocl = request.substring(index2,index3);
        //System.out.println(" " + method + " " + url + " " + protocl);
        //获取request和response
        Request request = new Request(method, url, protocl,socket);
        Response response = new Response(request);
        Servlet servlet = new Servlet();
        servlet.service(request,response);
        //发送响应
        response.send();

    } catch (IOException e | ServletException e) {
        throw new RuntimeException(e);
    }

}
知道请求方法后,对其进行处理
新建一个Servlet类,承担Servlet功能,继承HttpServlet
package com.dreams;

import javax.servlet.ServletException;
import javax.servlet.http.HttpServlet;
import javax.servlet.http.HttpServletRequest;
import javax.servlet.http.HttpServletResponse;
import java.io.IOException;

public class Servlet extends HttpServlet {
    @Override
    protected void doGet(HttpServletRequest req, HttpServletResponse resp) throws ServletException, IOException {
        //Get请求逻辑
    }
}
新建一个http目录,存放Request对象和Response对象
Request对象如下:
package com.dreams.http;

public class Request {
    private String method;
    private String url;
    private String protocol;

    //其余也可以截取,但是一个小型的tomcat就不处理了,就暂时处理3个参数

    //绑定socket
    private Socket socket;

    public Request(String method, String url, String protocol, Socket socket) {
        this.method = method;
        this.url = url;
        this.protocol = protocol;
        this.socket = socket;
    }

    public Socket getSocket() {
        return socket;
    }

    public Request(String method, String url, String protocol) {
        this.method = method;
        this.url = url;
        this.protocol = protocol;
    }


    public String getMethod() {
        return method;
    }

    public StringBuffer getUrl() {
        return new StringBuffer(url);
    }

    public String getProtocol() {
        return protocol;
    }
}
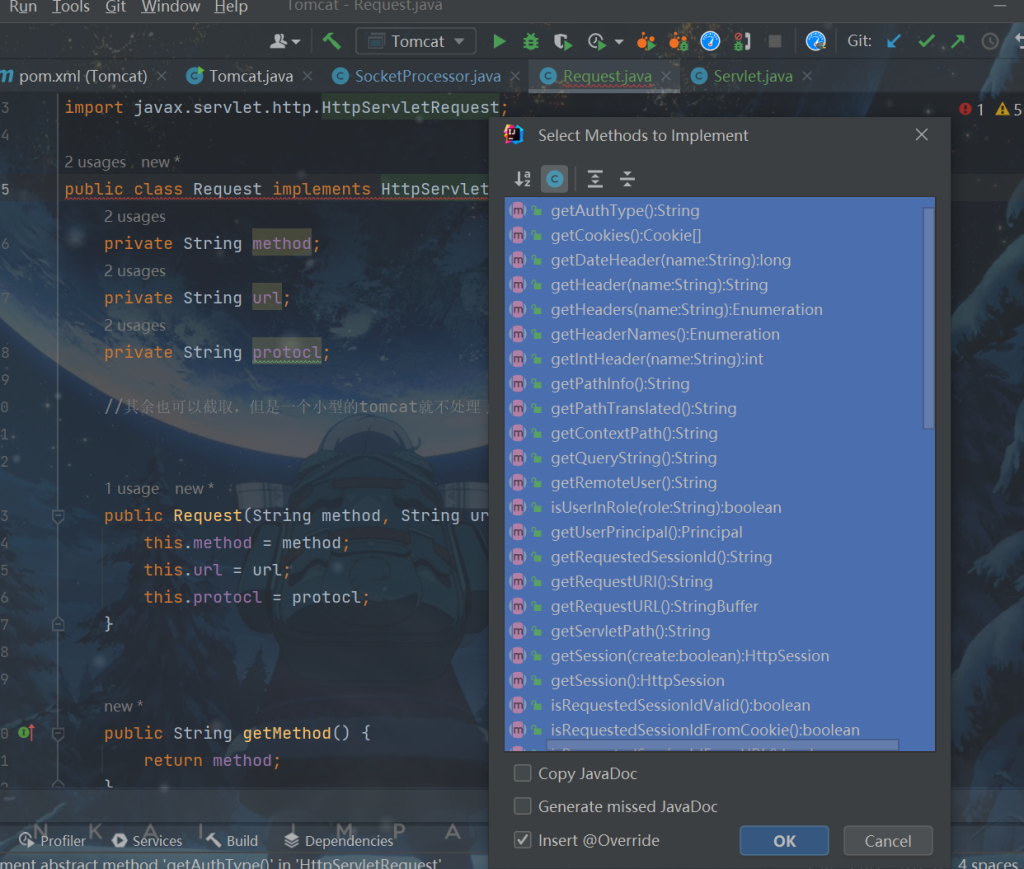
当然,Request对象应该实现HttpServletRequest,需要我们重写很多方法
在idea,我们按Alt+Enter,直接自动重写,代码都是自动生成的,就不再展出。
Response对象
package com.dreams.http;
import javax.servlet.ServletOutputStream;
import javax.servlet.http.HttpServletResponse;
import java.io.OutputStream;
import java.util.HashMap;
import java.util.Map;
public class Response implements HttpServletResponse {
private int status = 200;
private String message = "OK";
private Map<String,String> headers = new HashMap<>();
//常量,空格
private byte SP = ' ';
//常量,回车
private byte CR = '\r';
//常量,换行
private byte LF = '\n';
//每个response对应一个request
private Request request;
private OutputStream socketOutputStream;
//对于一个响应体只要一个响应体
private ResponseServletOutputStream responseServletOutputStream = new ResponseServletOutputStream();
public Response(Request request) {
this.request = request;
try {
this.socketOutputStream = request.getSocket().getOutputStream();
} catch (IOException e) {
throw new RuntimeException(e);
}
}
public void setStatus(int status,String message) {
status = status;
message = message;
}
public void addHeader(String s1, String s2) {
headers.put(s1,s2);
}
//响应
public ResponseServletOutputStream getOutputStream() {
return responseServletOutputStream;;
}
public void send(){
//发送响应
//响应行
sendResponseLine();
//响应头
sendResponseHeader();
//响应体
sendResponseBody();
}
private void sendResponseBody() {
}
private void sendResponseHeader() {
}
private void sendResponseLine() {
}
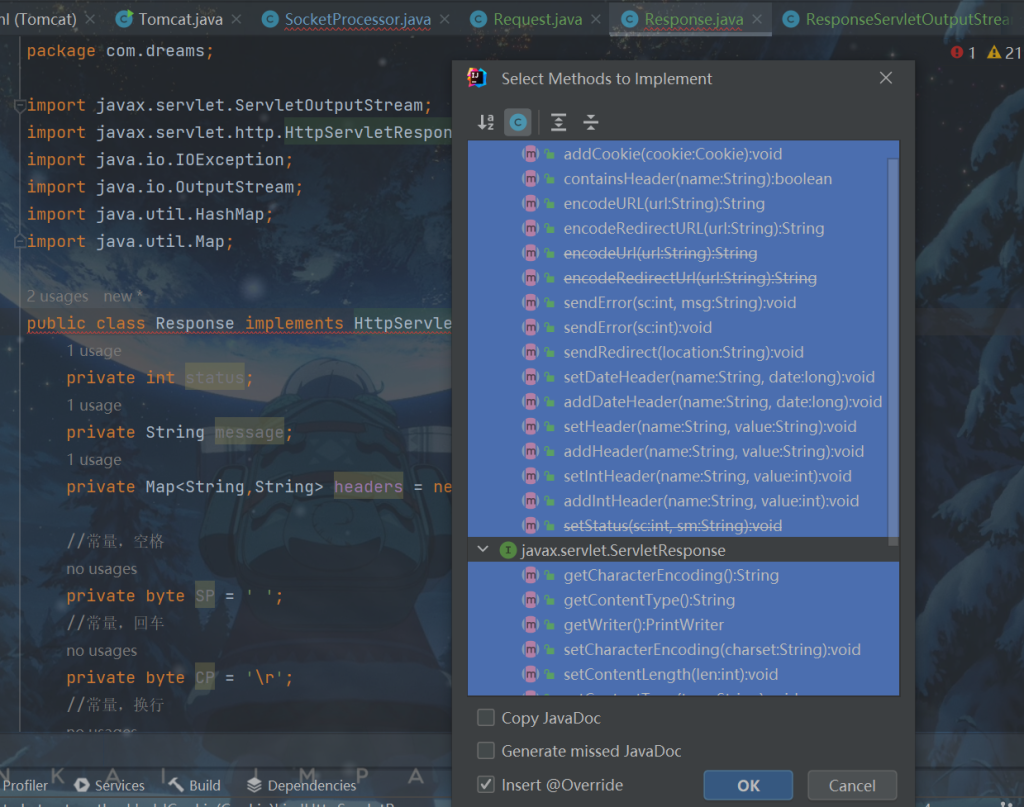
}当然,Response对象应该实现HttpServletResponse,需要我们重写很多方法
在idea,我们按Alt+Enter,直接自动重写,代码都是自动生成的,就不再展出。
ResponseServletOutputStream类
package com.dreams.http;

import javax.servlet.ServletOutputStream;
import java.io.IOException;

public class ResponseServletOutputStream extends ServletOutputStream {

    private byte[] bytes = new byte[1024];
    private int index = 0;
    @Override
    public void write(int b) throws IOException {
        bytes[index] = (byte) b;
        index++;
    }

    public byte[] getBytes() {
        return bytes;
    }

    public int getIndex() {
        return index;
    }
    public void send(){
        //响应完成
    }

}
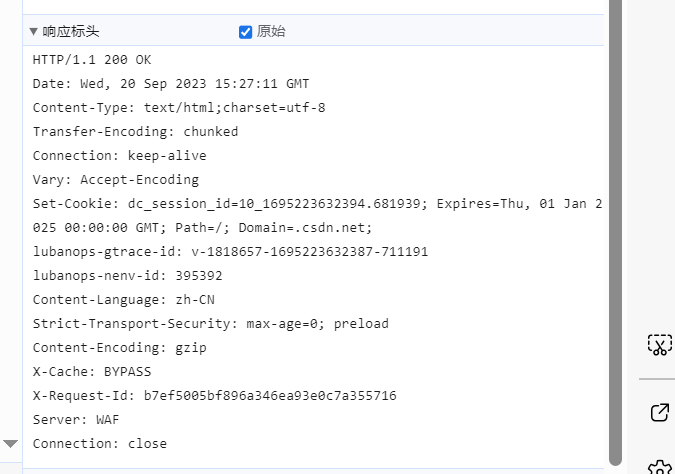
随便打开一个网页,查看响应:
sendResponseBody方法逻辑如下:
private void sendResponseBody() throws IOException {
    socketOutputStream.write(getOutputStream().getBytes());
}
sendResponseHeader方法逻辑如下:
private void sendResponseHeader() throws IOException {
    for (Map.Entry<String, String> entry : headers.entrySet()) {
        String key = entry.getKey();
        String value = entry.getValue();
        socketOutputStream.write(key.getBytes());
        socketOutputStream.write(":".getBytes());
        socketOutputStream.write(value.getBytes());
        socketOutputStream.write(CR);
        socketOutputStream.write(LF);
    }
    socketOutputStream.write(CR);
    socketOutputStream.write(LF);
}
sendResponseLine方法逻辑如下:
private void sendResponseLine() throws IOException {
    socketOutputStream.write(request.getProtocol().getBytes());
    socketOutputStream.write(SP);
    socketOutputStream.write(status);
    socketOutputStream.write(SP);
    socketOutputStream.write(message.getBytes());
    socketOutputStream.write(CR);
    socketOutputStream.write(LF);
}
因为我们抛出了异常,所以记得捕获
public void send(){
    //发送响应

    try {
        //响应行
        sendResponseLine();
        //响应头
        sendResponseHeader();
        //响应体
        sendResponseBody();
    } catch (IOException e) {
        throw new RuntimeException(e);
    }
}
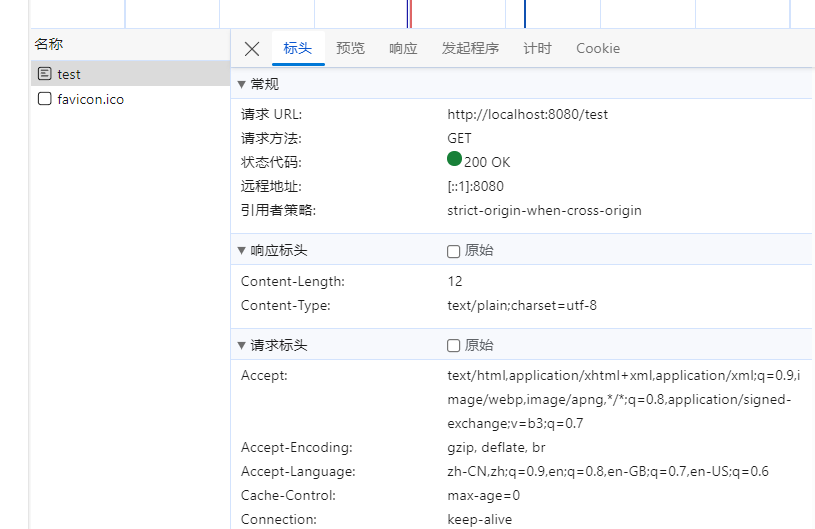
回到我们重写的doGet请求
手动写一些响应,测试一下
@Override
protected void doGet(HttpServletRequest req, HttpServletResponse resp) throws ServletException, IOException {
    //Get请求逻辑
    //数据长度
    resp.addHeader("Content-Length","12");
    //以纯文本方式展示
    resp.addHeader("Content-Type","text/plain;charset=utf-8");
    resp.getOutputStream().write("Hello World!".getBytes());
}
访问
http://localhost:8080/test

3.查找应用
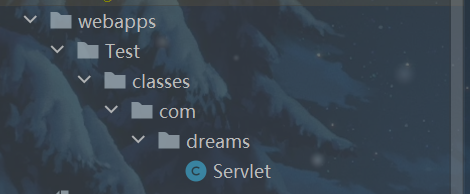
实际应用会放在webapps下
新建如图目录
在servlet加入注解
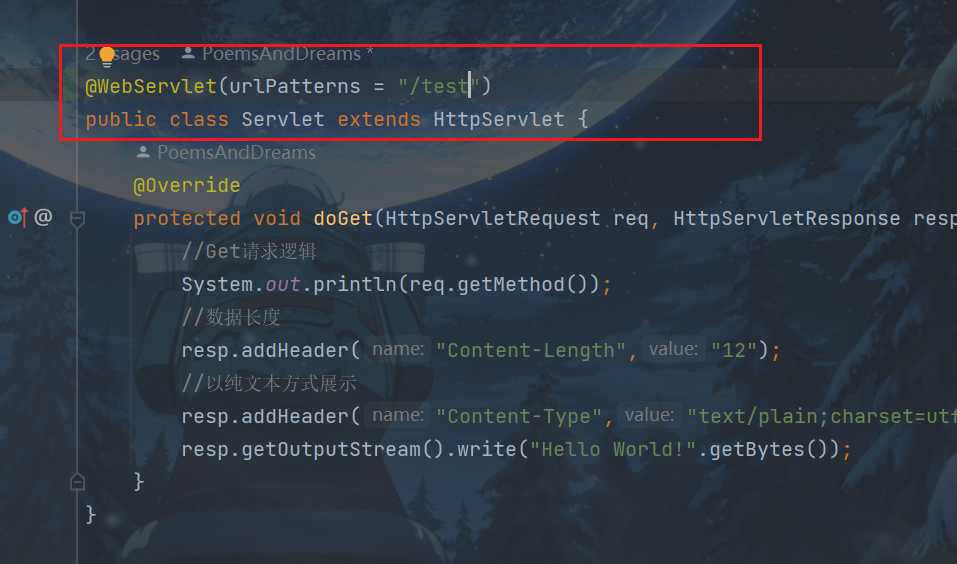
再将Servlet文件编译成class文件,放到如图目录下,删除原Servlet文件。
上述操作只是暂时拿来代替一个应用。
修改一下main方法
public static void main(String[] args) {
    Tomcat tomcat = new Tomcat();
    //先初始化
    tomcat.init();
    tomcat.start();
    System.out.println("Hello world!");
}
初始化逻辑,目前暂时只是先部署
private void init() {
    //先部署
    deploys();
}
deploys()方法实现
private void deploys() {
    //拿到当前目录下的webapps目录
    File webapps = new File(System.getProperty("user.dir"), "webapps");
    //webapps目录下每一个app
    for (String app : webapps.list()) {
        //每一个app的部署
        deploy(webapps,app);
    }
}
真正逻辑在deploy方法
获取文件,加载为class对象,然后通过反射,判断是否继承了HttpServlet
private void deploy(File webapps, String appName) {
    //查看有哪些servlet

    //获得appName文件夹
    File appDirectory = new File(webapps, appName);
    //获得classes文件夹
    File classesDirectory = new File(appDirectory, "classes");

    ////获得classes文件夹下所有文件
    List<File> files = getAllFilePath(classesDirectory);

    for (File file : files) {

        //获取全限定类名
        String path = file.getPath();
        path = path.replace(classesDirectory.getPath() + "\\", "");
        path = path.replace(".class","");
        path = path.replace("\\",".");

        //System.out.println(path);

        //加载一个类
        try {
            //自定义类加载器自定义加载目录
            WebaddsClassLoader webaddsClassLoader = new WebaddsClassLoader(new URL[]{classesDirectory.toURL()});
            Class<?> servletClass = webaddsClassLoader.loadClass(path);
            //......代码在下面

        } catch (ClassNotFoundException e) {
            throw new RuntimeException(e);
        } catch (MalformedURLException e) {
            throw new RuntimeException(e);
        }


    }

}
新建ClassLoader目录,存放自定义类加载器,自定义类加载器自定义加载目录否则无法加载webapps目录下的文件
package com.dreams.ClassLoader;

import java.net.URL;
import java.net.URLClassLoader;

public class WebaddsClassLoader extends URLClassLoader {

    //自定义类加载器自定义加载目录
    public WebaddsClassLoader(URL[] urls) {
        super(urls);
    }
}
getAllFilePath方法获取所有目录
//递归调用获取所有目录
public List<File> getAllFilePath(File srcFile){
    ArrayList<File> fileList = new ArrayList<>();
    File[] files = srcFile.listFiles();

    if (files != null){
        for (File file : files) {
            if (file.isDirectory()){
                fileList.addAll(getAllFilePath(file));
            }
            else {
                fileList.add(file);
            }
        }
    }
    return fileList;
}
判断是否是HttpServlet的子类,将参数urlPatterns内容保存在common下的context,一个应用保存在一个Map
private void deploy(File webapps, String appName) {
    //查看有哪些servlet

    //每个应用对应一个context对象
    Context context = new Context(appName);

    //获得appName文件夹
    File appDirectory = new File(webapps, appName);
    //获得classes文件夹
    File classesDirectory = new File(appDirectory, "classes");

    ////获得classes文件夹下所有文件
    List<File> files = getAllFilePath(classesDirectory);

    for (File file : files) {

        //获取全限定类名
        String path = file.getPath();
        path = path.replace(classesDirectory.getPath() + "\\", "");
        path = path.replace(".class","");
        path = path.replace("\\",".");

        //System.out.println(path);

        //加载一个类
        try {
            //自定义类加载器自定义加载目录
            WebaddsClassLoader webaddsClassLoader = new WebaddsClassLoader(new URL[]{classesDirectory.toURL()});
            Class<?> servletClass = webaddsClassLoader.loadClass(path);

            //判断是否是HttpServlet的子类
            if (HttpServlet.class.isAssignableFrom(servletClass)){
                //判断是否存在WebServlet注解
                if (servletClass.isAnnotationPresent(WebServlet.class)){
                    //获取WebServlet注解内容
                    WebServlet annotation = servletClass.getAnnotation(WebServlet.class);
                    //获取WebServlet参数urlPatterns内容
                    String[] urlPatterns = annotation.urlPatterns();

                    //这里保存在common下的context,一个应用保存在一个Map
                    for (String urlPattern : urlPatterns) {
                        context.addUrlurlPatternMap(urlPattern, (Servlet) servletClass.newInstance());
                    }

                }
            }

        } catch (ClassNotFoundException e) {
            throw new RuntimeException(e);
        } catch (MalformedURLException e) {
            throw new RuntimeException(e);
        } catch (InstantiationException e) {
            throw new RuntimeException(e);
        } catch (IllegalAccessException e) {
            throw new RuntimeException(e);
        }

    }

    //tomcat也会保存有哪些应用
    contextMap.put(appName,context);
}
新建common下的context
package com.dreams.common;

import javax.servlet.Servlet;
import java.util.HashMap;
import java.util.Map;

public class Context {
    private String appName;
    private Map<String,Servlet> urlPatternMap = new HashMap<>();

    public Context(String appName) {
        this.appName = appName;
    }

    //保存
    public void addUrlurlPatternMap(String urlPattern, Servlet servlet) {
        urlPatternMap.put(urlPattern,servlet);
    }

    //获取
    public Servlet getUrlurlPattern(String urlPattern){
        return urlPatternMap.get("/" + urlPattern);
    }
}
当然tomcat也会保存有哪些应用
在tomcat提供一个成员变量,在上面的deployf方法那里添加,代码已给出。
private Map<String,Context> contextMap = new HashMap<>();
获取tomcat也会保存有哪些应用
//获取tomcat也会保存有哪些应用
public Map<String, Context> getContextMap() {
    return contextMap;
}
真正对路径处理的逻辑来了
因为会用到Tomcat类,就在SocketProcessor加入成员变量
private Tomcat tomcat;
修改一下构造方法
public SocketProcessor(Socket socket,Tomcat tomcat) {
    this.socket = socket;
    this.tomcat = tomcat;
}
在创建对象是多传一个参数
SocketProcessor类的process方法更改如下:
private void process(Socket socket) {
    //处理逻辑
    try {
        //比如浏览器发送数据,在这里获取发送的数据
        InputStream inputStream = socket.getInputStream();
        //构造一个字节数组,1KB
        byte[] bytes = new byte[1024];
        //每次读取1KB,暂时先如此,今后优化
        inputStream.read(bytes);
        String re = new String(bytes);
        int index1,index2,index3;
        index1 = re.indexOf(' ');
        index2 = re.indexOf(' ',index1+1);
        index3 = re.indexOf('\r');
        String method = re.substring(0,index1);
        String url = re.substring(index1 + 1,index2);
        String protocl = re.substring(index2,index3);
        System.out.println(" " + method + " " + url + " " + protocl);
        Request request = new Request(method, url, protocl,socket);
        Response response = new Response(request);

        //拆分/Text/text......如/应用名/servlet路径名
        String requestURI = request.getUrl().toString();
        requestURI = requestURI.substring(1);
        String[] paths = requestURI.split("/");
        //应用名
        String appName = paths[0];
        //获取到tomcat保存的servlet
        Context context = tomcat.getContextMap().get(appName);
        if (context != null){
            //servlet路径名
            String servletName = paths[1];
            //根据名字获取到servlet
            Servlet servlet = context.getUrlurlPattern(servletName);
            //得到servlet对象,
            servlet.service(request,response);
        }

        //发送响应
        response.send();

    } catch (IOException e) {
        throw new RuntimeException(e);
    } catch (ServletException e) {
        throw new RuntimeException(e);
    }

}
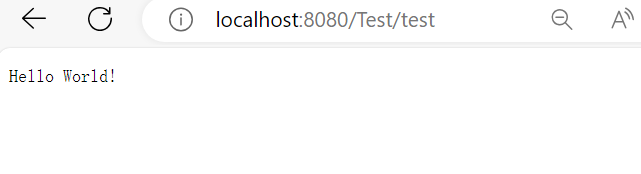
访问
http://localhost:8080/Test/test
但是,还是可能会有访问不存在的路径
if (context != null){
    //servlet路径名
    String servletName = paths[1];
    //根据名字获取到servlet
    Servlet servlet = context.getUrlurlPattern(servletName);
    if (servlet != null){
        //得到servlet对象,
        servlet.service(request,response);
        //发送响应
        response.send();
    }
    else {
        System.out.println("Not Find Path!");
        //自定义一个servlet,找不到路径跳转
        NotFindServlet notFindServlet = new NotFindServlet();
        notFindServlet.service(request,response);
        //发送响应
        response.send();

    }

}
新建servlet目录下NotFindServlet类
package com.dreams.servlet;

import javax.servlet.http.HttpServlet;

public class NotFindServlet extends HttpServlet {
    //处理业务
}
3.静态页面
因为只是一个超级超级超级超级简单的tomcat,就取巧一下
在SocketProcessor下的process方法的如下图位置
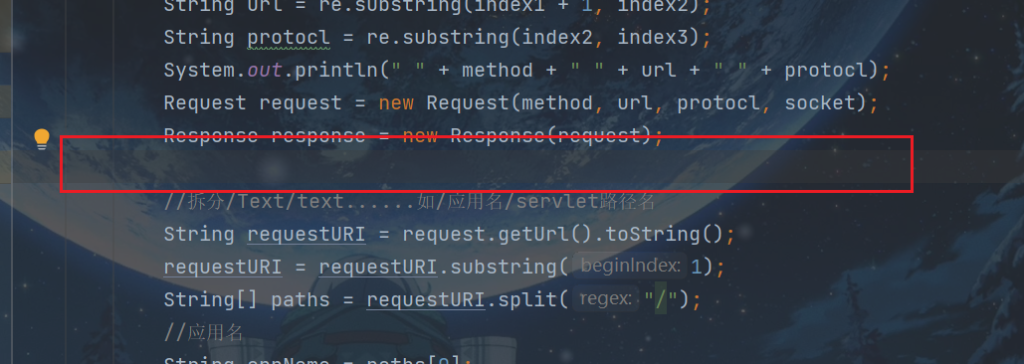
加入处理静态资源的逻辑,因为只是一个超级超级超级超级简单的tomcat,所以,就不考虑性能及优化了。
//直接处理静态资源,取巧只处理html文件
if (url.contains(".html")) {
    //拿到当前目录下的webapps目录
    File file = new File(System.getProperty("user.dir") + "\\webapps" + url);
    //返回目标资源
    FileInputStream fileInputStream = new FileInputStream(file);
    //就直接使用等大的大小了,不再优化了
    byte[] disposeBytes = new byte[(int) file.length()];
    fileInputStream.read(disposeBytes);
    response.addHeader("Content-Length", disposeBytes.length + "");
    response.getOutputStream().write(disposeBytes);
    response.send();
    return;
}
在ResponseServletOutputStream类加入以下方法,来给其赋值。
@Override
public void write(byte[] b) throws IOException {
    bytes = new byte[b.length];
    bytes = b;
}
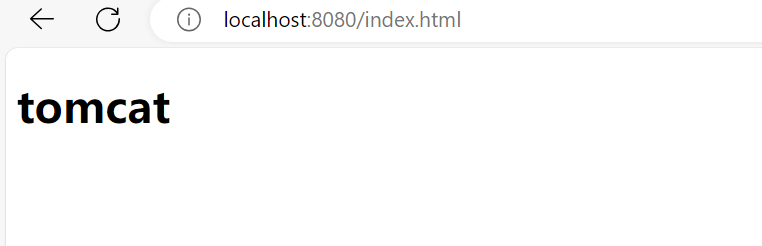
比如,在webapps下新建一个index.html页面
<!DOCTYPE html>
<html lang="en">
<head>
    <meta charset="UTF-8">
    <title>tomcat</title>
</head>
<body>
<h1>tomcat</h1>
</body>
</html>
访问
http://localhost:8080/index.html
目前就这样了,慢慢优化吧
参考
图灵学院的教程