1.基本概述
Sentinel是一款开源的流量控制组件,由阿里巴巴提供支持,旨在保护微服务架构中的应用程序免受不良请求的影响。
Spring Cloud Sentinel主要提供以下功能:
- 流量控制:可以通过配置规则来限制对服务的访问量,包括流量整形、流量降级、熔断降级等功能。
- 实时监控:提供实时的监控面板,展示各个服务的运行状态、流量情况以及异常信息,帮助开发人员及时发现问题并进行处理。
- 系统保护:可以对系统中不稳定的资源进行熔断,避免故障在整个系统中蔓延,保证系统的稳定性。
对于在微服务之间相互调用,因为调用链中的一个服务故障,引起整个链路都无法访问的情况。
解决方法如下:
- 超时处理: 设置适当的超时时间可以避免请求无限等待,当请求在规定的时间内未得到响应时,可以及时返回错误信息或进行相应处理,防止资源被长时间占用。
- 舱壁模式(Bulkhead Pattern): 舱壁模式通过将系统的不同功能隔离在不同的线程池或资源池中,避免某一功能的故障影响整个系统。这样即使某一功能出现问题导致资源耗尽,其他功能仍能正常运行。
- 熔断降级(Circuit Breaker & Fallback): 熔断机制可以监控服务的状态,当服务异常达到一定阈值时自动触发熔断,暂时中断对该服务的请求,避免继续请求可能导致雪崩效应的不可用服务。降级则是在服务不可用时提供一些默认值或缓存数据,保证系统的基本功能继续可用。
- 流量控制: 通过限制并发请求的数量或速率,可以有效控制系统的流量,防止系统过载。流量控制可以结合限流、排队等策略来平滑处理突发流量,保证系统稳定运行。
参考官方文档的基本原理:https://sentinelguard.io/zh-cn/docs/basic-implementation.html
总体架构设计如下:
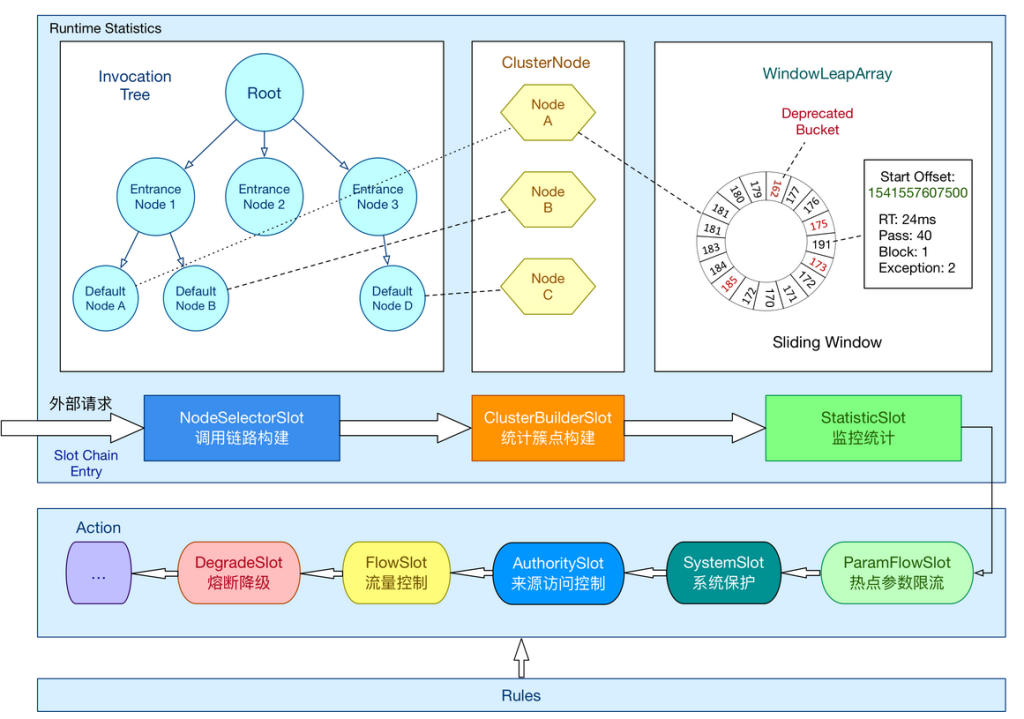
在 Sentinel 里面,所有的资源都对应一个资源名称以及一个 Entry。Entry 可以通过对主流框架的适配自动创建,也可以通过注解的方式或调用 API 显式创建;每一个 Entry 创建的时候,同时也会创建一系列功能插槽(slot chain)。这些插槽有不同的职责,例如:
- NodeSelectorSlot 负责收集资源的路径,并将这些资源的调用路径,以树状结构存储起来,用于根据调用路径来限流降级;
- ClusterBuilderSlot 则用于存储资源的统计信息以及调用者信息,例如该资源的 RT, QPS, thread count 等等,这些信息将用作为多维度限流,降级的依据;
- StatisticSlot 则用于记录、统计不同纬度的 runtime 指标监控信息;
- FlowSlot 则用于根据预设的限流规则以及前面 slot 统计的状态,来进行流量控制;
- AuthoritySlot 则根据配置的黑白名单和调用来源信息,来做黑白名单控制;
- DegradeSlot 则通过统计信息以及预设的规则,来做熔断降级;
- SystemSlot 则通过系统的状态,例如 load1 等,来控制总的入口流量;
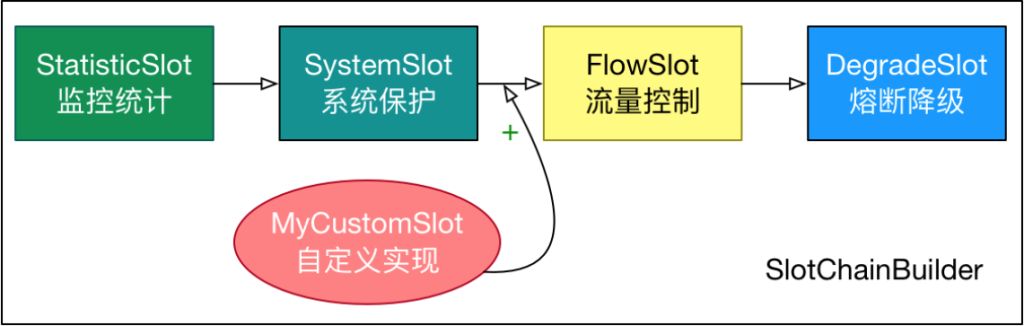
Sentinel将ProcessorSlot作为SPI接口进行扩展,使得Slot Chain具备了扩展的能力。您可以自行加入自定义的slot并 编排 slot 间的顺序,从而可以给 Sentinel添加自定义的功能。
官网:home | Sentinel (sentinelguard.io)
安装Sentinel控制台:
Tags · alibaba/Sentinel · GitHub
Release v1.8.1 · alibaba/Sentinel · GitHub
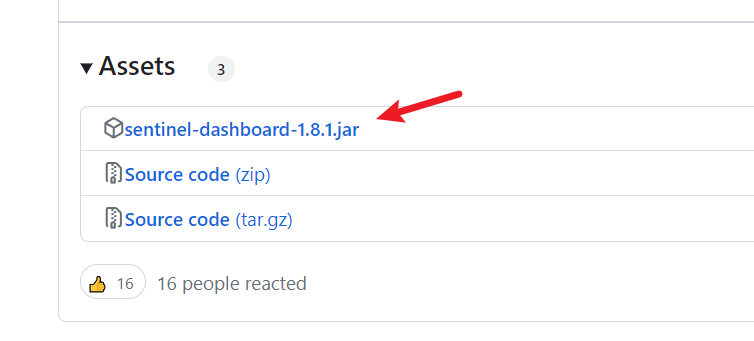
下载jar包运行即可默认端口为8080,账号密码都为sentinel
运行:
java -jar .\sentinel-dashboard-1.8.1.jar
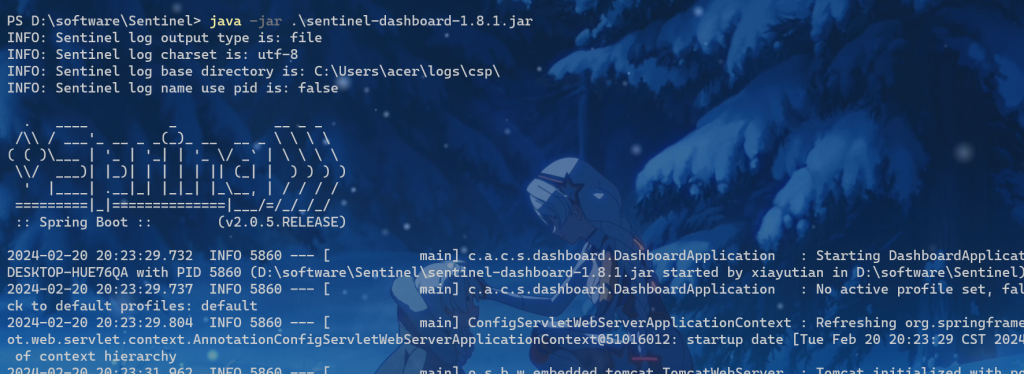
访问
http://localhost:8080
账号密码都为sentinel
首页如下
2.简单使用
新建微服务HelloWorld项目
pom文件如下:
<?xml version="1.0" encoding="UTF-8"?>
<project xmlns="http://maven.apache.org/POM/4.0.0"
xmlns:xsi="http://www.w3.org/2001/XMLSchema-instance"
xsi:schemaLocation="http://maven.apache.org/POM/4.0.0 http://maven.apache.org/xsd/maven-4.0.0.xsd">
    <modelVersion>4.0.0</modelVersion>

    <groupId>com.dreams.hello</groupId>
    <artifactId>HelloWorld</artifactId>
    <version>1.0</version>
    <modules>
        <module>user-service</module>
        <module>hello-service</module>
        <module>gateway</module>
    </modules>

    <packaging>pom</packaging>

    <parent>
        <groupId>org.springframework.boot</groupId>
        <artifactId>spring-boot-starter-parent</artifactId>
        <version>2.3.9.RELEASE</version>
        <relativePath/>
    </parent>
</project>
新建个模块hello-server作为一个微服务项目
在hello-server下创建com.dreams.hello.controller包
创建HelloController文件,定义接口
package com.dreams.hello.controller;
import org.springframework.web.bind.annotation.GetMapping;
import org.springframework.web.bind.annotation.RequestMapping;
import org.springframework.web.bind.annotation.RestController;
@RestController
@RequestMapping()
public class HelloController {
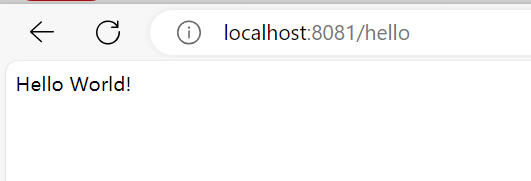
@GetMapping("/hello")
public String hello() {
return "Hello World!";
}
}启动类
package com.dreams.hello;

import org.springframework.boot.SpringApplication;
import org.springframework.boot.autoconfigure.SpringBootApplication;
import org.springframework.boot.autoconfigure.jdbc.DataSourceAutoConfiguration;

@SpringBootApplication

public class HelloApplication {
    public static void main(String[] args) {
        SpringApplication.run(HelloApplication.class, args);
    }
}
application.yml配置如下:
server:
  port: 8081
spring:
  application:
    name: hello-service
依赖如下:
<dependency>
    <groupId>org.springframework.boot</groupId>
    <artifactId>spring-boot-starter-web</artifactId>
</dependency>
使用sentinel
在hello-server引入依赖
<!--引入sentinel依赖-->
<dependency>
    <groupId>com.alibaba.cloud</groupId>
    <artifactId>spring-cloud-starter-alibaba-sentinel</artifactId>
</dependency>
在配置文件加入配置
spring:
  cloud:
    sentinel:
      transport:
        dashboard: localhost:8080 # sentinel控制台地址
启动hello-server
此时控制台什么都没有
访问多次接口后
http://localhost:8081/hello
接口正常
而控制台出现
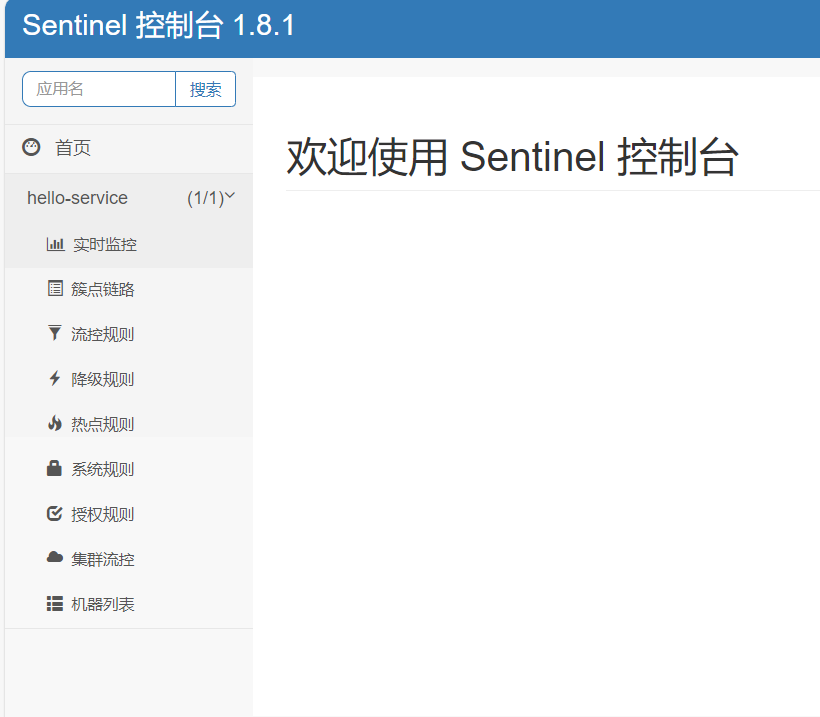
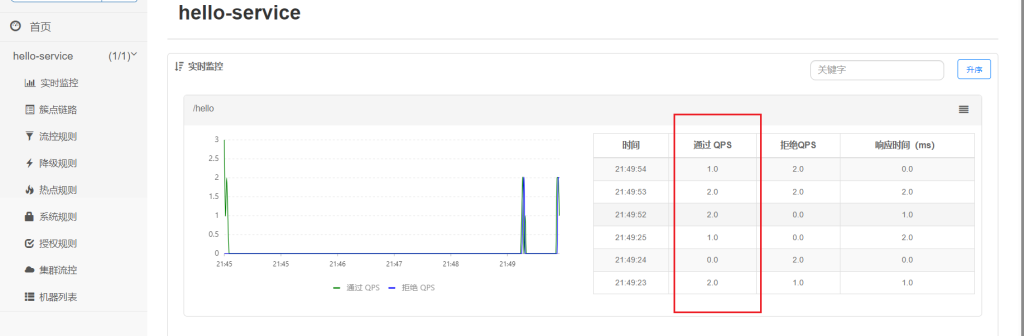
可以对其监控
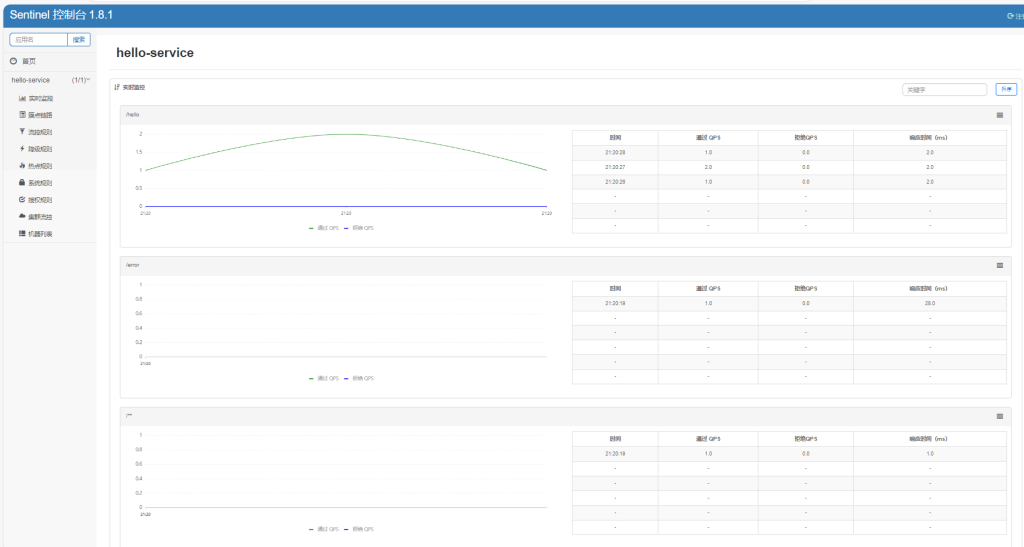
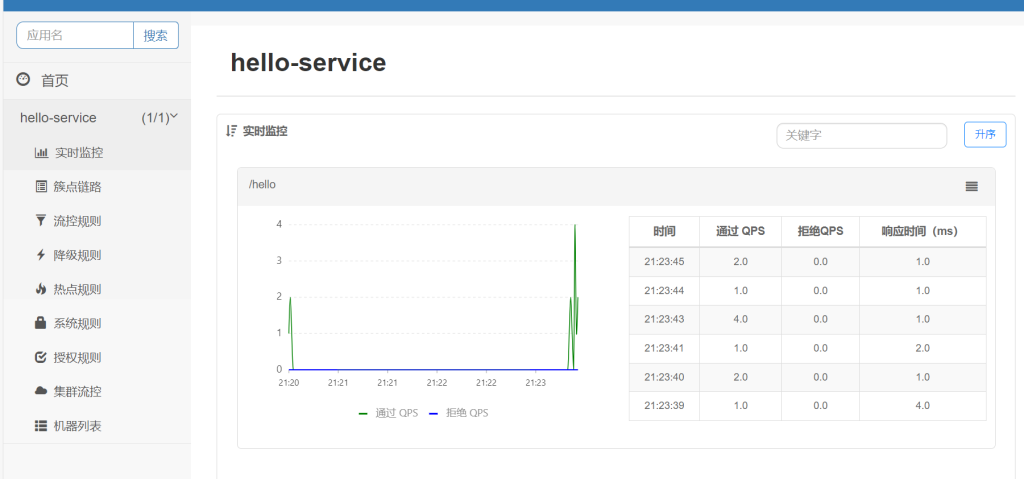
多访问,可以看到是实时监控
3.限流规则
1.流控模式
添加限流规则时,点击高级选项可以选择三种流控模式:
- 直接模式:统计当前资源的请求,当触发阈值时直接对当前资源进行限流。这也是默认的模式。
- 关联模式:统计与当前资源相关的另一个资源的请求,当触发阈值时,对当前资源进行限流。
- 链路模式:统计从指定链路访问到本资源的请求,当触发阈值时,对指定链路进行限流。
一、直接模式
统计当前资源的请求,当触发阈值时直接对当前资源进行限流。这也是默认的模式。
打开簇点链路
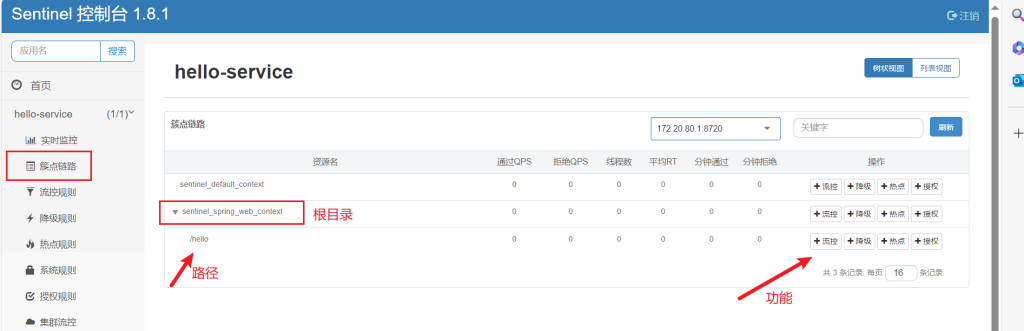
可以对其接口进行流控,点击流控

这里设置流控规则QPS为2,即每秒允许2个请求

点击高级选项,可以看到默认是直接模式
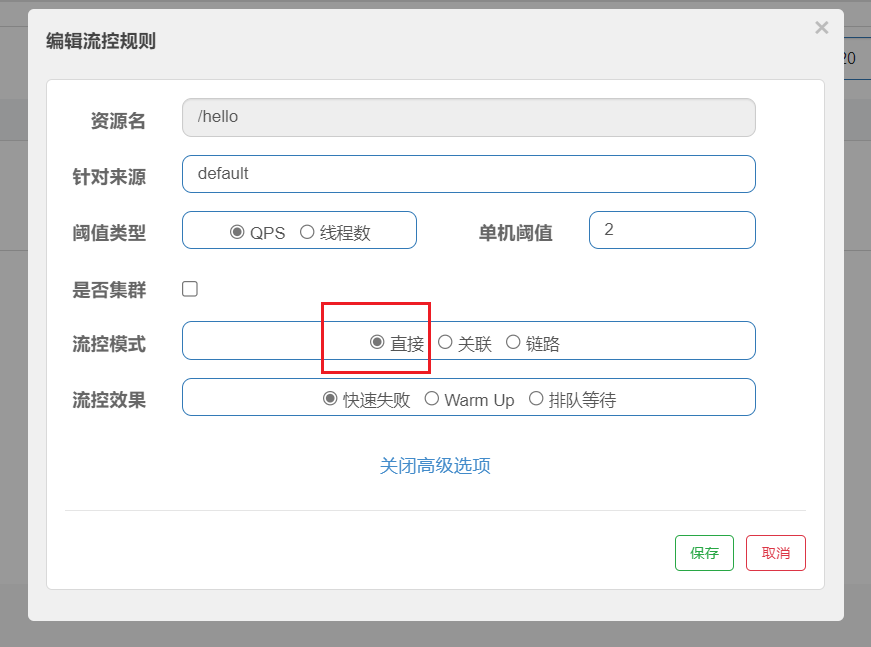
默认即可
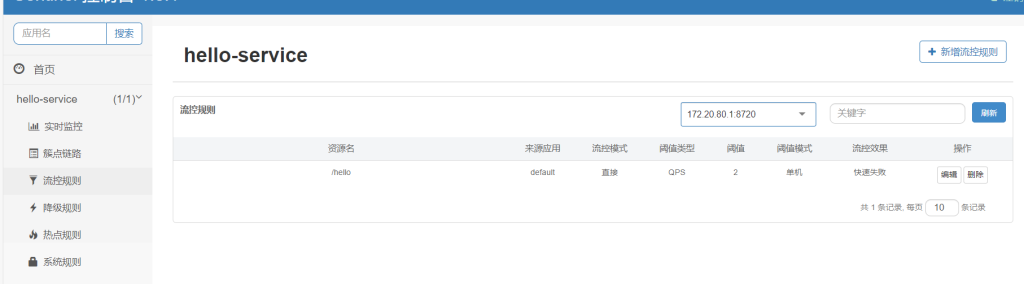
流控规则界面
快些多次请求
就会出现
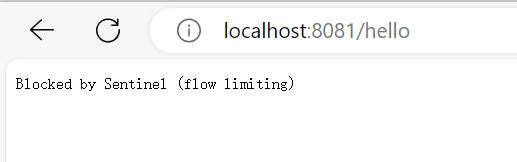
可以看到qps不会超过2
二、关联模式
统计与当前资源相关的另一个资源的请求,当触发阈值时,对当前资源进行限流。
比如在系统资源紧张时,可以通过调整相对非重要的接口来节省资源
添加两个接口,模拟在订单添加和订单搜索情况
package com.dreams.hello.controller;
import org.springframework.web.bind.annotation.GetMapping;
import org.springframework.web.bind.annotation.RequestMapping;
import org.springframework.web.bind.annotation.RestController;
@RestController
@RequestMapping()
public class HelloController {
@GetMapping("/hello")
public String hello() {
return "Hello World!";
}
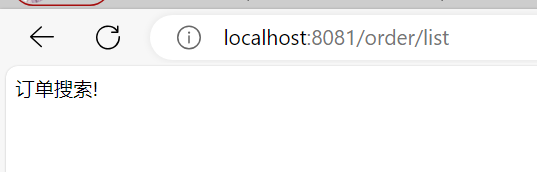
@GetMapping("/order/list")
public String listOrder() {
return "订单搜索!";
}
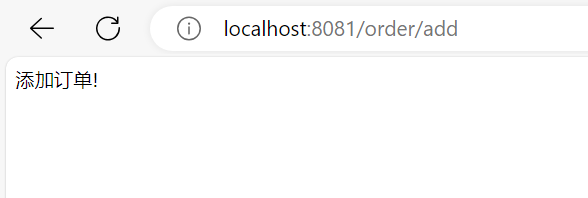
@GetMapping("/order/add")
public String updateOrder() {
return "添加订单!";
}
}访问3个接口后
就可以在簇点链路看到
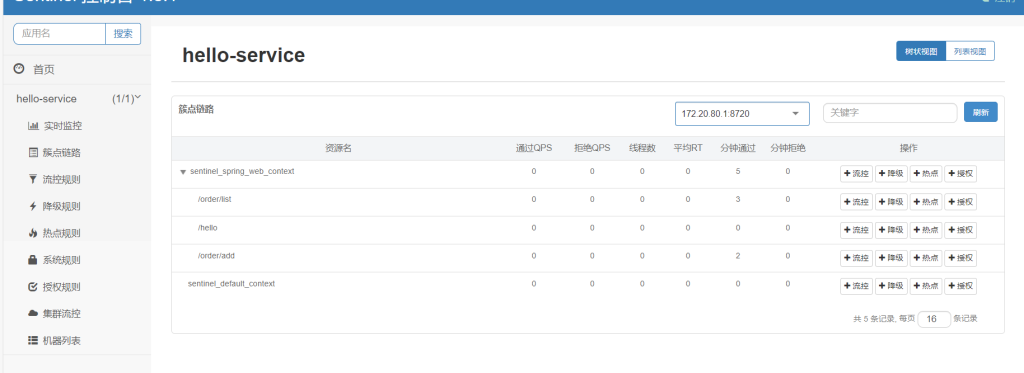
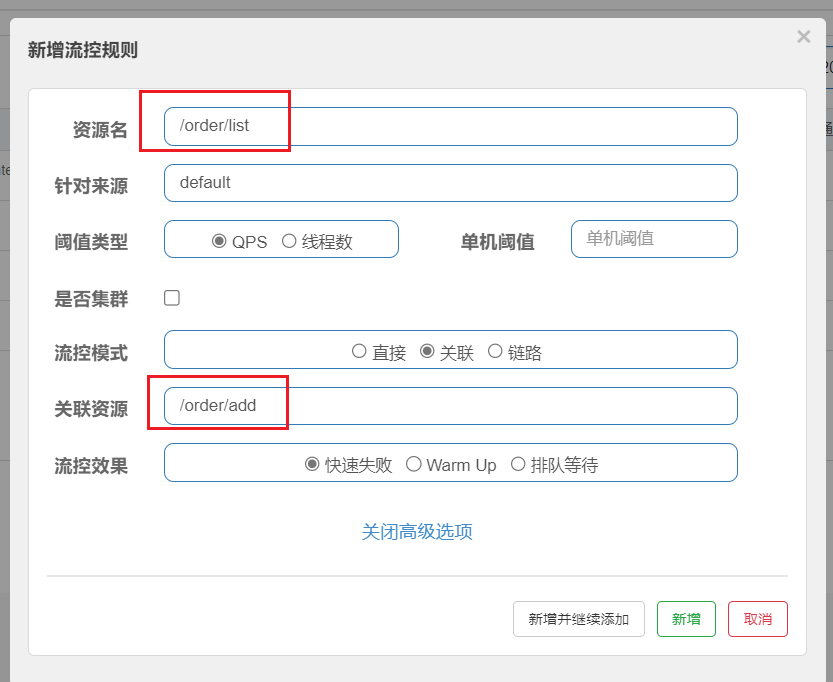
对搜索订单添加流控规则
在系统资源紧张时,可以通过调整相对非重要的接口来节省资源。很明显添加订单更重要。
因此当添加订单业务(填在关联资源处)触发阈值时,就对查询订单(填在资源名处)业务限流。
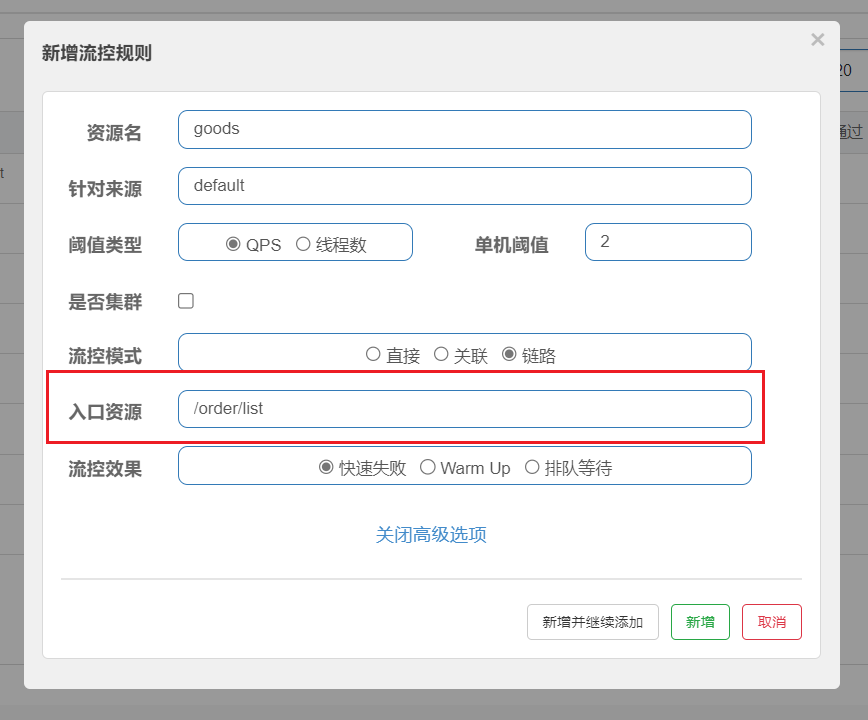
三、链路模式
链路模式:统计从指定链路访问到本资源的请求,当触发阈值时,对指定链路进行限流。
举例:
新建service包,包下创建OrderService文件,模拟业务
package com.dreams.hello.service;

import com.alibaba.csp.sentinel.annotation.SentinelResource;
@Service
public class OrderService {
    @SentinelResource("goods")
    public String list(){
        return "商品信息";
    }
}
Sentinel默认只标记Controller中的方法为资源,所以使用注解@SentinelResource(“goods”)就是将该方法定义为一个资源,命名为goods
在controller调用
package com.dreams.hello.controller;

import com.dreams.hello.service.OrderService;
import org.springframework.beans.factory.annotation.Autowired;
import org.springframework.web.bind.annotation.GetMapping;
import org.springframework.web.bind.annotation.RequestMapping;
import org.springframework.web.bind.annotation.RestController;

@RestController
@RequestMapping()
public class HelloController {
    @Autowired
    OrderService orderService;

    @GetMapping("/hello")
    public String hello() {
        return "Hello World!";
    }


    @GetMapping("/order/list")
    public String listOrder() {
        String list = orderService.list();
        return "订单搜索" + list;
    }

    @GetMapping("/order/add")
    public String updateOrder() {
    String list = orderService.list();
        return "添加订单" + list;
    }
}
不过Sentinel默认会将Controller方法做context整合,导致链路模式的流控失效,需要修改application.yml,添加配置:
在配置文件加入配置web-context-unify
spring:
  cloud:
    sentinel:
      transport:
        dashboard: localhost:8080 # sentinel控制台地址
      web-context-unify: false # 关闭context整合
运行再次请求3个接口,可以看到,出现了goods资源
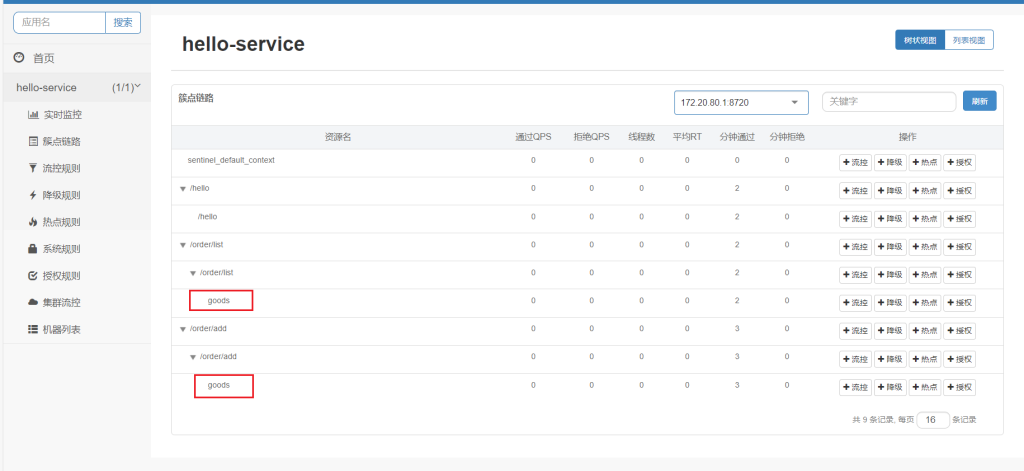
对goods限流,点击流控
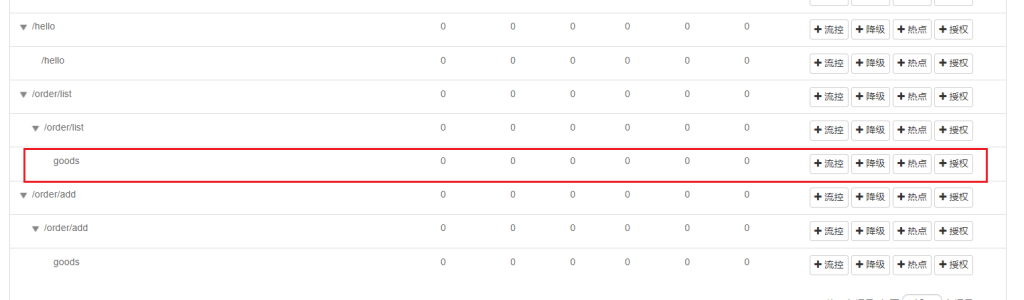
触发设定的阈值时对该链路进行限流,入口资源填写的就是要限制的链路,限制该路径对该资源的请求,但是另一个请求order/add不受影响
2.流控效果
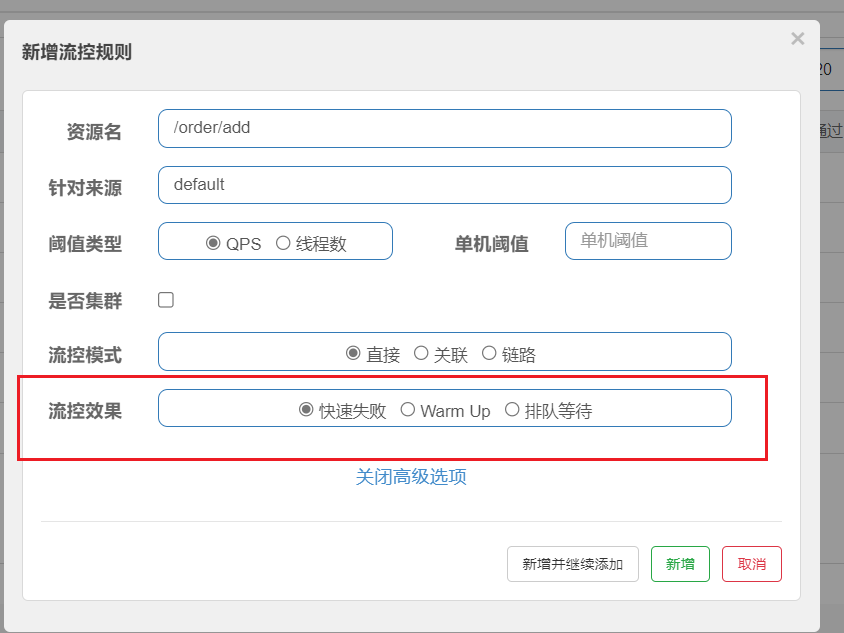
流控效果是指请求达到流控阈值时应该采取的措施:
- 快速失败:达到阈值后,新的请求会被立即拒绝并抛出FlowException异常。是默认的处理方式。
- warm up:预热模式,对超出阈值的请求同样是拒绝并抛出异常。但这种模式阈值会动态变化,从一个较小值逐渐增加到最大阈值。
- 排队等待:让所有的请求按照先后次序排队执行,两个请求的间隔不能小于指定时长
快速失败
同上,默认的效果,已经演示过了
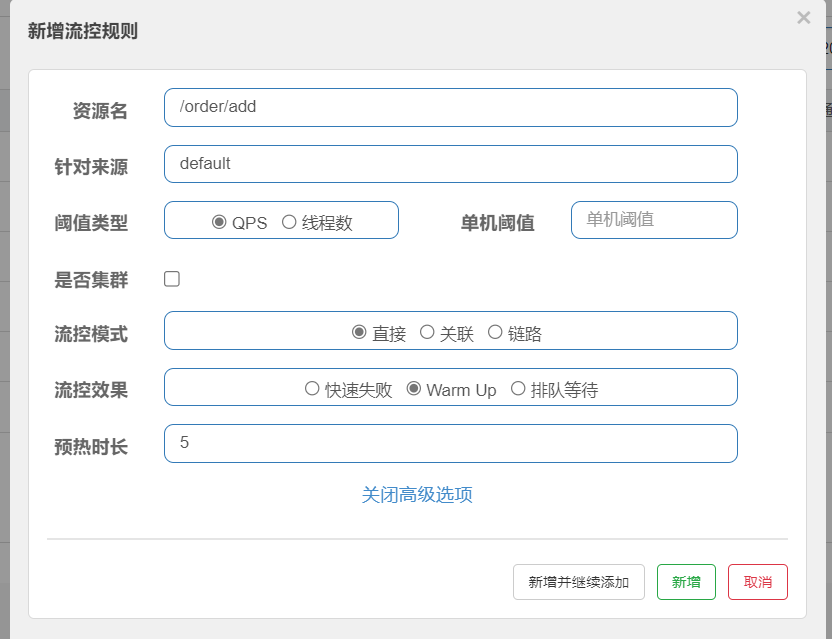
warm up
warm up也叫预热模式,是应对服务冷启动的一种方案。
请求阈值初始值是threshold /coldFactor,持续指定时长后,逐渐提高到threshold值。而coldFactor的默认值是3
例如,设置QPS的threshold为10,预热时间为5秒,那么初始阈值就是10/3,也就是3,然后在5秒后逐渐增长到10。
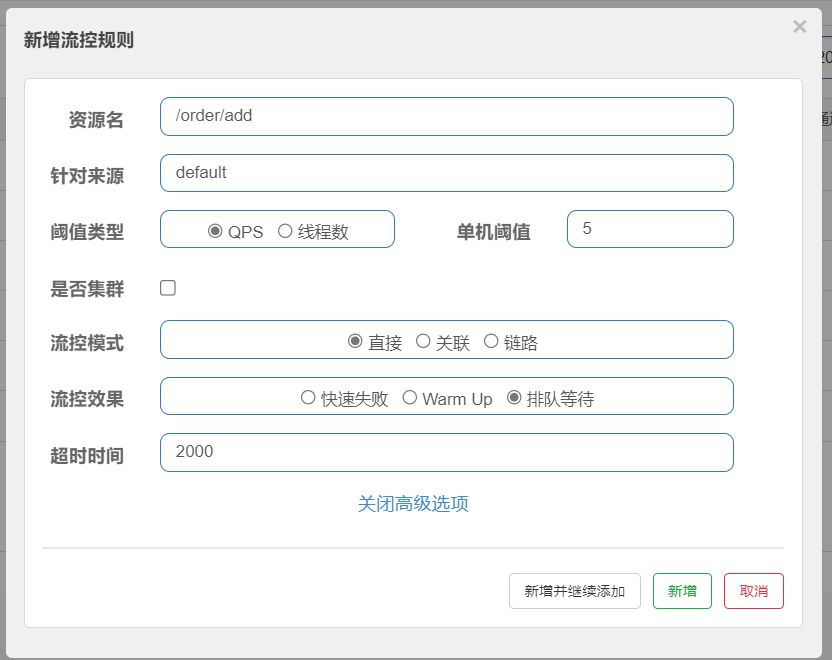
排队等待
当请求超过QPS阈值时,快速失败和warm up会拒绝新的请求并抛出异常。而排队等待则是让所有请求进入一个队列中,然后按照阈值允许的时间间隔依次执行。后来的请求必须等待前面执行完成,如果请求预期的等待时间超出最大时长,则会被拒绝。
例如: QPS=5,意味着每200ms处理一个队列中的请求; timeout=2000,意味着预期等待超过2000ms的请求会被拒绝并抛出异常
4.隔离和降级
线程隔离和熔断是在分布式系统中常见的应对策略,用于保护系统免受异常情况的影响。
线程隔离(Thread Isolation):线程隔离是一种将不同的任务或请求在独立的线程中执行的策略。在多线程环境下,如果一个线程发生了异常或故障,通过线程隔离可以避免异常的扩散影响其他线程,保证系统的稳定性。线程隔离可以通过使用线程池或线程分组的方式实现,确保每个任务或请求都在独立的线程中执行。
熔断(Circuit Breaker):熔断是一种在出现故障或异常情况时主动断开服务调用的策略。熔断器会监控系统或服务的状态,当发现系统或服务出现异常或超过预设的阈值时,会断开对该系统或服务的调用,并且在一定时间内阻止对其的继续请求。熔断能够减少对故障系统的压力,同时也可以快速失败,避免长时间的等待导致更多的资源浪费。
Feign整合
实现一般通过Feign整合。
新建个模块user-service
使用nacos完成服务注册,feign实现远程调用
Pom依赖如下:
<?xml version="1.0" encoding="UTF-8"?>
<project xmlns="http://maven.apache.org/POM/4.0.0"
xmlns:xsi="http://www.w3.org/2001/XMLSchema-instance"
xsi:schemaLocation="http://maven.apache.org/POM/4.0.0 http://maven.apache.org/xsd/maven-4.0.0.xsd">
    <parent>
        <artifactId>HelloWorld</artifactId>
        <groupId>com.dreams.hello</groupId>
        <version>1.0</version>
    </parent>
    <modelVersion>4.0.0</modelVersion>

    <artifactId>user-service</artifactId>

    <dependencies>
        <dependency>
            <groupId>org.springframework.boot</groupId>
            <artifactId>spring-boot-starter-web</artifactId>
        </dependency>
        <!-- nacos客户端依赖包 -->
        <dependency>
            <groupId>com.alibaba.cloud</groupId>
            <artifactId>spring-cloud-starter-alibaba-nacos-discovery</artifactId>
            <version>2.2.7.RELEASE</version>
        </dependency>
    </dependencies>
    <build>
        <finalName>app</finalName>
        <plugins>
            <plugin>
                <groupId>org.springframework.boot</groupId>
                <artifactId>spring-boot-maven-plugin</artifactId>
            </plugin>
        </plugins>
    </build>
</project>
controller层
package com.dreams.user.controller;

import lombok.extern.slf4j.Slf4j;
import org.springframework.web.bind.annotation.GetMapping;
import org.springframework.web.bind.annotation.PathVariable;
import org.springframework.web.bind.annotation.RequestMapping;
import org.springframework.web.bind.annotation.RestController;

@Slf4j
@RestController
@RequestMapping("/user")
public class UserController {

    @GetMapping("/list")
    public String list(){
        return "User server Hello !";
    }

    @GetMapping("/{id}")
    String findById(@PathVariable("id") Long id){
        return "user";
    }

}
application.yml配置文件
server:
  port: 8082
spring:
  application:
    name: user-service
  profiles:
    active: dev # 环境
  cloud:
    nacos:
      server-addr: localhost:8848 # nacos地址
      config:
        file-extension: yaml # 文件后缀名
下面更改hello-server模块
添加依赖
<dependency>
    <groupId>org.springframework.boot</groupId>
    <artifactId>spring-boot-starter-web</artifactId>
</dependency>
<!-- nacos客户端依赖包 -->
<dependency>
    <groupId>com.alibaba.cloud</groupId>
    <artifactId>spring-cloud-starter-alibaba-nacos-discovery</artifactId>
    <version>2.2.7.RELEASE</version>
</dependency>
<!--feign客户端依赖-->
<dependency>
    <groupId>org.springframework.cloud</groupId>
    <artifactId>spring-cloud-starter-openfeign</artifactId>
    <version>2.2.7.RELEASE</version>
</dependency>
<!--引入HttpClient依赖-->
<dependency>
    <groupId>io.github.openfeign</groupId>
    <artifactId>feign-httpclient</artifactId>
    <version>10.10.1</version>
    </dependency>
<!--引入sentinel依赖-->
<dependency>
    <groupId>com.alibaba.cloud</groupId>
    <artifactId>spring-cloud-starter-alibaba-sentinel</artifactId>
    <version>2021.0.5.0</version>
</dependency>
application.yml文件加入,不过因为我们没有使用HttpClient,所以不加也无所谓。
feign:
  httpclient:
    enabled: true # 支持HttpClient的开关
    max-connections: 200 # 最大连接数
    max-connections-per-route: 50 # 单个路径的最大连接数
新建包api下新建文件UserClient
@FeignClient(value = “user-service”)就是在nacos中调用服务user-server
package com.dreams.hello.api;

import com.dreams.hello.api.fallback.UserClientFallbackFactory;
import org.springframework.cloud.openfeign.FeignClient;
import org.springframework.web.bind.annotation.GetMapping;
import org.springframework.web.bind.annotation.PathVariable;

@FeignClient(value = "user-service")
public interface UserClient {
    @GetMapping("/user/{id}")
    String findById(@PathVariable("id") Long id);
}
方法就是需要远程调用user-server的接口
在controller层添加一个接口
注入
@Autowired
private UserClient userClient;
调用
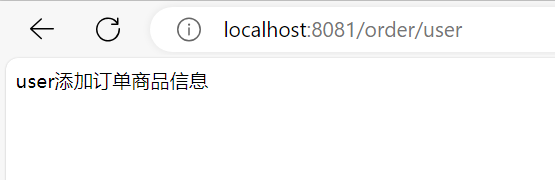
@GetMapping("/order/user")
public String usrOrder() {
    String user = userClient.findById(1L);
    String list = orderService.list();
    return user + "添加订单" + list;
}
运行正常
下面Feign整合Sentinel
要开启只要在application.yml文件加入如下配置,这里是hello-server远程调用user-server,所以在hello-server的application.yml文件加入即可
feign:
  sentinel:
    enabled: true # 开启feign对sentinel的支持
在hello-server下的com.dreams.hello.api包新建fallback包存放
UserClientFallbackFactory文件,只要在该方法下实现要返回的数据即可。当 FeignClient 调用发生异常时,会自动触发降级逻辑,并返回预先定义的降级结果。这样可以保证系统在异常情况下依然能够正常运行,并提供一定程度的容错能力。
代码如下:
package com.dreams.hello.api.fallback;
import com.dreams.hello.api.UserClient;
import feign.hystrix.FallbackFactory;
import lombok.extern.slf4j.Slf4j;
public class UserClientFallbackFactory implements FallbackFactory<UserClient> {
@Override
public UserClient create(Throwable throwable) {
return new UserClient() {
@Override
public String findById(Long id) {
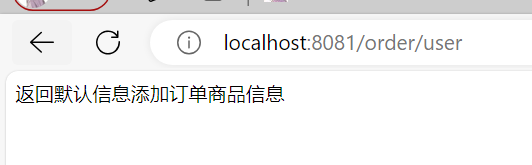
return "返回默认信息";
}
};
}
}
在UserClient文件配置,在@FeignClient注解添加fallbackFactory参数,值为上述代码的类名
@FeignClient(value = "user-service", fallbackFactory = UserClientFallbackFactory.class)
public interface UserClient {
    @GetMapping("/user/{id}")
    String findById(@PathVariable("id") Long id);
}
然后还要将配置注册进bean
可以自定义配置类,也可以直接在启动类配置Bean
这里直接在启动类配置Bean
package com.dreams.hello;


import com.dreams.hello.api.fallback.UserClientFallbackFactory;
import org.springframework.boot.SpringApplication;
import org.springframework.boot.autoconfigure.SpringBootApplication;
import org.springframework.boot.autoconfigure.jdbc.DataSourceAutoConfiguration;
import org.springframework.cloud.openfeign.EnableFeignClients;
import org.springframework.context.annotation.Bean;


@SpringBootApplication
@EnableFeignClients
public class HelloApplication {

    public static void main(String[] args) {
        SpringApplication.run(HelloApplication.class, args);
    }

    @Bean
    public UserClientFallbackFactory userClientFallbackFactory(){
        return new UserClientFallbackFactory();
    }

}
这样当调用user/{id}是出现异常,将返回定义的默认值“返回默认信息”。
运行
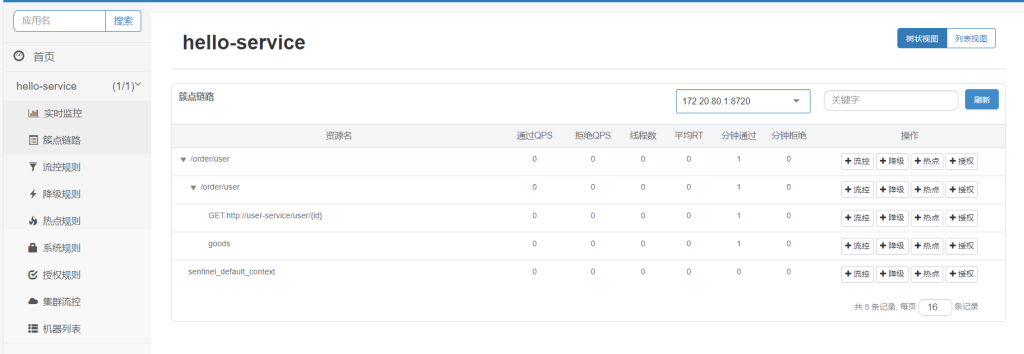
我们配置阙值为0,看看返回的效果
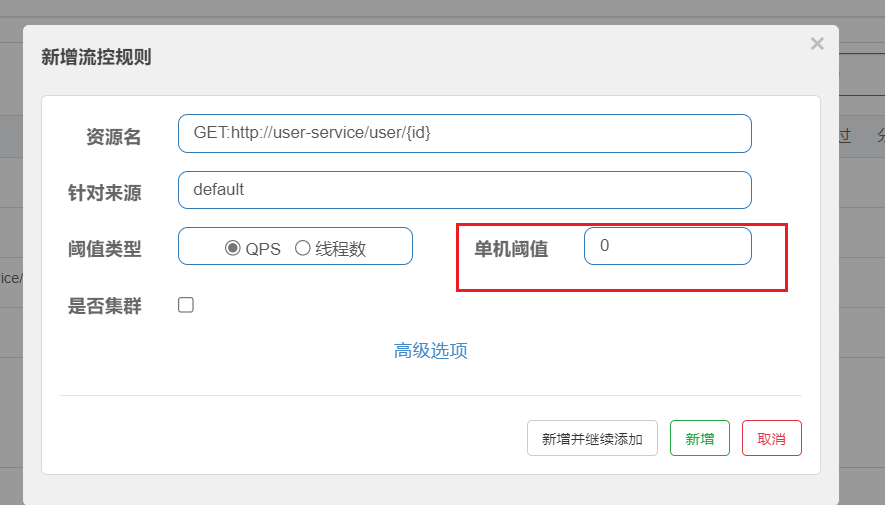
如图:
线程隔离(舱壁模式)
线程隔离分为线程池隔离和信号量隔离(Sentinel默认采用)
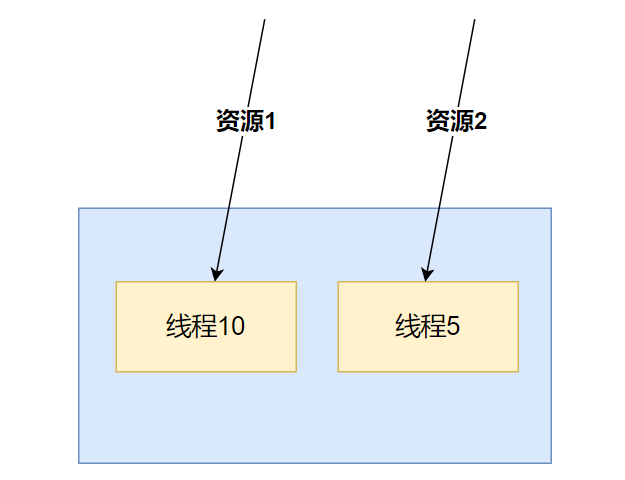
线程池隔离
即每个资源享用固定的线程数量,互不影响,这样即使一方异常也不会引起雪崩。
优点:使用线程池,就可以好容易管理各个线程
- 支持主动超时
- 支持异步调用
缺点:线程的额外开销比较大
Hystix默认是基于线程池实现的线程隔离,每一个被隔离的业务都要创建一个独立的线程池,线程过多会带来额外的CPU开销,性能一般,但是隔离性更强。
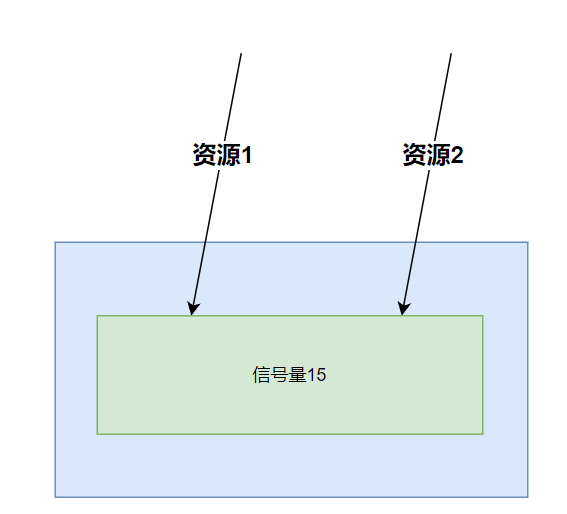
信号量隔离
固定总共多少,一起使用,但是固定只能共存一定数量
优点:轻量级,无额外开销
缺点:不使用线程池,也就不支持主动超时不支持异步调用
Sentinel是基于信号量(计数器)实现的线程隔离,不用创建线程池,性能较好,但是隔离性一般。
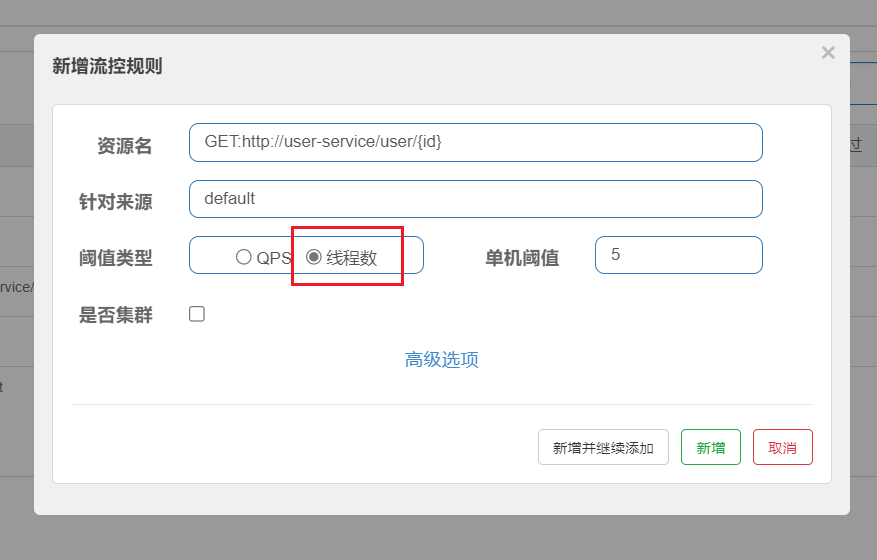
实现也很简单,同样打开流控
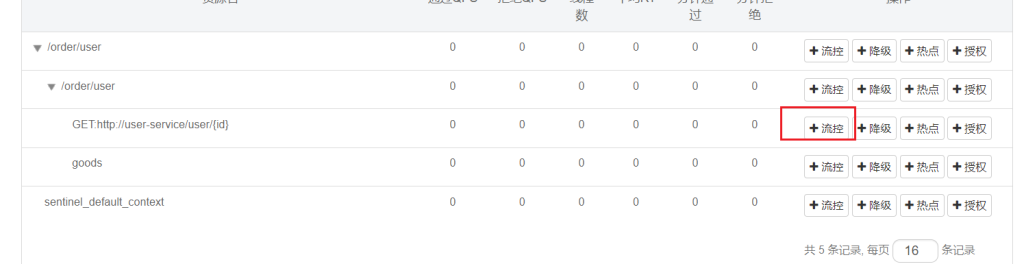
将阙值类型改为线程数,就开启了线程隔离(舱壁模式)
熔断降级
熔断:当资源的异常比例超过设定的阈值时,系统会触发熔断,暂时关闭资源的访问,避免继续向下游服务发送请求,从而保护系统不受连锁故障的影响。
降级:当资源被熔断后,可以配置降级策略,返回预设的默认值或执行预定义的降级逻辑,保证系统的可用性和稳定性。
断路器有三个状态:
- 关闭状态(Closed):在关闭状态下,断路器允许请求通过,并监控失败请求的数量或失败率。如果失败请求未达到触发熔断的阈值,则保持断路器处于关闭状态,继续监控请求。
- 打开状态(Open):一旦失败请求的数量或失败率超过了设定的阈值,断路器会进入打开状态,停止所有对资源的访问,并直接返回失败响应,从而避免向下游服务发送更多请求。
- 半开状态(Half-Open):熔断时间结束,断路器会尝试放通部分请求进入资源,以检测资源的可用性。如果这些请求成功,则断路器会恢复到关闭状态;如果这些请求仍然失败,则断路器会重新进入打开状态。
断路器三个熔断策略:慢调用、异常比例、异常数
在簇点链路配置
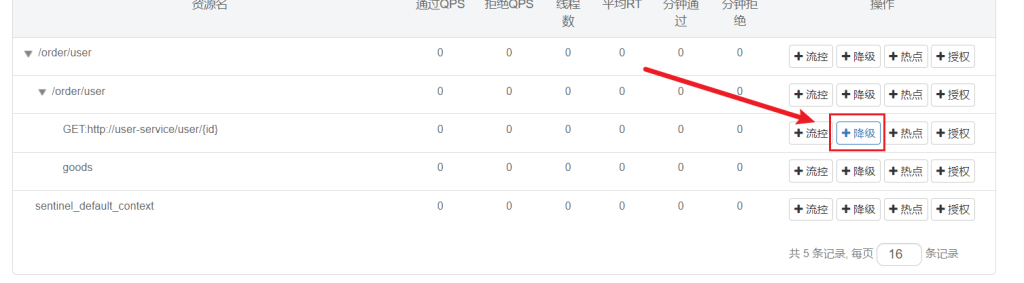
1.慢调用:
慢调用熔断策略基于请求的响应时间来触发熔断。当服务的请求响应时间超过预设的阈值时,断路器会进入打开状态,停止对资源的访问。
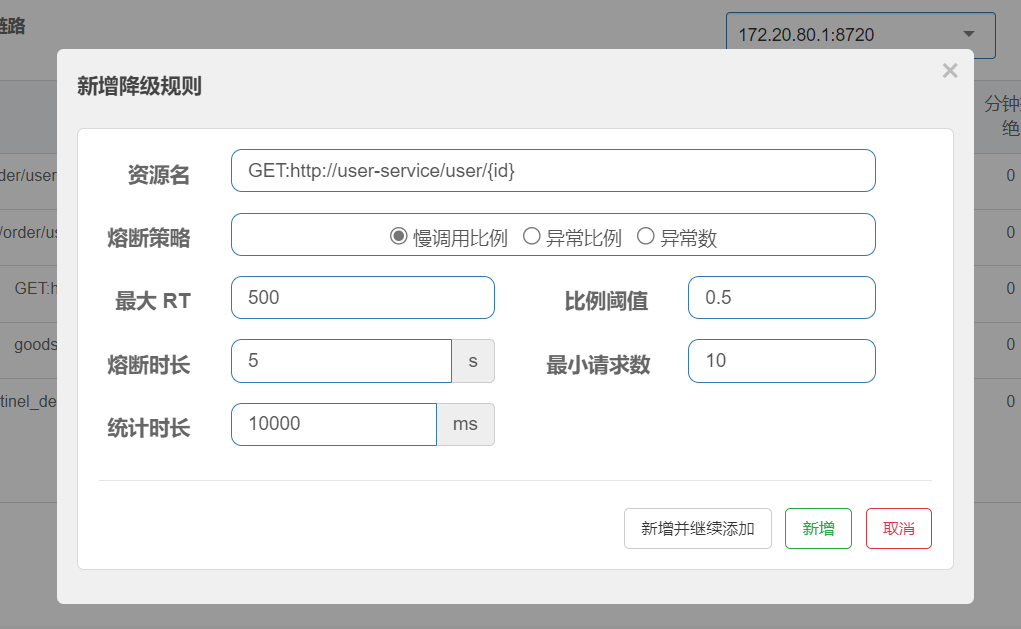
业务的响应时长(RT)大于指定时长的请求认定为慢调用请求。如图超过500ms的调用是慢调用,统计最近10000ms内的请求,如果请求量超过10次,并且慢调用比例不低于0.5,则触发熔断,熔断时长为5秒。然后进入half-open状态,放行一次请求做测试。
2.异常比例:
异常比例熔断策略基于请求的异常率来触发熔断。当服务的异常请求比例超过设置的阈值时,断路器会进入打开状态,停止对资源的访问,以避免错误请求继续影响系统的稳定性。这种策略有助于及时发现并应对服务异常情况。
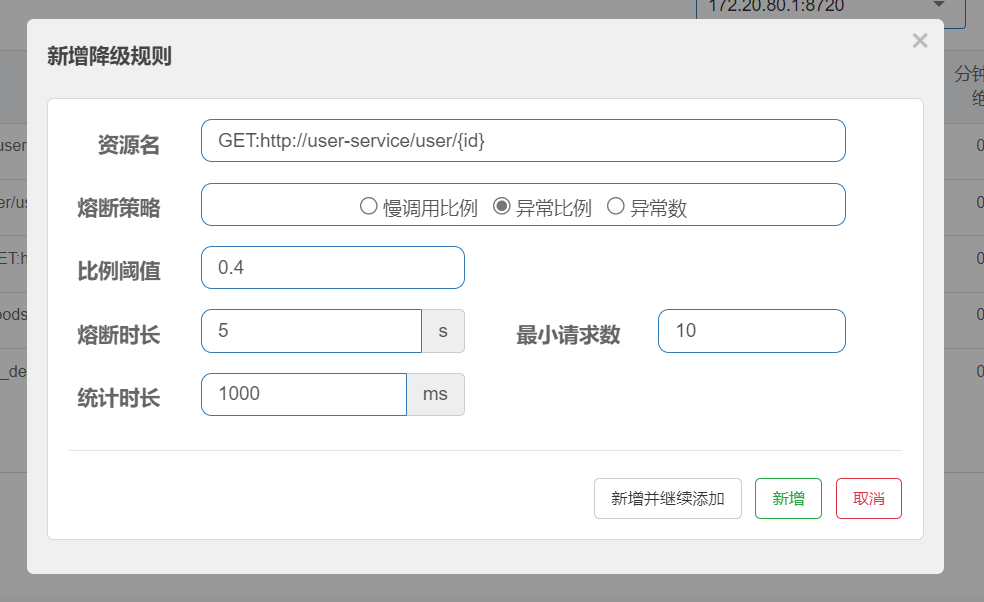
统计最近1000ms内的请求,如果请求量超过10次,并且异常比例不低于0.4,则触发熔断,熔断时长为5秒。然后进入half-open状态,放行一次请求做测试。
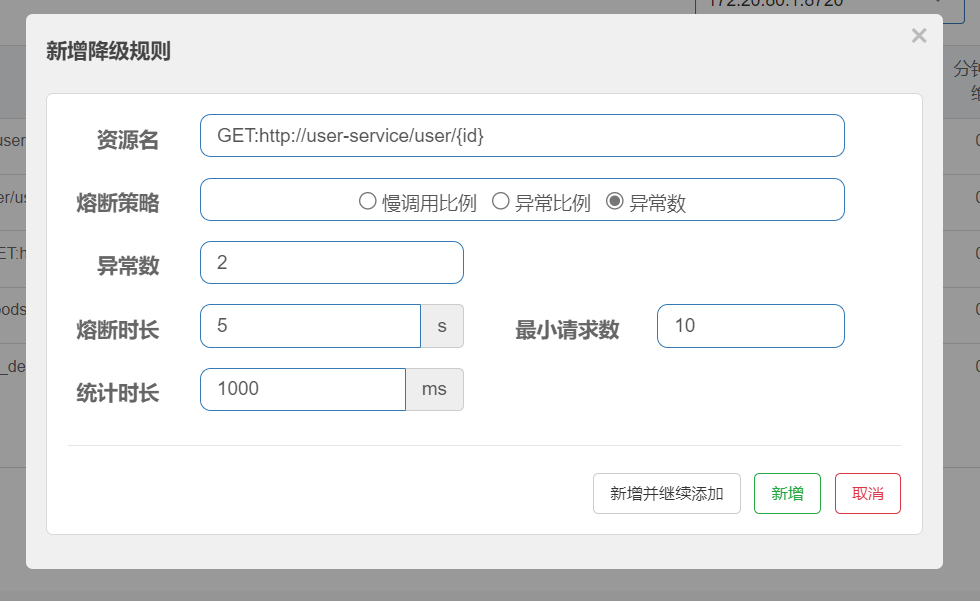
3.异常数:
异常数熔断策略基于一定时间内的异常请求数量来触发熔断。当异常请求的数量达到设定的阈值时,断路器会进入打开状态,暂时停止对资源的访问,以减轻系统的负荷和保护资源不受进一步损害。
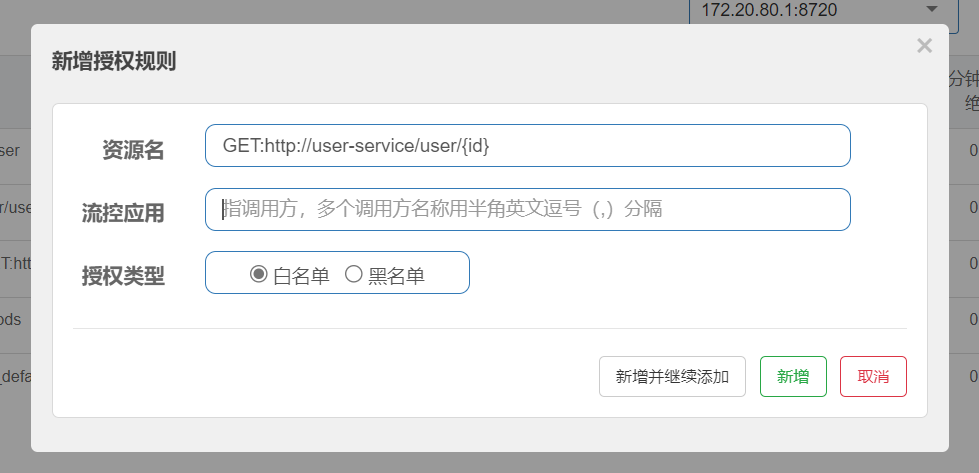
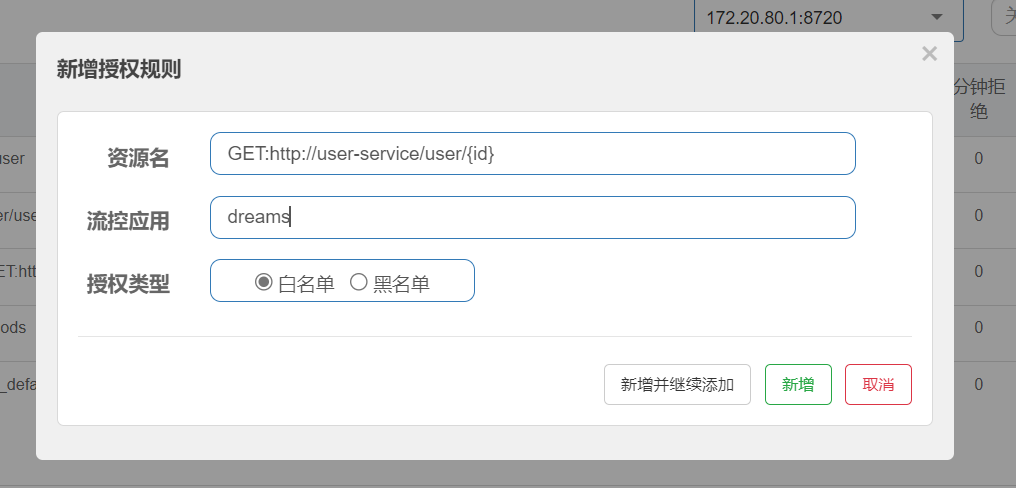
5.授权规则
授权规则可以对调用方的来源做控制。
在白名单内的调用者允许访问,在黑名单内的调用者不允许访问

流控应用的值就是请求头要带参数origin的值
比如:
同样在hello-server新建sentinel/HeaderOriginParser文件
Sentinel提供了 RequestOriginParser 接口来处理来源。
只要Sentinel保护的接口资源被访问,Sentinel就会调用 RequestOriginParser 的实现类去解析访问来源。我们实现这个接口来加上我们的逻辑。
package com.dreams.hello.sentinel;

import com.alibaba.csp.sentinel.adapter.spring.webmvc.callback.RequestOriginParser;
import org.springframework.stereotype.Component;
import org.springframework.util.StringUtils;

import javax.servlet.http.HttpServletRequest;

@Component
public class HeaderOriginParser implements RequestOriginParser {
    @Override
    public String parseOrigin(HttpServletRequest request) {
        // 1.获取请求头
        String name = request.getHeader("origin");
        // 2.非空判断
        if (StringUtils.isEmpty(name)) {
            name = "blank";
        }
        return name;
    }
}这段代码的作用是根据请求头中的”origin“字段来确定请求的来源
新建个模块gateway
依赖:
<dependencies>
     <!--nacos服务注册发现依赖-->
    <dependency>
        <groupId>com.alibaba.cloud</groupId>
        <artifactId>spring-cloud-starter-alibaba-nacos-discovery</artifactId>
        <version>2.2.7.RELEASE</version>
    </dependency>
    <!--网关gateway依赖-->
    <dependency>
        <groupId>org.springframework.cloud</groupId>
        <artifactId>spring-cloud-starter-gateway</artifactId>
        <version>2.2.7.RELEASE</version>
    </dependency>
</dependencies>
application.yml配置
server:
port: 10010
spring:
application:
name: gateway
cloud:
nacos:
server-addr: localhost:8848 # nacos地址
gateway:
routes:
- id: user-service # 路由标示,必须唯一
uri: lb://user-service # 路由的目标地址
predicates: # 路由断言,判断请求是否符合规则
- Path=/user/** # 路径断言,判断路径是否是以/user开头,如果是则符合
- id: hello-service
uri: lb://hello-service
predicates:
- Path=/order/**
default-filters:
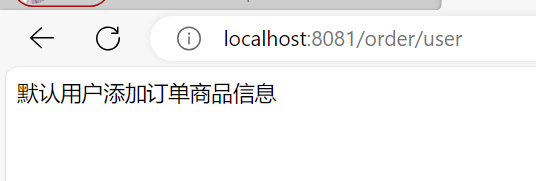
- AddRequestHeader=origin,dreams这里AddRequestHeader=origin,dreams配置每个网关的值都加上了origin=dreams
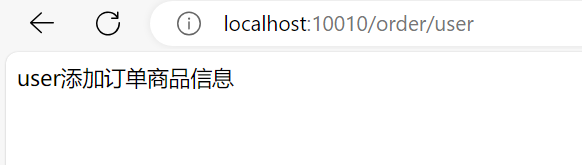
如果不走网关就失败
网关正常
6.自定义异常
如果我们没有处理,那前端就会拿到未处理的错误消息
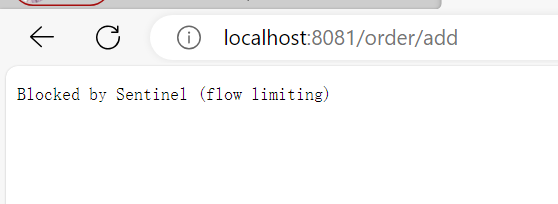
我们自定义一个返回类
package com.dreams.hello.sentinel;

import java.io.Serializable;


public class Result implements Serializable {
    String msg;
    int code;
    String data;

    public Result(String msg, int code, String data) {
        this.msg = msg;
        this.code = code;
        this.data = data;
    }

    public String getMsg() {
        return msg;
    }

    public void setMsg(String msg) {
        this.msg = msg;
    }

    public int getCode() {
        return code;
    }

    public void setCode(int code) {
        this.code = code;
    }

    public String getData() {
        return data;
    }

    public void setData(String data) {
        this.data = data;
    }
}
BlockExceptionHandler 是 Sentinel 提供的异常处理器接口,用于在发生流量控制异常时进行处理。
- FlowException限流异常
- ParamFlowException热点参数限流的异常
- DegradeException降级异常
- AuthorityException授权规则异常
- SystemBlockException系统规则异常
package com.dreams.hello.sentinel;
import com.alibaba.csp.sentinel.adapter.spring.webmvc.callback.BlockExceptionHandler;
import com.alibaba.csp.sentinel.slots.block.BlockException;
import com.alibaba.csp.sentinel.slots.block.authority.AuthorityException;
import com.alibaba.csp.sentinel.slots.block.degrade.DegradeException;
import com.alibaba.csp.sentinel.slots.block.flow.FlowException;
import com.alibaba.csp.sentinel.slots.block.flow.param.ParamFlowException;
import com.fasterxml.jackson.databind.ObjectMapper;
import org.springframework.stereotype.Component;
import javax.servlet.http.HttpServletRequest;
import javax.servlet.http.HttpServletResponse;
@Component
public class SentinelExceptionHandler implements BlockExceptionHandler {
@Override
public void handle(HttpServletRequest request, HttpServletResponse response, BlockException e) throws Exception {
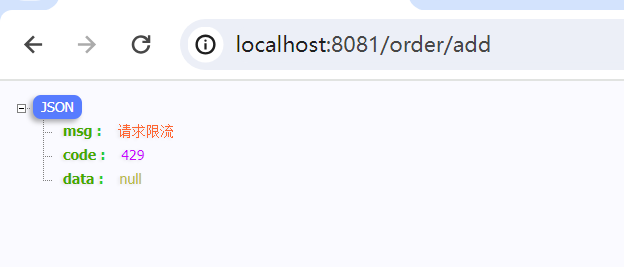
String msg = "未知异常";
int code = 429;
if (e instanceof FlowException) {
msg = "请求限流";
} else if (e instanceof ParamFlowException) {
msg = "请求被热点参数限流";
} else if (e instanceof DegradeException) {
msg = "请求被降级";
} else if (e instanceof AuthorityException) {
msg = "没有权限访问";
code = 401;
}
response.setContentType("application/json;charset=utf-8");
response.setStatus(code);
ObjectMapper objectMapper = new ObjectMapper();
response.getWriter().println(objectMapper.writeValueAsString(new Result(msg,code,null)));
}
}这样就可以返回指定的结果,前端也好处理。

7.规则持久化
可以参考:Sentinel规则持久化
Sentinel的控制台规则管理有三种模式:
- 原始模式 :API 将规则推送至客户端并直接更新到内存中,扩展写数据源(WritableDataSource) 简单,无任何依赖 不保证一致性;规则保存在内存中,重启即消失。严重不建议用于生产环境
- Pull 模式 :扩展写数据源(WritableDataSource), 客户端主动向某个规则管理中心定期轮询拉取规则,这个规则中心可以是 RDBMS、文件 等 简单,无任何依赖;规则持久化 不保证一致性;实时性不保证,拉取过于频繁也可能会有性能问题。
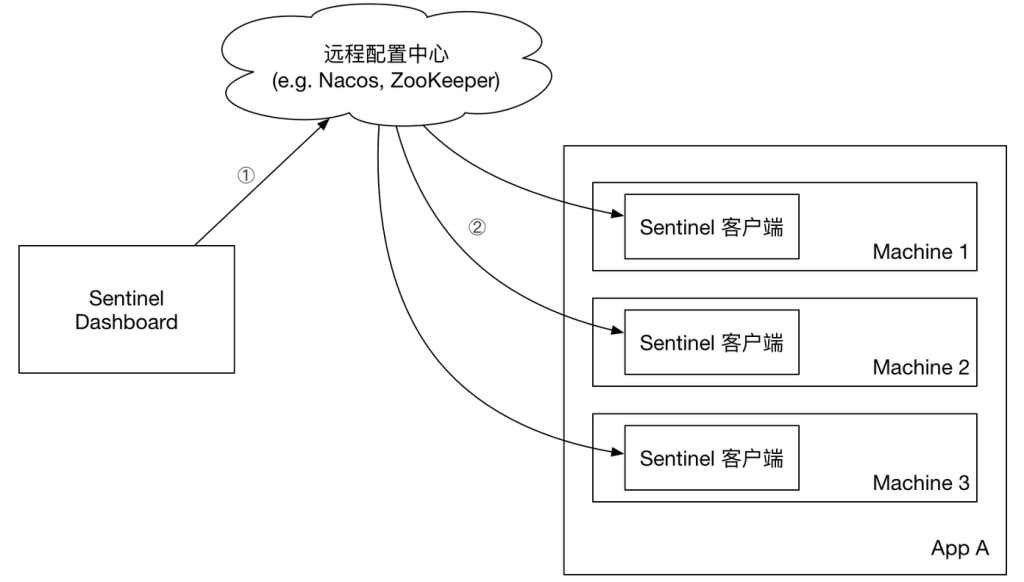
- Push 模式: 扩展读数据源(ReadableDataSource),规则中心统一推送,客户端通过注册监听器的方式时刻监听变化,比如使用 Nacos、Zookeeper 等配置中心。这种方式有更好的实时性和一致性保证。生产环境下一般采用 push 模式的数据源。
可以参考官方文档:Sentinel持久化
推荐