前面我们已经实验了IOC和AOP逻辑
下面就可以在这基础上完成SpringMVC逻辑了
1.新建项目
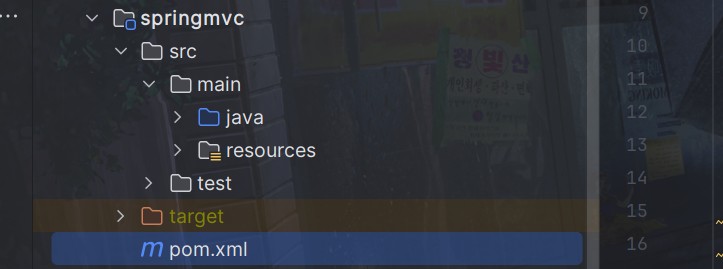
先创建新项目
springmvc这里存放我们的MVC逻辑代码,maven项目即可
这里用到我们之前手写的spring代码,所以我们需要导入其依赖,如果在同一项目下可以直接导入下面依赖,如果不是同一项目下的模块,就要把我们之前手写的spring代码打包到本地,或者上传到maven仓库了。
同时因为springMvc底层是对servlet的封装,所以也把servlet的依赖导入。
<dependencies>
    <dependency>
        <groupId>com.dreams</groupId>
        <artifactId>spring</artifactId>
        <version>1.0-SNAPSHOT</version>
    </dependency>
    <dependency>
        <groupId>javax.servlet</groupId>
        <artifactId>javax.servlet-api</artifactId>
        <version>4.0.1</version>
    </dependency>
</dependencies>
再创建一个项目UseSpringMvc,这里用来测试springMvc的代码,这是web项目

这里测试我们的MVC代码,所以导入该依赖
<dependencies>
    <dependency>
        <groupId>com.dreams</groupId>
        <artifactId>springmvc</artifactId>
        <version>1.0-SNAPSHOT</version>
    </dependency>
</dependencies>
2.监听web启动
UseSpringMvc是一个web项目,是我们测试我们mvc代码的项目
如图创建需要的文件,spring.xml和springmvc.xml和web.xml以及index.jsp
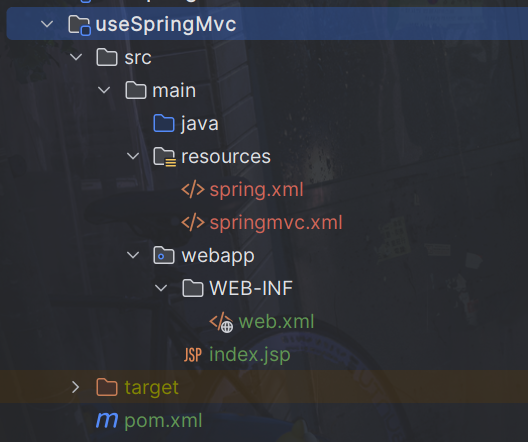
spring.xml和springmvc.xml内容随意,因为暂时用不到,不过需要创建,因为web.xml有对他们的引用
index.jsp如下:
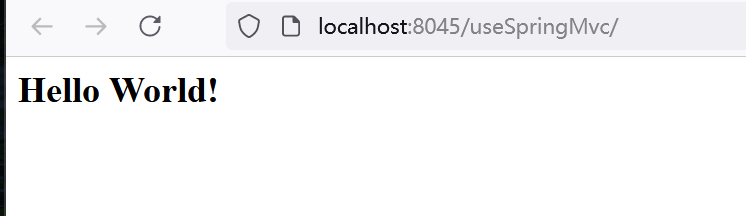
<%--
  Created by IntelliJ IDEA.
  User: xiayutian
  Date: 2024/6/17
  Time: 8:17
  To change this template use File | Settings | File Templates.
--%>
<%@ page contentType="text/html;charset=UTF-8" language="java" %>
<html>
<body>
<h2>Hello World!</h2>
</body>
</html>
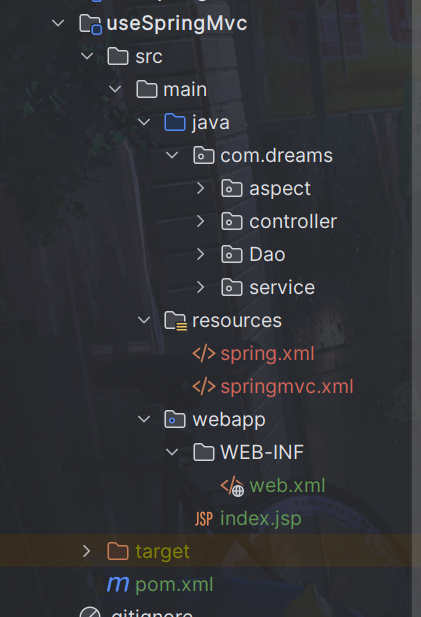
将我们测试手写spring的项目useSpring的代码复制过来
仿造真正的MVC项目的web.xml文件如下:
<!DOCTYPE web-app PUBLIC
 "-//Sun Microsystems, Inc.//DTD Web Application 2.3//EN"
 "http://java.sun.com/dtd/web-app_2_3.dtd" >

<web-app>
  <display-name>Archetype Created Web Application</display-name>

  <!--设置Spring配置文件自定义的位置和名称-->
  <context-param>
    <param-name>contextConfigLocation</param-name>
    <param-value>classpath:spring.xml</param-value>
  </context-param>

  <!--配置Spring的监听器,在服务器启动时加载Spring的配置文件-->
  <listener>
    <listener-class>com.dreams.springframework.web.context.ContextLoaderListener</listener-class>
  </listener>

  <!--配置SpringMVC的前端控制器DispatcherServlet-->
  <servlet>
    <servlet-name>springMVC</servlet-name>
    <servlet-class>com.dreams.springframework.web.servlet.DispatcherServlet</servlet-class>
    <!--设置SpringMVC配置文件自定义的位置和名称-->
    <init-param>
      <param-name>contextConfigLocation</param-name>
      <param-value>classpath:springmvc.xml</param-value>
    </init-param>
    <!--编码-->
    <init-param>
      <param-name>encoding</param-name>
      <param-value>UTF-8</param-value>
    </init-param>
    <!--将DispatcherServlet的初始化时间提前到服务器启动时-->
    <load-on-startup>1</load-on-startup>
  </servlet>
  <servlet-mapping>
    <servlet-name>springMVC</servlet-name>
    <url-pattern>/</url-pattern>
  </servlet-mapping>

</web-app>
可以看到我们需要两个类
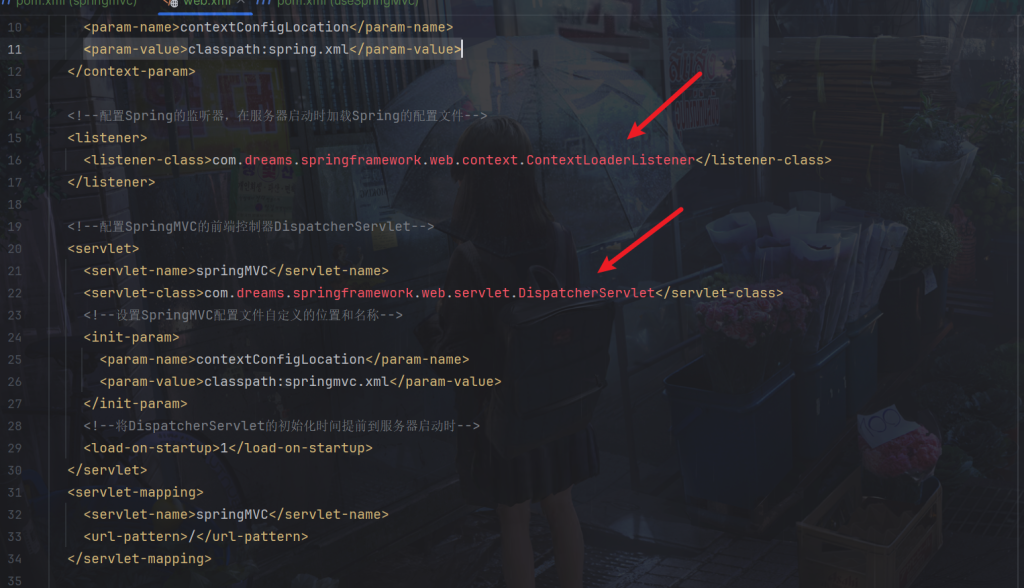
com.dreams.springframework.web.context.ContextLoaderListener是Spring的监听器,在服务器启动时加载Spring的配置文件,我们配置类”/”即所有请求交给springMVC处理,springMVC就是我们定义的com.dreams.springframework.web.servlet.DispatcherServlet就是SpringMVC的前端控制器
那么回到我们的springmvc项目里,我们提供这两个类
创建这两个类
ContextLoaderListener是Spring的监听器,一启动就加载,我们可以让它加载spring的配置文件,即调用我们之前的ClassPathXmlApplicationContext类
package com.dreams.springframework.web.context;
import com.dreams.springframework.context.ClassPathXmlApplicationContext;
import javax.servlet.ServletContextEvent;
import javax.servlet.ServletContextListener;
import javax.servlet.annotation.WebListener;
/**
* @author PoemsAndDreams
* @description //监听器监听web启动
*/
@WebListener
public class ContextLoaderListener implements ServletContextListener {
@Override
public void contextInitialized(ServletContextEvent sce) {
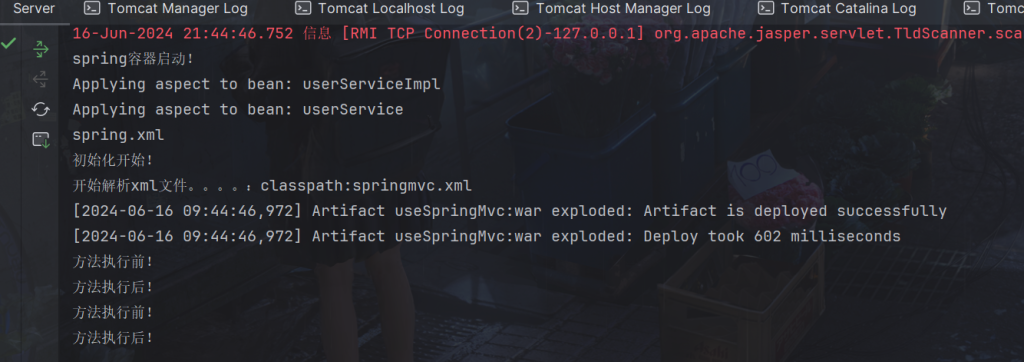
System.out.println("spring容器启动!");
String contextConfigLocation = sce.getServletContext().getInitParameter("contextConfigLocation");
if (contextConfigLocation == null || contextConfigLocation.isEmpty()) {
System.err.println("contextConfigLocation 未配置或为空");
return;
}
if (contextConfigLocation.contains("classpath:")) {
contextConfigLocation = contextConfigLocation.replace("classpath:","") ;
}
ClassPathXmlApplicationContext context = new ClassPathXmlApplicationContext(contextConfigLocation);
System.out.println(contextConfigLocation);
}
@Override
public void contextDestroyed(ServletContextEvent sce) {
System.out.println("web服务停止!");
}
}
还有前端控制器,DispatcherServlet的初始化时间同样为服务器启动时
package com.dreams.springframework.web.servlet;
import javax.servlet.*;
import javax.servlet.http.HttpServlet;
import javax.servlet.http.HttpServletRequest;
import javax.servlet.http.HttpServletResponse;
import java.io.IOException;
/**
* @author PoemsAndDreams
* @description //前端控制器
*/
public class DispatcherServlet extends HttpServlet {
@Override
public void init() throws ServletException {
System.out.println("初始化开始!");
String contextConfigLocation = this.getServletConfig().getInitParameter("contextConfigLocation");
System.out.println("开始解析xml文件。。。。:" + contextConfigLocation);
}
@Override
protected void service(HttpServletRequest req, HttpServletResponse resp) throws ServletException, IOException {
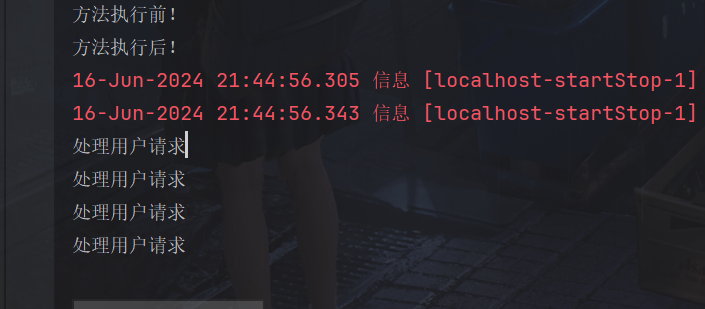
System.out.println("处理用户请求");
}
}运行
可以看到正常执行了
浏览器也跳转了
请求随意路径多次
也能接收到
3.处理器链路
回忆springMVC文件中,我们只需要配置一下就能处理静态资源了
<mvc:default-servlet-handler/>
这里我们仿照一下,打开userSpringMVC项目下的springmvc.xml
配置如下:
<?xml version="1.0" encoding="UTF-8"?>

<bean>
    <!-- 配置静态资源处理器 -->
    <default-servlet-handler/>
</bean>
要处理静态资源或下面的动态链路,我们采用责任链模式处理
定义处理者接口(Handler) 声明处理请求的方法,并且可以定义一个链中的下一个处理者。
package com.dreams.springframework.web.processor;

import javax.servlet.http.HttpServletRequest;
import javax.servlet.http.HttpServletResponse;

/**
 * @author PoemsAndDreams
 * @description //处理器
 */
public interface Processor {
    void setNextProcessor(Processor processor);

    void handle(HttpServletRequest request, HttpServletResponse response);

}
这里我们先对字符集处理,设置为传递的编码,然后调用下一个处理器即可。
package com.dreams.springframework.web.processor;


import javax.servlet.http.HttpServletRequest;
import javax.servlet.http.HttpServletResponse;

/**
 * @author PoemsAndDreams
 * @description //静态资源处理器
 */
public class EncodeProcessor implements Processor {

    private Processor nextProcessor;

    private String encodeConfig;

    public EncodeProcessor(String encodeConfig) {
        this.encodeConfig = encodeConfig;
    }

    @Override
    public void setNextProcessor(Processor processor) {
        this.nextProcessor = processor;
    }


    public void handle(HttpServletRequest request, HttpServletResponse response) {
        try {
            // 设置编码
            request.setCharacterEncoding(encodeConfig);
            // 设置响应码
            response.setContentType("text/html;charset=" + encodeConfig);

            if (nextProcessor != null){
                this.nextProcessor.handle(request,response);
            }
        } catch (Exception e) {
            throw new RuntimeException(e);
        }
    }

}
接着是静态资源处理器
package com.dreams.springframework.web.processor;

import com.dreams.springframework.beans.factory.xml.XmlBeanDefinitionReader;
import org.dom4j.Attribute;
import org.dom4j.Document;
import org.dom4j.DocumentException;
import org.dom4j.Element;
import org.dom4j.io.SAXReader;

import javax.servlet.RequestDispatcher;
import javax.servlet.ServletException;
import javax.servlet.ServletRequest;
import javax.servlet.http.HttpServletRequest;
import javax.servlet.http.HttpServletResponse;
import java.io.IOException;
import java.io.InputStream;

/**
 * @author PoemsAndDreams
 * @description //静态资源处理器
 */
public class StaticResourceProcessor implements Processor {

    private Processor nextProcessor;

    private String configResources;


    public StaticResourceProcessor(String configResources) {
        this.configResources = configResources;
    }

    @Override
    public void setNextProcessor(Processor processor) {
        this.nextProcessor = processor;
    }


    public void handle(HttpServletRequest request, HttpServletResponse response) {
        try {
            //创建 SAXReader 对象
            SAXReader saxReader = new SAXReader();
            //获取class对象加载文件返回流
            InputStream resourceAsStream = StaticResourceProcessor.class.getClassLoader().getResourceAsStream(configResources);
            //获取document对象
            Document document = null;
            document = saxReader.read(resourceAsStream);
            //获取根节点
            Element rootElement = document.getRootElement();
            //获取扫描包
            Element element = rootElement.element("default-servlet-handler");

            if (element == null) {
                if (nextProcessor != null){
                    this.nextProcessor.handle(request,response);
                }
                return;
            }

            String requestURI = request.getRequestURI();
            boolean isStaticResource = requestURI.endsWith(".css") ||
                    requestURI.endsWith(".js") ||
                    requestURI.endsWith(".png") ||
                    requestURI.endsWith(".jpg");
            if (isStaticResource) {
                // 处理静态资源的逻辑
                // 交给tomcat默认servlet处理
                RequestDispatcher requestDispatcher = request.getServletContext().getNamedDispatcher("default");
                // 设置响应状态码
                response.setStatus(HttpServletResponse.SC_OK);
                if (requestURI.endsWith(".png") ) {
                    response.setContentType("image/png");
                }
                if (requestURI.endsWith(".jpg")){
                    response.setContentType("image/jpg");
                }
                requestDispatcher.forward(request,response);
            } else {
                // 处理其他类型的请求
                if (nextProcessor != null){
                    this.nextProcessor.handle(request,response);
                }
            }

        } catch (Exception e) {
            throw new RuntimeException(e);
        }
    }

}
然后回到DispatcherServlet,我们将在这里调用它,在init方法里,我们读取contextConfigLocation配置和encoding配置,然后在service方法里调用链路处理。
package com.dreams.springframework.web.servlet;

import com.dreams.springframework.web.processor.EncodeProcessor;
import com.dreams.springframework.web.processor.StaticResourceProcessor;

import javax.servlet.*;
import javax.servlet.http.HttpServlet;
import javax.servlet.http.HttpServletRequest;
import javax.servlet.http.HttpServletResponse;
import java.io.IOException;

/**
 * @author PoemsAndDreams
 * @description //前端控制器
 */
public class DispatcherServlet extends HttpServlet {

    private String contextConfigLocation;

    private String encoding;


    @Override
    public void init() throws ServletException {
        System.out.println("初始化开始!");
        this.contextConfigLocation = this.getServletConfig().getInitParameter("contextConfigLocation");
        this.encoding = this.getServletConfig().getInitParameter("encoding");

        if (contextConfigLocation == null || contextConfigLocation.isEmpty()) {
            System.err.println("contextConfigLocation 未配置或为空");
            return;
        }

        if (contextConfigLocation.contains("classpath:")) {
            contextConfigLocation = contextConfigLocation.replace("classpath:","")   ;
        }

    }

    @Override
    protected void service(HttpServletRequest request, HttpServletResponse response) throws ServletException, IOException {
        System.out.println("处理用户请求");
        EncodeProcessor encodeProcessor = new EncodeProcessor(this.encoding);
        StaticResourceProcessor staticResourceProcessor = new StaticResourceProcessor(this.contextConfigLocation);
        encodeProcessor.setNextProcessor(staticResourceProcessor);
        encodeProcessor.handle(request,response);
    }
}
在对应目录下创建各种静态文件,如下:
这样就能正确访问了

4.处理路径请求
这次我们需要处理路径请求
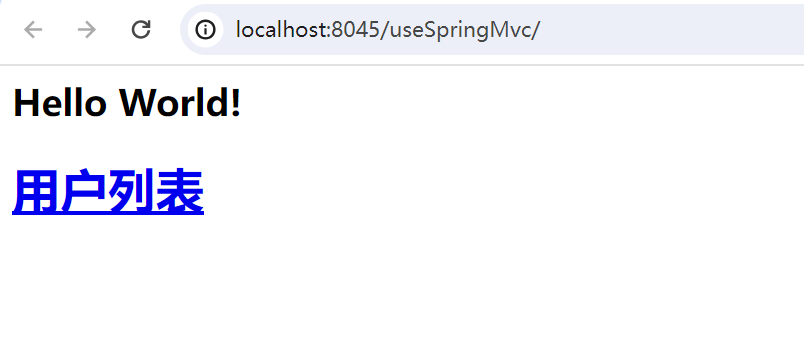
在userSpringMVC项目的index.jsp加上一个请求
<%--
  Created by IntelliJ IDEA.
  User: xiayutian
  Date: 2024/6/17
  Time: 8:17
  To change this template use File | Settings | File Templates.
--%>
<%@ page contentType="text/html;charset=UTF-8" language="java" %>
<html>
<body>
<h2>Hello World!</h2>
<h1><a href="/user/list">用户列表</a> </h1>
</body>
</html>
先定义注解
package com.dreams.springframework.web.bind.annotation;

import java.lang.annotation.ElementType;
import java.lang.annotation.Retention;
import java.lang.annotation.RetentionPolicy;
import java.lang.annotation.Target;

@Target({ElementType.TYPE, ElementType.METHOD})
@Retention(RetentionPolicy.RUNTIME)
public @interface RequestMapping {

    String value() default "";

}
还有路径参数的注解
package com.dreams.springframework.web.bind.annotation;

import java.lang.annotation.ElementType;
import java.lang.annotation.Retention;
import java.lang.annotation.RetentionPolicy;
import java.lang.annotation.Target;

@Target({ElementType.PARAMETER})
@Retention(RetentionPolicy.RUNTIME)
public @interface RequestParam {
    String value() default "";
}
在我们之前的手写spring代码ClassPathXmlApplicationContext类里,添加一个Getter方法获取bean工厂。
public ConfigurableListableBeanFactory getBeanFactory() {
    return beanFactory;
}
一个请求映射器,这里放控制类和该控制类对应的方法。
package com.dreams.springframework.web.servlet;

import java.lang.reflect.Method;

/**
 * @author PoemsAndDreams
 * @description //请求映射器
 */
public class HandlerMapping {

    private Object object;

    private Method method;


    public HandlerMapping(Object object, Method method) {
        this.object = object;
        this.method = method;
    }

    public Object getObject() {
        return object;
    }

    public Method getMethod() {
        return method;
    }
}
然后回到ContextLoaderListener,监听器监听web启动时调用handle方法
package com.dreams.springframework.web.context;

import com.dreams.springframework.beans.factory.config.ConfigurableListableBeanFactory;
import com.dreams.springframework.context.ClassPathXmlApplicationContext;
import com.dreams.springframework.stereotype.Controller;
import com.dreams.springframework.web.bind.annotation.RequestMapping;
import com.dreams.springframework.web.servlet.HandlerMapping;

import javax.servlet.ServletContextEvent;
import javax.servlet.ServletContextListener;
import javax.servlet.annotation.WebListener;
import java.lang.reflect.Method;
import java.util.HashMap;
import java.util.Map;
import java.util.Set;
import java.util.concurrent.ConcurrentHashMap;

/**
 * @author PoemsAndDreams
 * @description //监听器监听web启动
 */
@WebListener
public class ContextLoaderListener implements ServletContextListener {

    @Override
    public void contextInitialized(ServletContextEvent sce) {
        System.out.println("spring容器启动!");
        String contextConfigLocation = sce.getServletContext().getInitParameter("contextConfigLocation");

        if (contextConfigLocation == null || contextConfigLocation.isEmpty()) {
            System.err.println("contextConfigLocation 未配置或为空");
            return;
        }

        if (contextConfigLocation.contains("classpath:")) {
            contextConfigLocation = contextConfigLocation.replace("classpath:","")   ;
        }

        ClassPathXmlApplicationContext context = new ClassPathXmlApplicationContext(contextConfigLocation);
        //处理请求路径
        handle(sce,context);
    }

    @Override
    public void contextDestroyed(ServletContextEvent sce) {
        System.out.println("web服务停止!");
    }


    /**
     * 处理请求路径
     * @param sce
     * @param context
     */
    void handle(ServletContextEvent sce,ClassPathXmlApplicationContext context){
        //......
    }


}
handle方法逻辑将ClassPathXmlApplicationContext里的InstanceMap拿到controller对象,然后拼接类上的RequestMapping的路径和方法上的RequestMapping的路径,最后以拼接的路径为key,HandlerMapping为value存储到pathMethodMap,然后存储到上下文中。
/**
 * 处理请求路径
 * @param sce
 * @param context
 */
void handle(ServletContextEvent sce,ClassPathXmlApplicationContext context){

    Map<String, HandlerMapping> pathMethodMap = new HashMap<>();


    ConfigurableListableBeanFactory beanFactory = context.getBeanFactory();
    ConcurrentHashMap<String, Object> instanceMap = beanFactory.getInstanceMap();

    // 创建一个新的 Map,用于存储带有@Controller注解的类实例
    Map<String, Object> controllerMap = new HashMap<>();

    Set<Map.Entry<String, Object>> entries = instanceMap.entrySet();
    for (Map.Entry<String, Object> entry : entries) {
        String beanName = entry.getKey();
        Object value = entry.getValue();
        // 检查值的类是否标记了@Controller注解
        if (value.getClass().isAnnotationPresent(Controller.class)) {
            // 将符合条件的条目存入新的 Map
            controllerMap.put(beanName, value);
        }
    }

    Set<Map.Entry<String, Object>> entrySet = controllerMap.entrySet();

    for (Map.Entry<String, Object> entry : entrySet) {
        Object controller = entry.getValue();

        String classPath =null;
        // 获取类上的@RequestMapping注解
        if (controller.getClass().isAnnotationPresent(RequestMapping.class)) {
            RequestMapping classRequestMapping = controller.getClass().getAnnotation(RequestMapping.class);
            // 处理斜杠
            classPath = classRequestMapping.value();
            if (classPath != null){
                classPath = classPath.startsWith("/")?classPath:"/"+classPath;
                classPath = classPath.endsWith("/")?classPath.substring(0, classPath.length() - 1):classPath;
            }
        }
        // 获取方法上的@RequestMapping注解
        Method[] methods = controller.getClass().getDeclaredMethods();
        for (Method method : methods) {
            if (method.isAnnotationPresent(RequestMapping.class)) {
                RequestMapping methodRequestMapping = method.getAnnotation(RequestMapping.class);
                String methodPath = methodRequestMapping.value();
                // 路径开头的斜杠
                if (classPath == null && methodPath != null){
                    methodPath = methodPath.startsWith("/")?methodPath:"/" + methodPath;
                }else if (methodPath != null){
                    // 去除路径开头的斜杠
                    methodPath = methodPath.startsWith("/")?methodPath:"/" + methodPath;
                }
                String path = classPath + methodPath;
                path = path.endsWith("/")?path.substring(0, path.length() - 1):path;
                HandlerMapping handlerMapping = new HandlerMapping(controller, method);
                pathMethodMap.put(path,handlerMapping);
            }
        }
    }
    //存储到上下文
    sce.getServletContext().setAttribute("pathMethodMap",pathMethodMap);
}
所以再来一个路径处理器,逻辑很简单,只要从上下文中获取到上面保存的pathMethodMap,拿到路径去与request中的路径对比,匹配到的HandlerMapping交给处理器适配器HandlerAdapter去执行。
package com.dreams.springframework.web.processor;

import com.dreams.springframework.web.servlet.HandlerAdapter;
import com.dreams.springframework.web.servlet.HandlerMapping;

import javax.servlet.ServletContext;
import javax.servlet.http.HttpServletRequest;
import javax.servlet.http.HttpServletResponse;
import java.io.IOException;
import java.util.Map;

/**
 * @author PoemsAndDreams
 * @description //路径处理器
 */
public class RouteProcessor implements Processor {
    private Processor nextProcessor;

    @Override
    public void setNextProcessor(Processor processor) {
        this.nextProcessor = processor;
    }


    public void handle(HttpServletRequest request, HttpServletResponse response) {
        try {
            // 获取完整的请求URI
            String requestURI = request.getRequestURI();

            // 获取上下文路径
            String contextPath = request.getContextPath();

            // 去除上下文路径,得到相对路径
            if (requestURI.startsWith(contextPath)) {
                requestURI = requestURI.substring(contextPath.length());
            }
            requestURI = requestURI.endsWith("/")?requestURI.substring(0, requestURI.length() - 1):requestURI;

            ServletContext servletContext = request.getServletContext();
            Map<String, HandlerMapping> pathMethodMap = (Map<String, HandlerMapping>) servletContext.getAttribute("pathMethodMap");

            if (!pathMethodMap.containsKey(requestURI)) {
                // 返回404,not found
                response.setContentType("text/html;charset=utf-8");
                response.sendError(HttpServletResponse.SC_NOT_FOUND,"路径未定义异常:没有找到该路径!");

            }

            // 处理请求--处理器适配器
            HandlerAdapter handlerAdapter = new HandlerAdapter(pathMethodMap.get(requestURI), request, response);

            //执行
            handlerAdapter.execute();

            if (nextProcessor != null){
                this.nextProcessor.handle(request,response);
            }

        } catch (Exception e) {
            try {
                response.setContentType("text/html;charset=utf-8");
                response.sendError(HttpServletResponse.SC_INTERNAL_SERVER_ERROR,"系统内部异常");
            } catch (IOException ex) {
                e.printStackTrace();
            }
            e.printStackTrace();
        }
    }

}
然后真正的逻辑在处理器适配器HandlerAdapter中
package com.dreams.springframework.web.servlet;
import com.dreams.springframework.web.bind.annotation.RequestParam;
import javax.servlet.http.HttpServletRequest;
import javax.servlet.http.HttpServletResponse;
import javax.servlet.http.HttpSession;
import java.lang.reflect.Constructor;
import java.lang.reflect.Method;
import java.lang.reflect.Parameter;
import java.text.ParseException;
import java.text.SimpleDateFormat;
import java.util.ArrayList;
import java.util.Date;
/**
* @author PoemsAndDreams
* @description //封装请求参数,调用目标方法
*/
public class HandlerAdapter {
private HandlerMapping handlerMapping;
private HttpServletRequest request;
private HttpServletResponse response;
public HandlerAdapter(HandlerMapping handlerMapping, HttpServletRequest request, HttpServletResponse response) {
this.handlerMapping = handlerMapping;
this.request = request;
this.response = response;
}
public void execute() {
//......
}
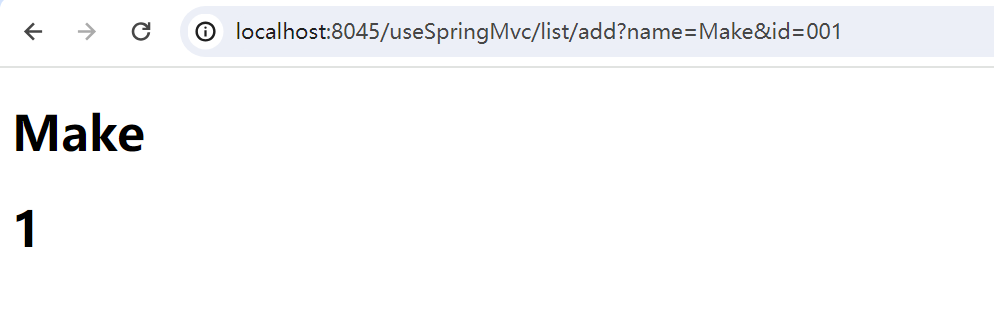
}execute方法逻辑如下:
就是从request(比如:http://localhost:8045/useSpringMvc/list/add?name=Make&id=001)中获取参数,将字符串转换为目标类型,然后传递给对应方法,然后反射去调用即可。
public void execute() {
    //控制器对象
    Object object = handlerMapping.getObject();
    //控制器方法
    Method method = handlerMapping.getMethod();
    // 获取方法的参数
    Parameter[] parameters = method.getParameters();

    ArrayList<Object> parameterValues = new ArrayList<>();

    for (Parameter parameter : parameters) {
        String name = parameter.getName();
        Class<?> type = parameter.getType();
        // 如果参数上面有@RequestParam注解
        if (parameter.isAnnotationPresent(RequestParam.class)) {
            RequestParam requestParam = parameter.getAnnotation(RequestParam.class);
            String param = requestParam.value();
            if (param != null) {
                name = param;
            }
        }

        if (type == HttpServletRequest.class) {
            parameterValues.add(request);
        } else if (type == HttpServletResponse.class) {
            parameterValues.add(response);
        } else if (type == HttpSession.class) {
            parameterValues.add(request.getSession());
        } else {
            // 使用HttpServletRequest获取查询参数name和id的值
            String requestParameter = request.getParameter(name);
            // 简单转换字符串参数为对应类型
            Object parameterObj = convert(requestParameter, type);
            parameterValues.add(parameterObj);
        }
    }

    try {

        method.setAccessible(true);
        Object[] array = parameterValues.toArray(new Object[0]);
        // 反射调用控制器方法
        System.out.println(method);
        Object result = method.invoke(object, parameterValues.toArray(new Object[0]));
        // 处理方法返回值
        // todo 处理方法返回值

    } catch (Exception e) {
        e.printStackTrace();
    }


}

// 将字符串转换为目标类型
private Object convert(String value, Class<?> targetType) {
    if (value == null){
        value = "0";
    }
    if (targetType == String.class) {
        return value;
    } else if (targetType == int.class || targetType == Integer.class) {
        return Integer.parseInt(value);
    } else if (targetType == long.class || targetType == Long.class) {
        return Long.parseLong(value);
    } else if (targetType == boolean.class || targetType == Boolean.class) {
        return Boolean.parseBoolean(value);
    } else if (targetType == float.class || targetType == Float.class) {
        return Float.parseFloat(value);
    } else if (targetType == double.class || targetType == Double.class) {
        return Double.parseDouble(value);
    } else if (targetType == Date.class) {
        // 简单日期格式解析,可以根据需要更改
        SimpleDateFormat dateFormat = new SimpleDateFormat("yyyy-MM-dd");
        try {
            return dateFormat.parse(value);
        } catch (ParseException e) {
            throw new IllegalArgumentException("Failed to parse date: " + value, e);
        }
    } else {
        // 支持自定义类
        // todo 支持 自定义类型

        throw new UnsupportedOperationException("Unsupported parameter type: " + targetType);
    }
}
最后,回到DispatcherServlet类中,加入路径处理器。
@Override
protected void service(HttpServletRequest request, HttpServletResponse response) throws ServletException, IOException {
    System.out.println("处理用户请求");
    EncodeProcessor encodeProcessor = new EncodeProcessor(this.encoding);
    StaticResourceProcessor staticResourceProcessor = new StaticResourceProcessor(this.contextConfigLocation);

    RouteProcessor routeProcessor = new RouteProcessor();
    encodeProcessor.setNextProcessor(staticResourceProcessor);
    // 加入路径处理器
    staticResourceProcessor.setNextProcessor(routeProcessor);
    encodeProcessor.handle(request,response);
}
在测试项目里的userController
package com.dreams.controller;
import com.dreams.pojo.User;
import com.dreams.service.impl.UserServiceImpl;
import com.dreams.springframework.stereotype.Autowired;
import com.dreams.springframework.stereotype.Controller;
import com.dreams.springframework.web.bind.annotation.RequestMapping;
import com.dreams.springframework.web.bind.annotation.RequestParam;
/**
* @author PoemsAndDreams
*/
@Controller
@RequestMapping("/list")
public class UserController {
@Autowired
UserServiceImpl userService;
@RequestMapping("/list")
public void test(User user){
userService.test();
}
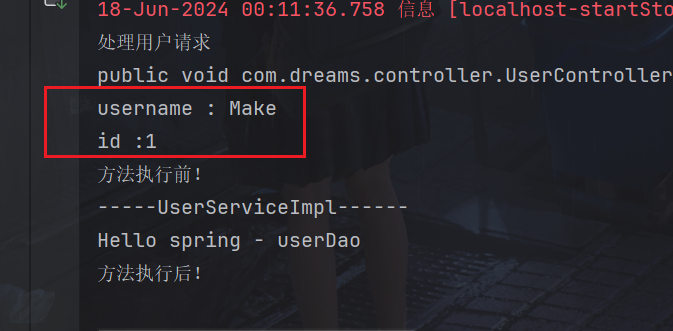
@RequestMapping("/add")
public void insert(@RequestParam("name") String userName, @RequestParam("id") Integer id){
System.out.println("username : " + userName);
System.out.println("id :" + id);
userService.test();
}
}
浏览器请求

可以看到输出成功了
不过浏览器页面是没有什么变化的,因为我们还没有处理
5.返回页面或JSON
一个请求可能需要返回值,这里我们完成返回Thymeleaf渲染的页面或者JSON
我们需要Thymeleaf和JSON的依赖
<dependency>
    <groupId>org.thymeleaf</groupId>
    <artifactId>thymeleaf</artifactId>
    <version>3.0.15.RELEASE</version>
</dependency>
<dependency>
    <groupId>com.google.code.gson</groupId>
    <artifactId>gson</artifactId>
    <version>2.9.1</version>
</dependency>
是否使用Thymeleaf应该是配置出来的,可以与上面的配置一起从配置文件中读取,方法一样,这里就直接默认使用Thymeleaf了
梳理一下流程
从DispatcherServlet前端控制器init时我们应该 Thymeleaf 模板解析器
打开DispatcherServlet类
我们加入参数templateEngine,
private TemplateEngine templateEngine;
init方法先初始化它,
@Override
public void init() throws ServletException {
    System.out.println("初始化开始!");
    this.contextConfigLocation = this.getServletConfig().getInitParameter("contextConfigLocation");
    this.encoding = this.getServletConfig().getInitParameter("encoding");

    if (contextConfigLocation == null || contextConfigLocation.isEmpty()) {
        System.err.println("contextConfigLocation 未配置或为空");
        return;
    }

    if (contextConfigLocation.contains("classpath:")) {
        contextConfigLocation = contextConfigLocation.replace("classpath:","")   ;
    }

    ServletContext context = this.getServletConfig().getServletContext();
    // 配置 Thymeleaf 模板解析器
    ServletContextTemplateResolver templateResolver = new ServletContextTemplateResolver(context);
    templateResolver.setPrefix("/");
    templateResolver.setSuffix(".html");
    templateResolver.setTemplateMode("HTML5");

    // 创建 Thymeleaf 模板引擎
    templateEngine = new TemplateEngine();
    templateEngine.setTemplateResolver(templateResolver);
}
下面的service方法将templateEngine参数传递给路径处理器。
@Override
protected void service(HttpServletRequest request, HttpServletResponse response) throws ServletException, IOException {
    System.out.println("处理用户请求");
    EncodeProcessor encodeProcessor = new EncodeProcessor(this.encoding);
    StaticResourceProcessor staticResourceProcessor = new StaticResourceProcessor(this.contextConfigLocation);

    RouteProcessor routeProcessor = new RouteProcessor(templateEngine);
    encodeProcessor.setNextProcessor(staticResourceProcessor);
    // 加入路径处理器
    staticResourceProcessor.setNextProcessor(routeProcessor);
    encodeProcessor.handle(request,response);
}
然后来到路径处理器RouteProcessor,同样加入属性templateEngine,同时改为构造器传参,代码基本没有什么变化
只加入属性
private TemplateEngine templateEngine;

public RouteProcessor(TemplateEngine templateEngine) {
    this.templateEngine = templateEngine;
}
同时调用处理器适配器时,也把templateEngine传入
// 处理请求--处理器适配器
HandlerAdapter handlerAdapter = new HandlerAdapter(templateEngine,pathMethodMap.get(requestURI), request, response);

//执行
handlerAdapter.execute();
在来到处理器适配器handlerAdapter,同样加入属性templateEngine,execute()方法执行先把WebContext初始化,用于Thymeleaf,然后下面遍历方法参数时就可以使用webContext的setVariable方法存储进去,到时候就可以对其渲染到Thymeleaf了,反射得到结果就可以返回Thymeleaf视图或将对象转变为JSON返回
package com.dreams.springframework.web.servlet;

import com.dreams.springframework.web.bind.annotation.RequestParam;
import com.google.gson.Gson;
import org.thymeleaf.TemplateEngine;
import org.thymeleaf.context.WebContext;

import javax.servlet.ServletContext;
import javax.servlet.http.HttpServletRequest;
import javax.servlet.http.HttpServletResponse;
import javax.servlet.http.HttpSession;
import java.lang.reflect.Method;
import java.lang.reflect.Parameter;
import java.text.ParseException;
import java.text.SimpleDateFormat;
import java.util.ArrayList;
import java.util.Date;

/**
 * @author PoemsAndDreams
 * @description //封装请求参数,调用目标方法
 */
public class HandlerAdapter {

    private TemplateEngine templateEngine;
    private HandlerMapping handlerMapping;

    private HttpServletRequest request;

    private HttpServletResponse response;


    public HandlerAdapter(TemplateEngine templateEngine, HandlerMapping handlerMapping, HttpServletRequest request, HttpServletResponse response) {
        this.templateEngine = templateEngine;
        this.handlerMapping = handlerMapping;
        this.request = request;
        this.response = response;
    }

    public void execute() {

        // 创建 WebContext,用于Thymeleaf
        ServletContext servletContext = request.getServletContext();
        WebContext webContext = new WebContext(request, response, servletContext, request.getLocale());

        //控制器对象
        Object object = handlerMapping.getObject();
        //控制器方法
        Method method = handlerMapping.getMethod();
        // 获取方法的参数
        Parameter[] parameters = method.getParameters();

        ArrayList<Object> parameterValues = new ArrayList<>();

        for (Parameter parameter : parameters) {
            String name = parameter.getName();
            Class<?> type = parameter.getType();
            // 如果参数上面有@RequestParam注解
            if (parameter.isAnnotationPresent(RequestParam.class)) {
                RequestParam requestParam = parameter.getAnnotation(RequestParam.class);
                String param = requestParam.value();
                if (param != null) {
                    name = param;
                }
            }

            if (type == HttpServletRequest.class) {
                parameterValues.add(request);
            } else if (type == HttpServletResponse.class) {
                parameterValues.add(response);
            } else if (type == HttpSession.class) {
                parameterValues.add(request.getSession());
            } else {
                // 使用HttpServletRequest获取查询参数name和id的值
                String requestParameter = request.getParameter(name);
                // 简单转换字符串参数为对应类型
                Object parameterObj = convert(requestParameter, type);
                webContext.setVariable(name, parameterObj);
                parameterValues.add(parameterObj);
            }
        }

        try {
            method.setAccessible(true);
            Object[] array = parameterValues.toArray(new Object[0]);
            // 反射调用控制器方法
            System.out.println(method);
            Object result = method.invoke(object, parameterValues.toArray(new Object[0]));


            // 返回Thymeleaf视图
            if (result != null && result instanceof String) {
                String viewName = (String) result;
                // 处理视图名称,确保视图名称符合 Thymeleaf 的期望格式
                viewName = viewName.startsWith("/") ? viewName.substring(1) : viewName; // 去掉开头的斜杠
                // 转发到 Thymeleaf 模板页面
                viewName = viewName.startsWith("/") ? viewName.replace("/", "") : viewName;
                // 渲染 Thymeleaf 模板
                response.setContentType("text/html;charset=UTF-8");
                templateEngine.process(viewName, webContext, response.getWriter());
                return;
            }

            // 返回json
            if (result instanceof Object){
                Gson gson=new Gson();
                String json = gson.toJson(result);
                response.setContentType("application/json;charset=utf-8");
                response.getWriter().write(json);
            }

        } catch (Exception e) {
            e.printStackTrace();
        }

    }

    // 将字符串转换为目标类型
    private Object convert(String value, Class<?> targetType) {
        if (value == null){
            value = "0";
        }
        if (targetType == String.class) {
            return value;
        } else if (targetType == int.class || targetType == Integer.class) {
            return Integer.parseInt(value);
        } else if (targetType == long.class || targetType == Long.class) {
            return Long.parseLong(value);
        } else if (targetType == boolean.class || targetType == Boolean.class) {
            return Boolean.parseBoolean(value);
        } else if (targetType == float.class || targetType == Float.class) {
            return Float.parseFloat(value);
        } else if (targetType == double.class || targetType == Double.class) {
            return Double.parseDouble(value);
        } else if (targetType == Date.class) {
            // 简单日期格式解析,可以根据需要更改
            SimpleDateFormat dateFormat = new SimpleDateFormat("yyyy-MM-dd");
            try {
                return dateFormat.parse(value);
            } catch (ParseException e) {
                throw new IllegalArgumentException("Failed to parse date: " + value, e);
            }
        } else {
            // 支持自定义类
            // todo 支持 自定义类型
            throw new UnsupportedOperationException("Unsupported parameter type: " + targetType);
        }
    }


}
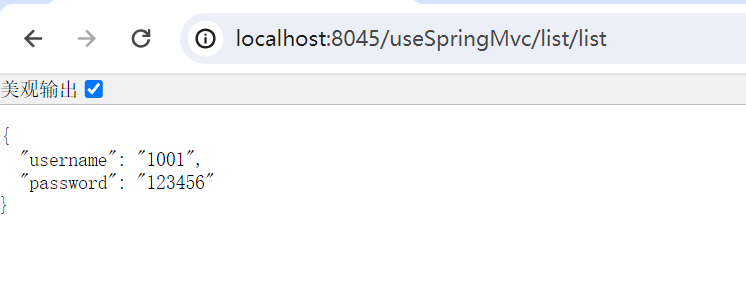
在测试项目里,userController代码:
package com.dreams.controller;

import com.dreams.pojo.User;
import com.dreams.service.impl.UserServiceImpl;
import com.dreams.springframework.stereotype.Autowired;
import com.dreams.springframework.stereotype.Controller;
import com.dreams.springframework.web.bind.annotation.RequestMapping;
import com.dreams.springframework.web.bind.annotation.RequestParam;

/**
 * @author PoemsAndDreams
 */
@Controller
@RequestMapping("/list")
public class UserController {
    @Autowired
    UserServiceImpl userService;


    @RequestMapping("/list")
    public User test(){
        User user = new User();
        user.setUsername(String.valueOf(1001));
        user.setPassword("123456");
        return user;
    }

    @RequestMapping("/add")
    public String insert(@RequestParam("name") String userName, @RequestParam("id") Integer id){
        System.out.println("username : " + userName);
        System.out.println("id :" + id);
        return "list";
    }
}
下面运行就可以正常显示了